DIY Pantry Labels – Cricut Vinyl Pantry Labels
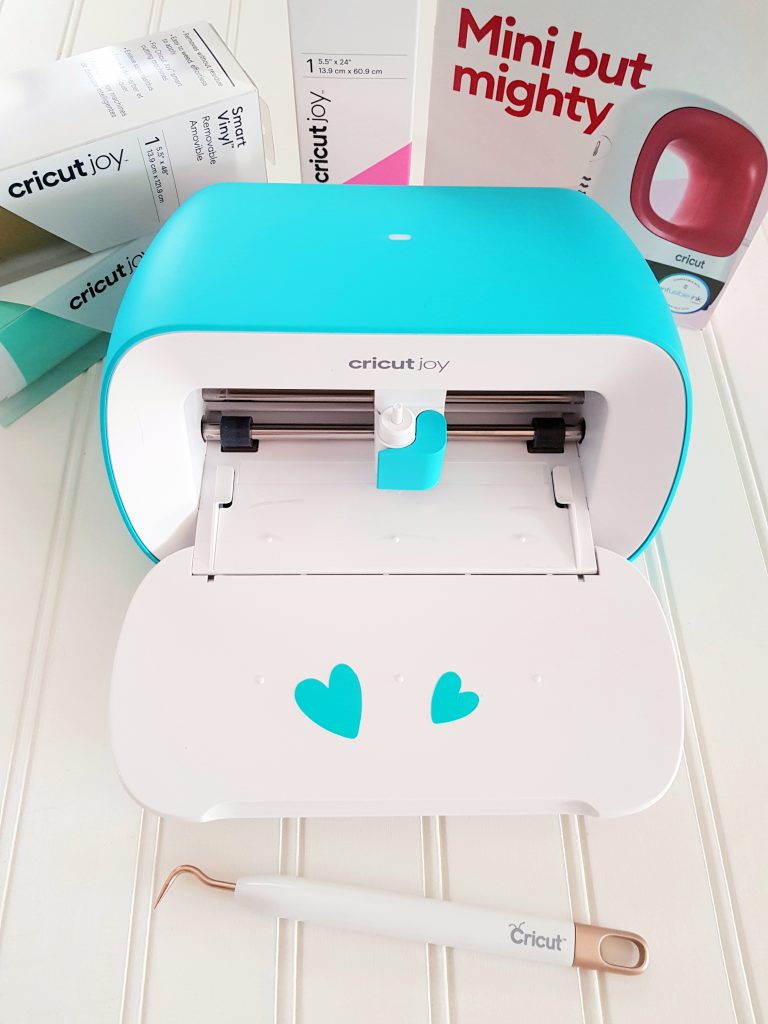
DIY Pantry Labels (With Cricut) – I brought a little joy into my life. How? By getting a Cricut Joy Machine! Yes, I decided it would be nice to try a smaller-sized digital cutting machine. Plus, see why everyone is talking about them. Today, I am sharing the DIY pantry labels I made with it. Use this tutorial to inspire you to make your own with your die-cutting machine.
You can make any vinyl labels you need for organizing your home with the Joy! Plus, other projects.
Are you looking for more creative ways to use your machine? Check out my latest Cricut Craft Ideas and more projects like these DIY iron-on zipper pouches! New to Cricut or considering buying one? Start here: Cricut Crafts. Let's get to making this craft project!
DIY Pantry Labels With The Cricut Joy Machine
- Today, I am sharing all the things I found out from making my first Cricut Joy project. Plus, helpful video tutorials (to save you time from hunting them down), and give you tips for using the Cricut Joy.
- Why did I decide to get the Cricut Joy? I wanted to try this crafting tool for my craft projects and home organization. Also, I grabbed it with the deal I shared over the holidays! Don't worry if you missed out. I will point you to a new bundle sale in a bit.
- Do you have a Cricut Joy yet? If not, this post might help you to see if this is the right Cricut machine for you. (Side-by-Side Machine Comparison) If you have one, yay!
Let's make vinyl labels for your pantry.
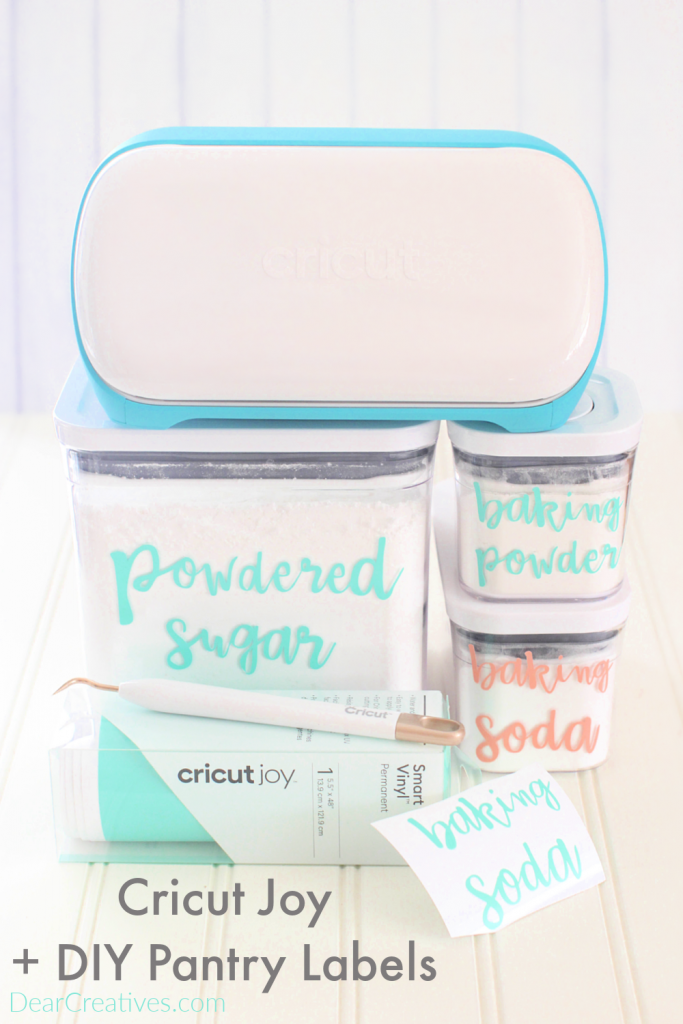
DIY Pantry Labels
Supplies
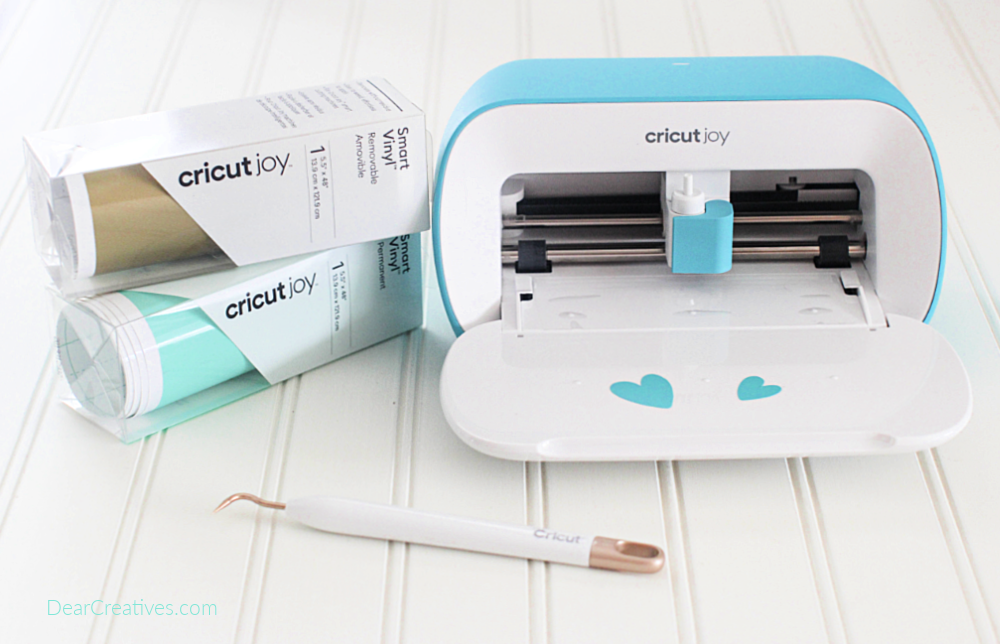
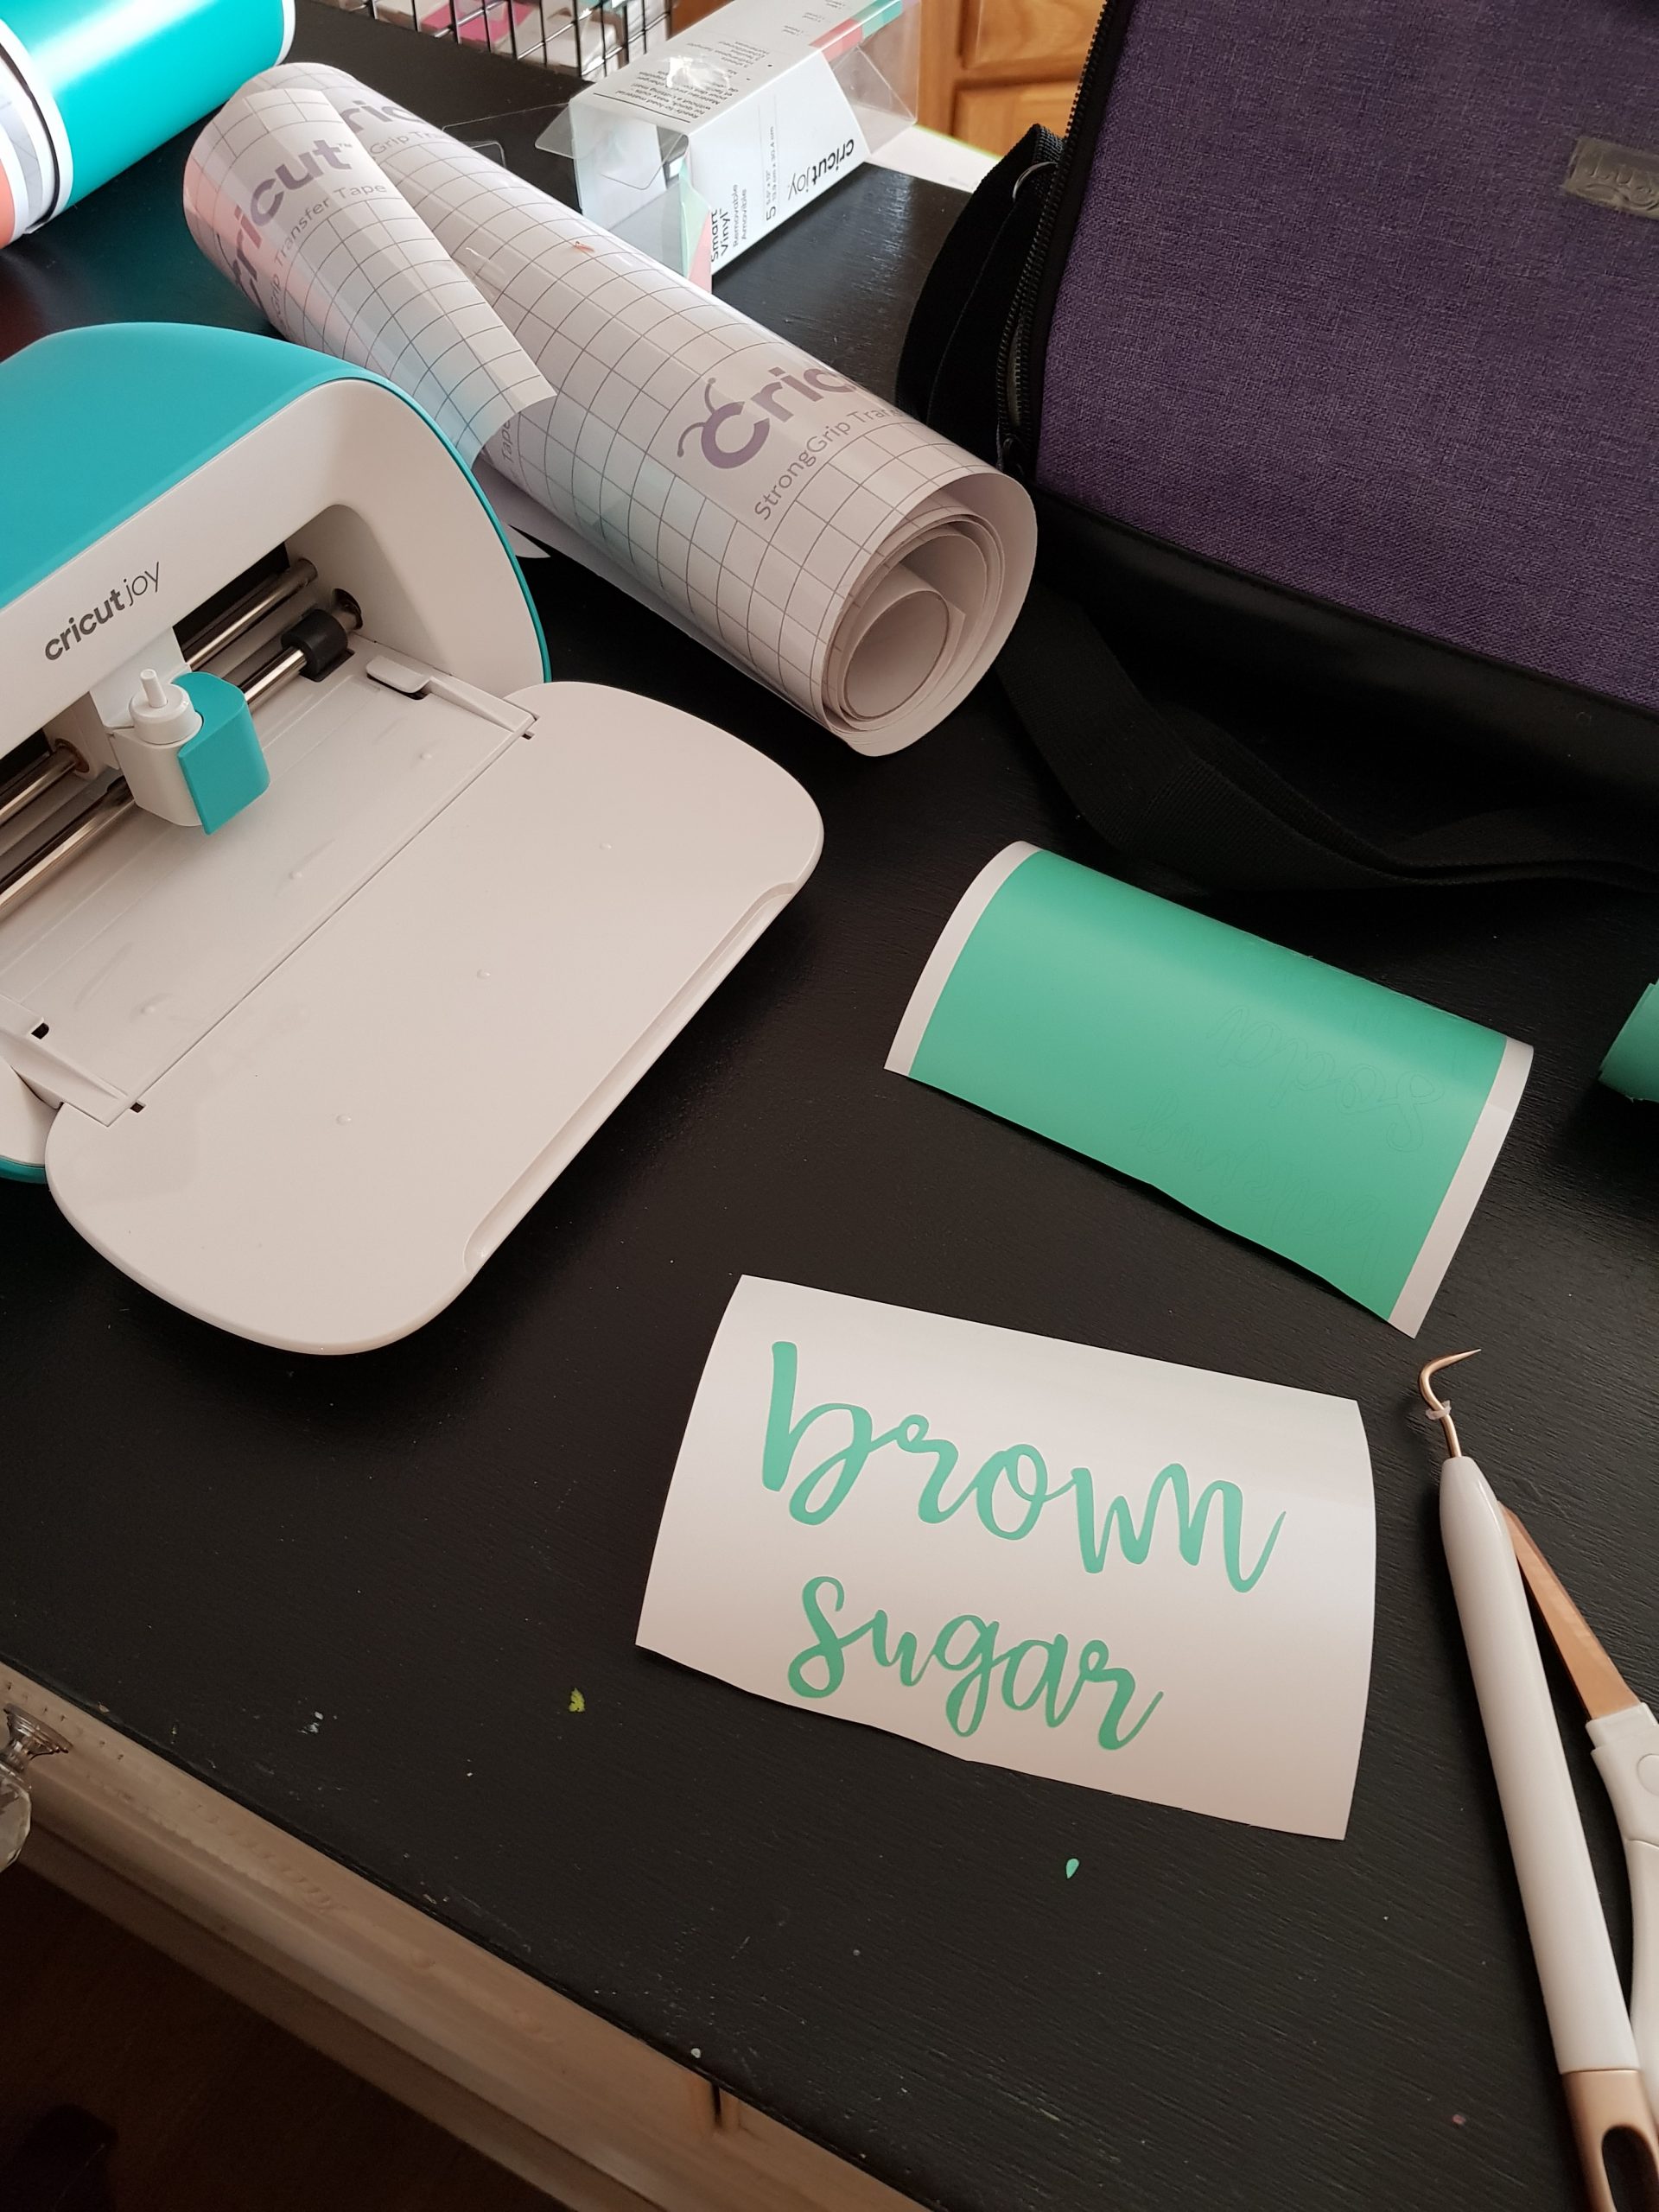
- Cricut Joy (In your box, you get a small mat, sample vinyl, and cardstock paper). You will need a wireless computer, laptop, or cell phone to register it and use it. It's super easy to hook up via the prompts! (see the video tutorial link at the end of the post)
- Cricut Joy Smart Vinyl (doesn't require a mat!) Yay!
- Cricut Transfer Tape – You need this to transfer your design onto your containers.
- Ruler or Measuring Tape
- Scissors
- Weeding Tool and Burnishing Tool -(Grab the Essentials Tool Set) These are a, must! This is the Cricut Tool Set I own.
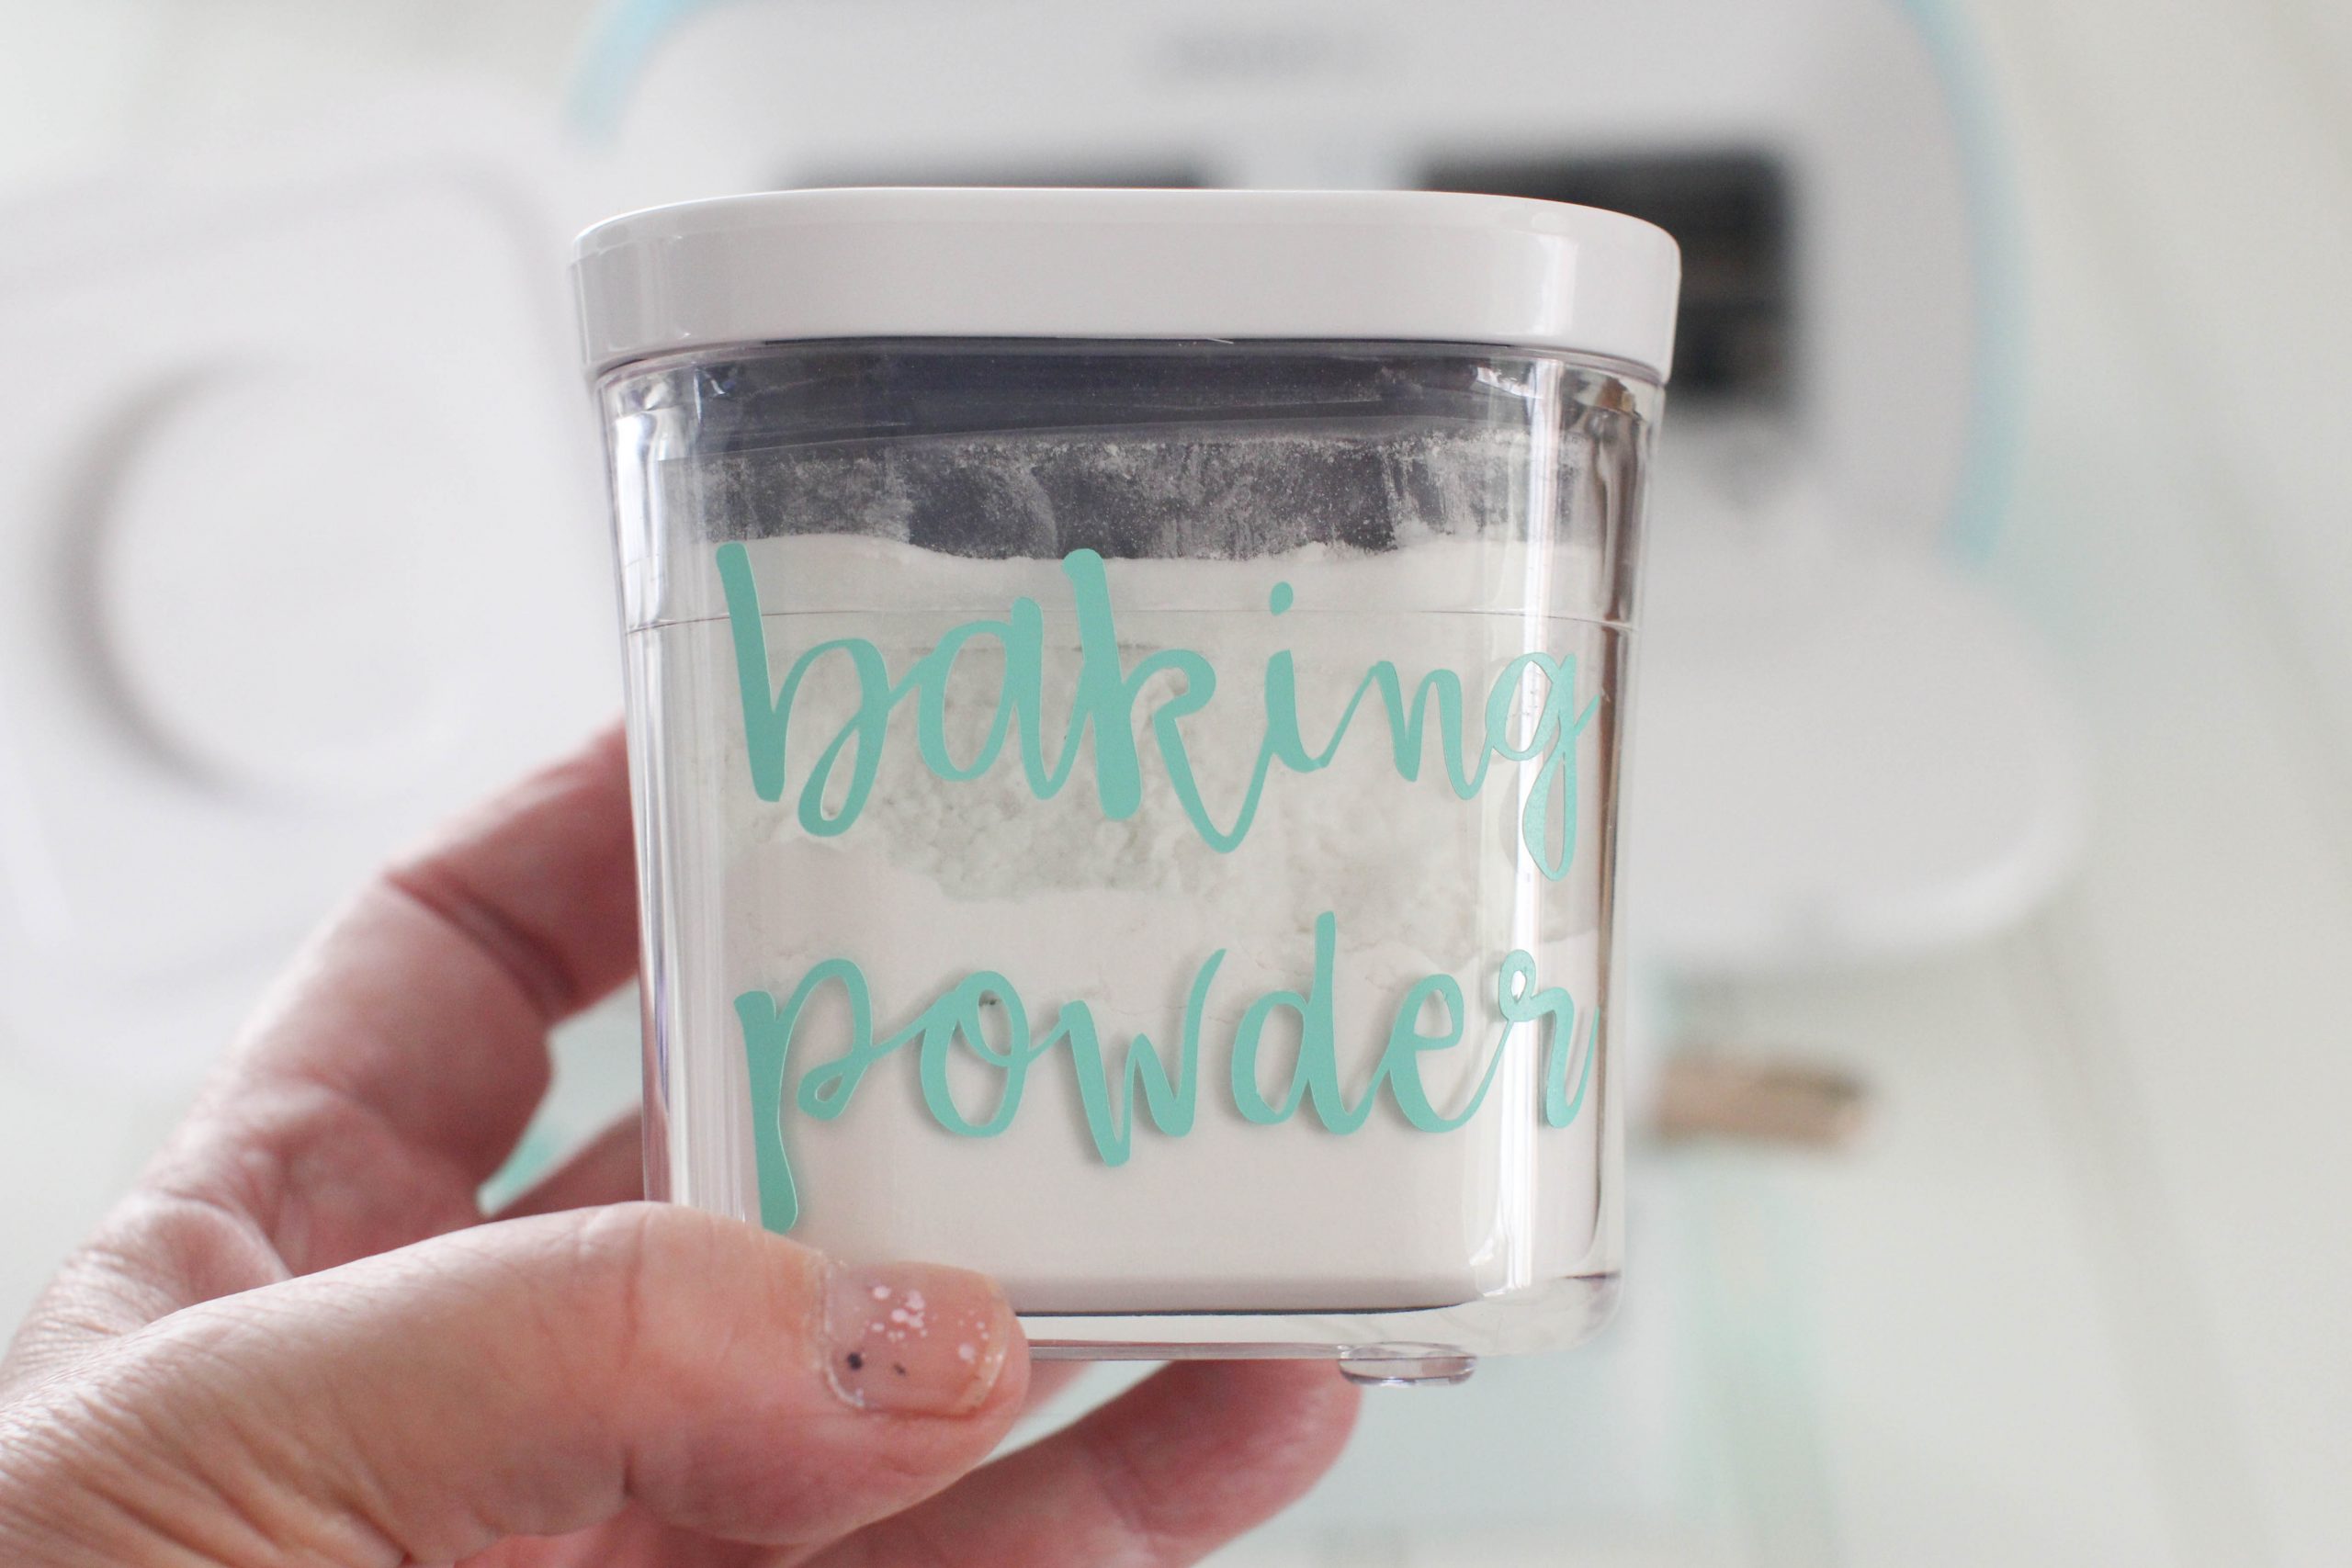
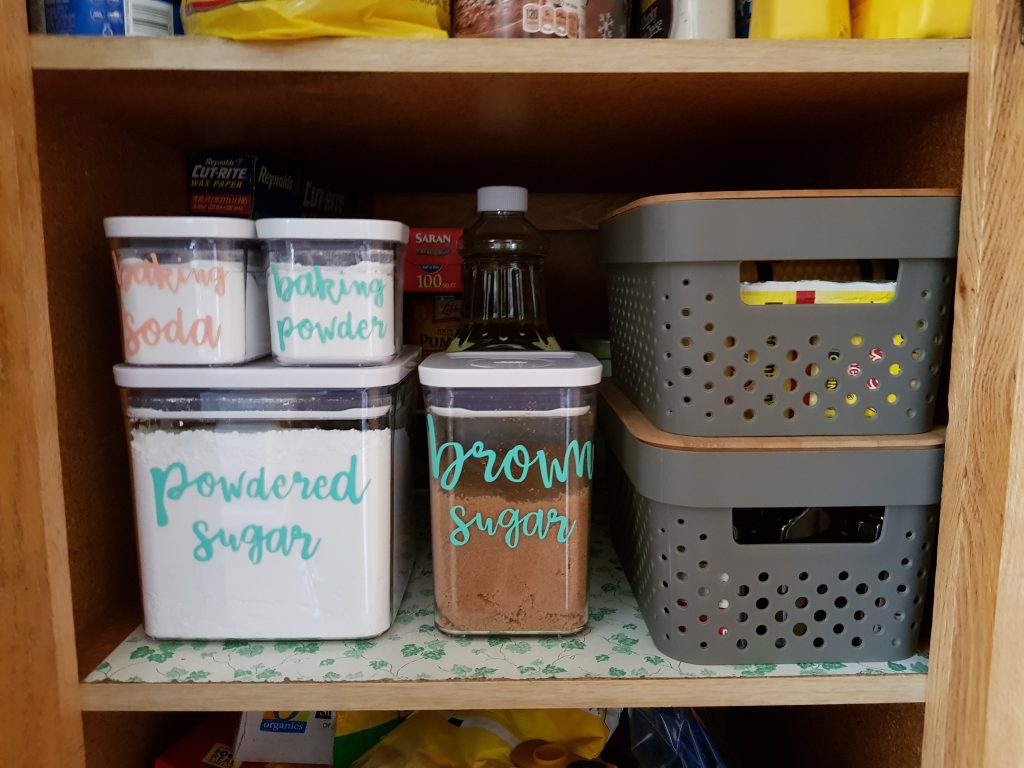
- Xoxo Containers – I used the 0.4-quart and 0.6-quart (for baking powder/ baking soda) 1.7-quart, (for 1 lb. brown sugar), and 2.8-quart (for 2lb powdered sugar)
- Or buy an XOXO Containers Set, like this or this storage container set.
- NOTE: But, at some point, I think I will up the size of my brown sugar to the 2.8-quart for my baking needs.
Shop For Cricut Supplies
Right now, you can get the Cricut Joy Smart Bundle of supplies on sale at 50% off! Find out more.
Optional supplies
- Amber spray bottles for adding cleaners to.
- Other pantry storage sets to consider (5-piece set ) (10-piece set)(Bulk Set), or see these pantry storage containers.
- (Optional) – Cricut Access – for a variety of Images and Fonts. See below for more information.
- Not crafty? Here is where to buy premade or custom-designed pantry labels.
- You might like to pick up the brown sugar saver. Perfect for the Xoxo brown sugar storage. It's on my list to get! My brown sugar was getting hard. Insert sad face.
Cricut Joy Project Notes
- Note: for this project, you do not need the Cricut Joy Mat. You are using Smart vinyl!
- If you just got a new Cricut Joy, open the envelope with instructions, unbox your machine, and take the foam from under the cutter area. The cutting needle is already in place and ready to use! Do (Need help setting up the Cricut Joy? See the video at the end of the post, then come back to do the project!)
- Keep a replacement cutting needle on hand. They are easy to replace, btw.
- Need with designing in Cricut Design Space? See the list of helpful Cricut video tutorials below!
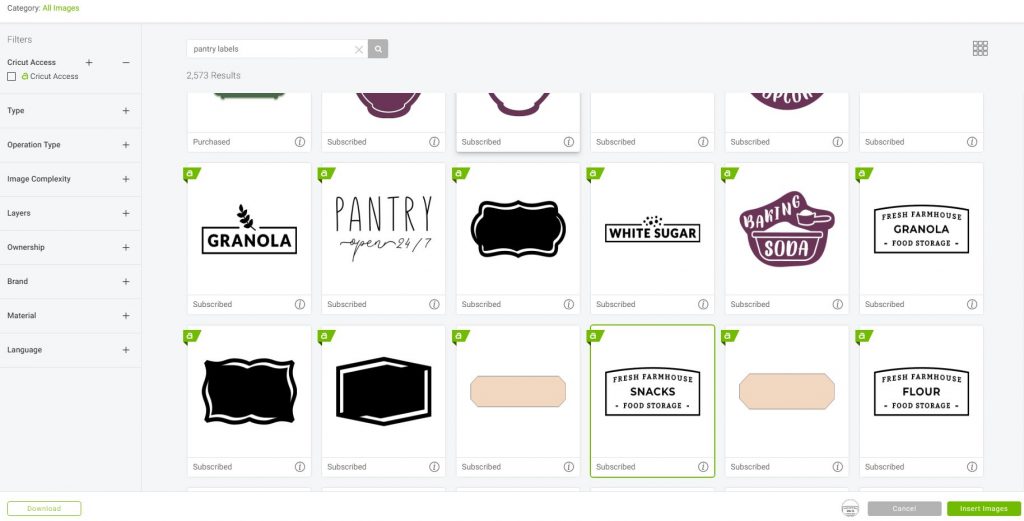
Next, design your pantry labels or pick pre-designed labels from Cricut Design Space for free (if not already registered just use your email and get a free account!), or with Cricut Access (Where you can get free images and free fonts, plus pre-designed SVG files to use. This does have a small monthly fee but, I got the free trial to see if I want to use it).
Avoid mistakes; Always preview the designs before cutting. See how to preview and make the labels below.
How-To Make Pantry Labels With A Cricut Joy

Shown above are steps 7/8 and 9-16 condensed – Plus, I used cut-out vinyl hearts to add to the inside door of my Cricut Joy. Cute! Right?
How-To Instructions For Making Vinyl Pantry Labels
The font I used for my Cricut Joy project was Babette. The font used below was Feather.
How To Make Vinyl Labels With Cricut Joy
These are the written steps. I do have a video below that shows steps on a similar process of adding vinyl labels to a spray bottle. The steps in the video are referenced with time in the video to help you with your project.
- First, make your design in the Cricut Design Space. (Or use a premade design or SVG files.) You can grab SVG files for Pantry Labels here, too. Then upload them to Cricut's Design Space. It's free to use!
- Then, group any items such as lettering together (or words) as needed for cutting. Be sure to weld your word. (2:49 on the video)
- Save the design with a name.
- How to preview your design in Cricut Design? Go to cut the design (Make it) to preview the DIY pantry labels (or other designs) and see how the layout will look. Go to cut the image, but then…
- Cancel the cut.
- Before you begin cutting, fix anything that needs to be changed or fixed.
- (Or) Now: If everything looks good, you can begin to load the Smart Vinyl paper. Then, follow the prompts for cutting the labels.
- Print your pantry labels with the Cricut Joy (or another digital cutting machine).
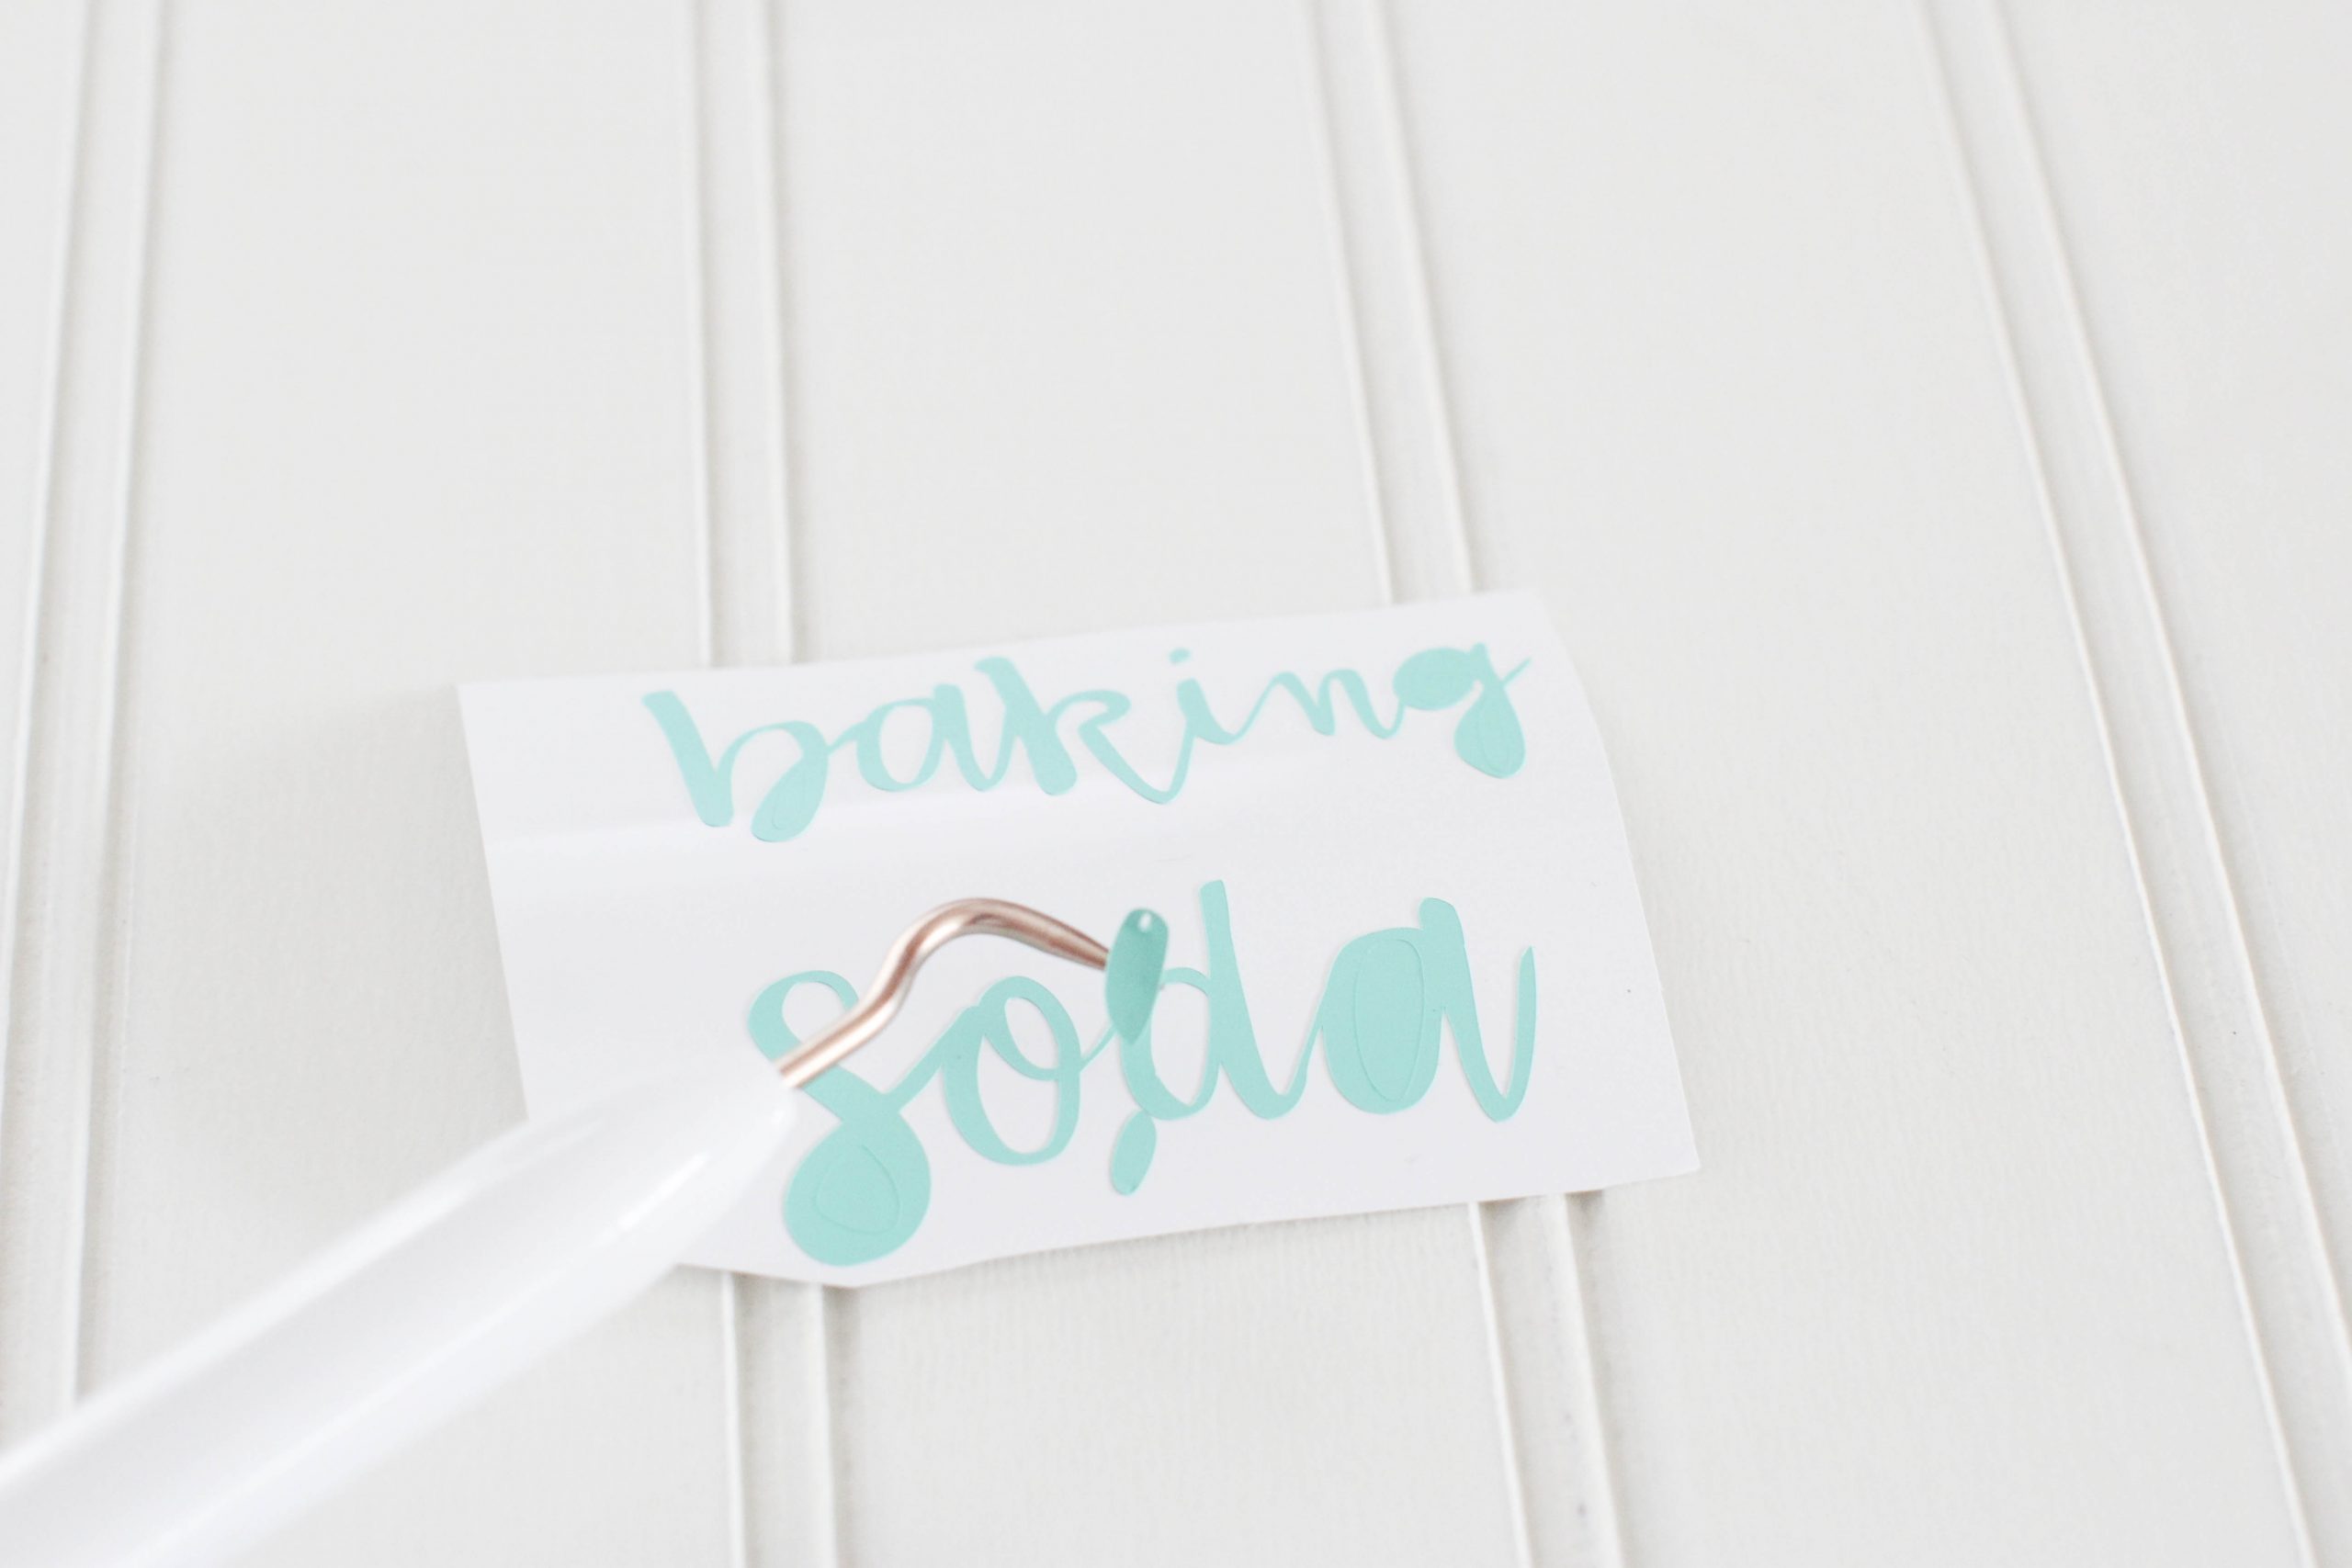
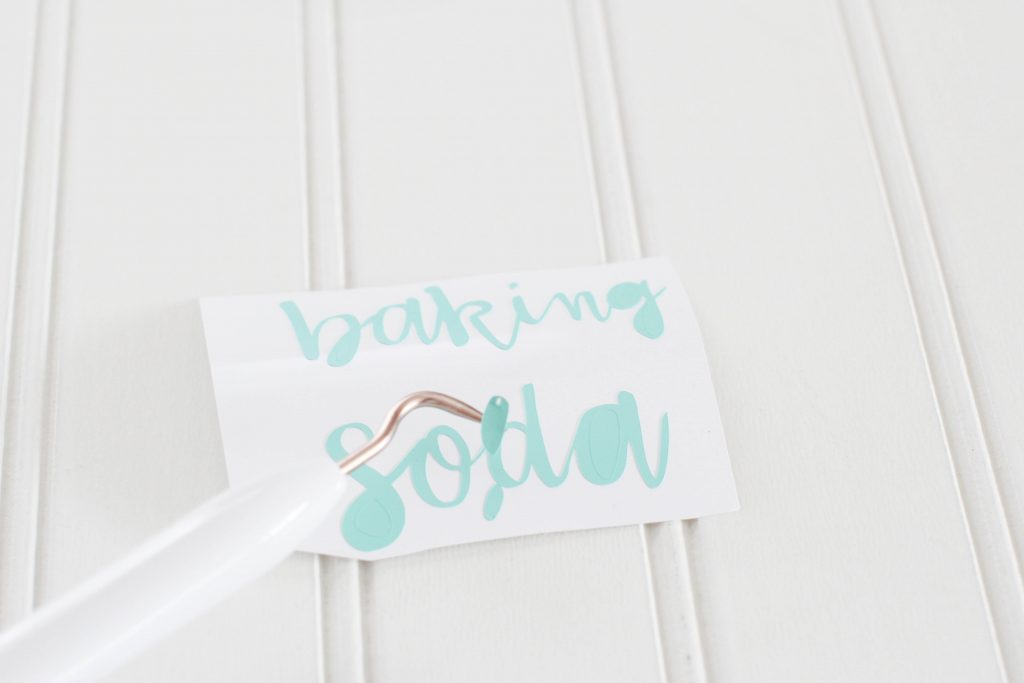
- Once the pantry labels are cut; You need to weed the vinyl from the design. (5:14 in the video) This removes excess, unneeded vinyl from the design.
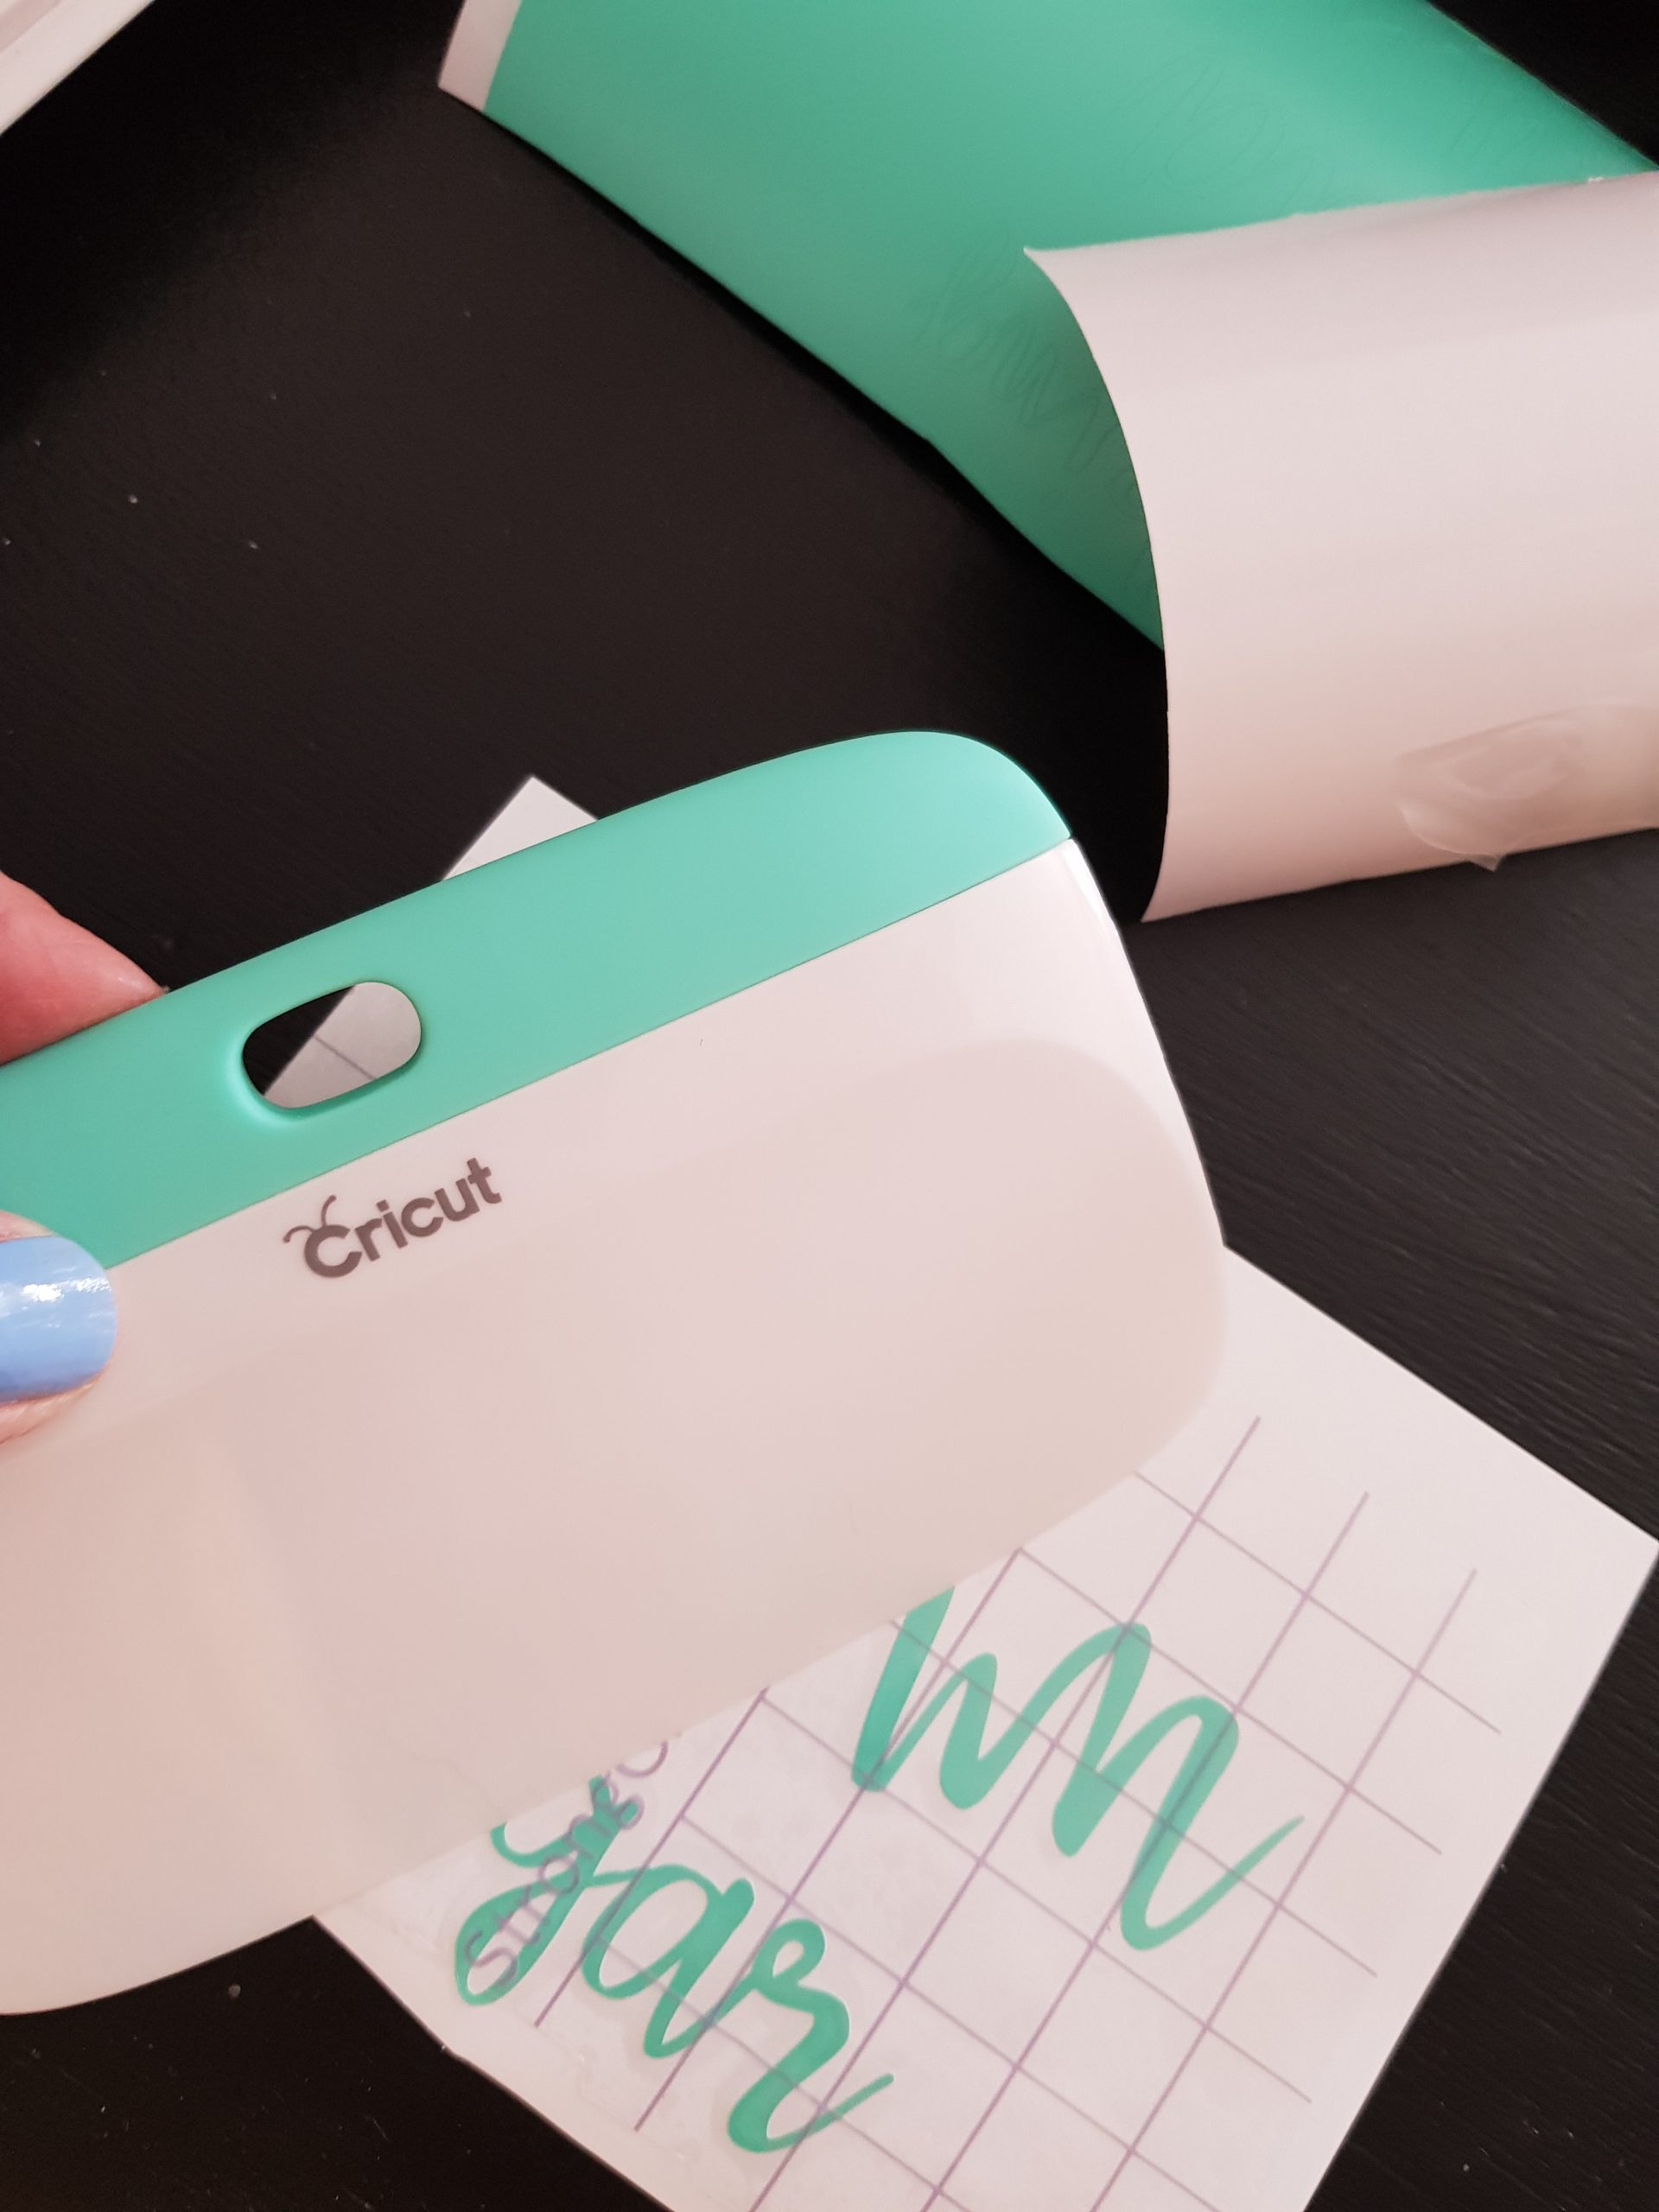
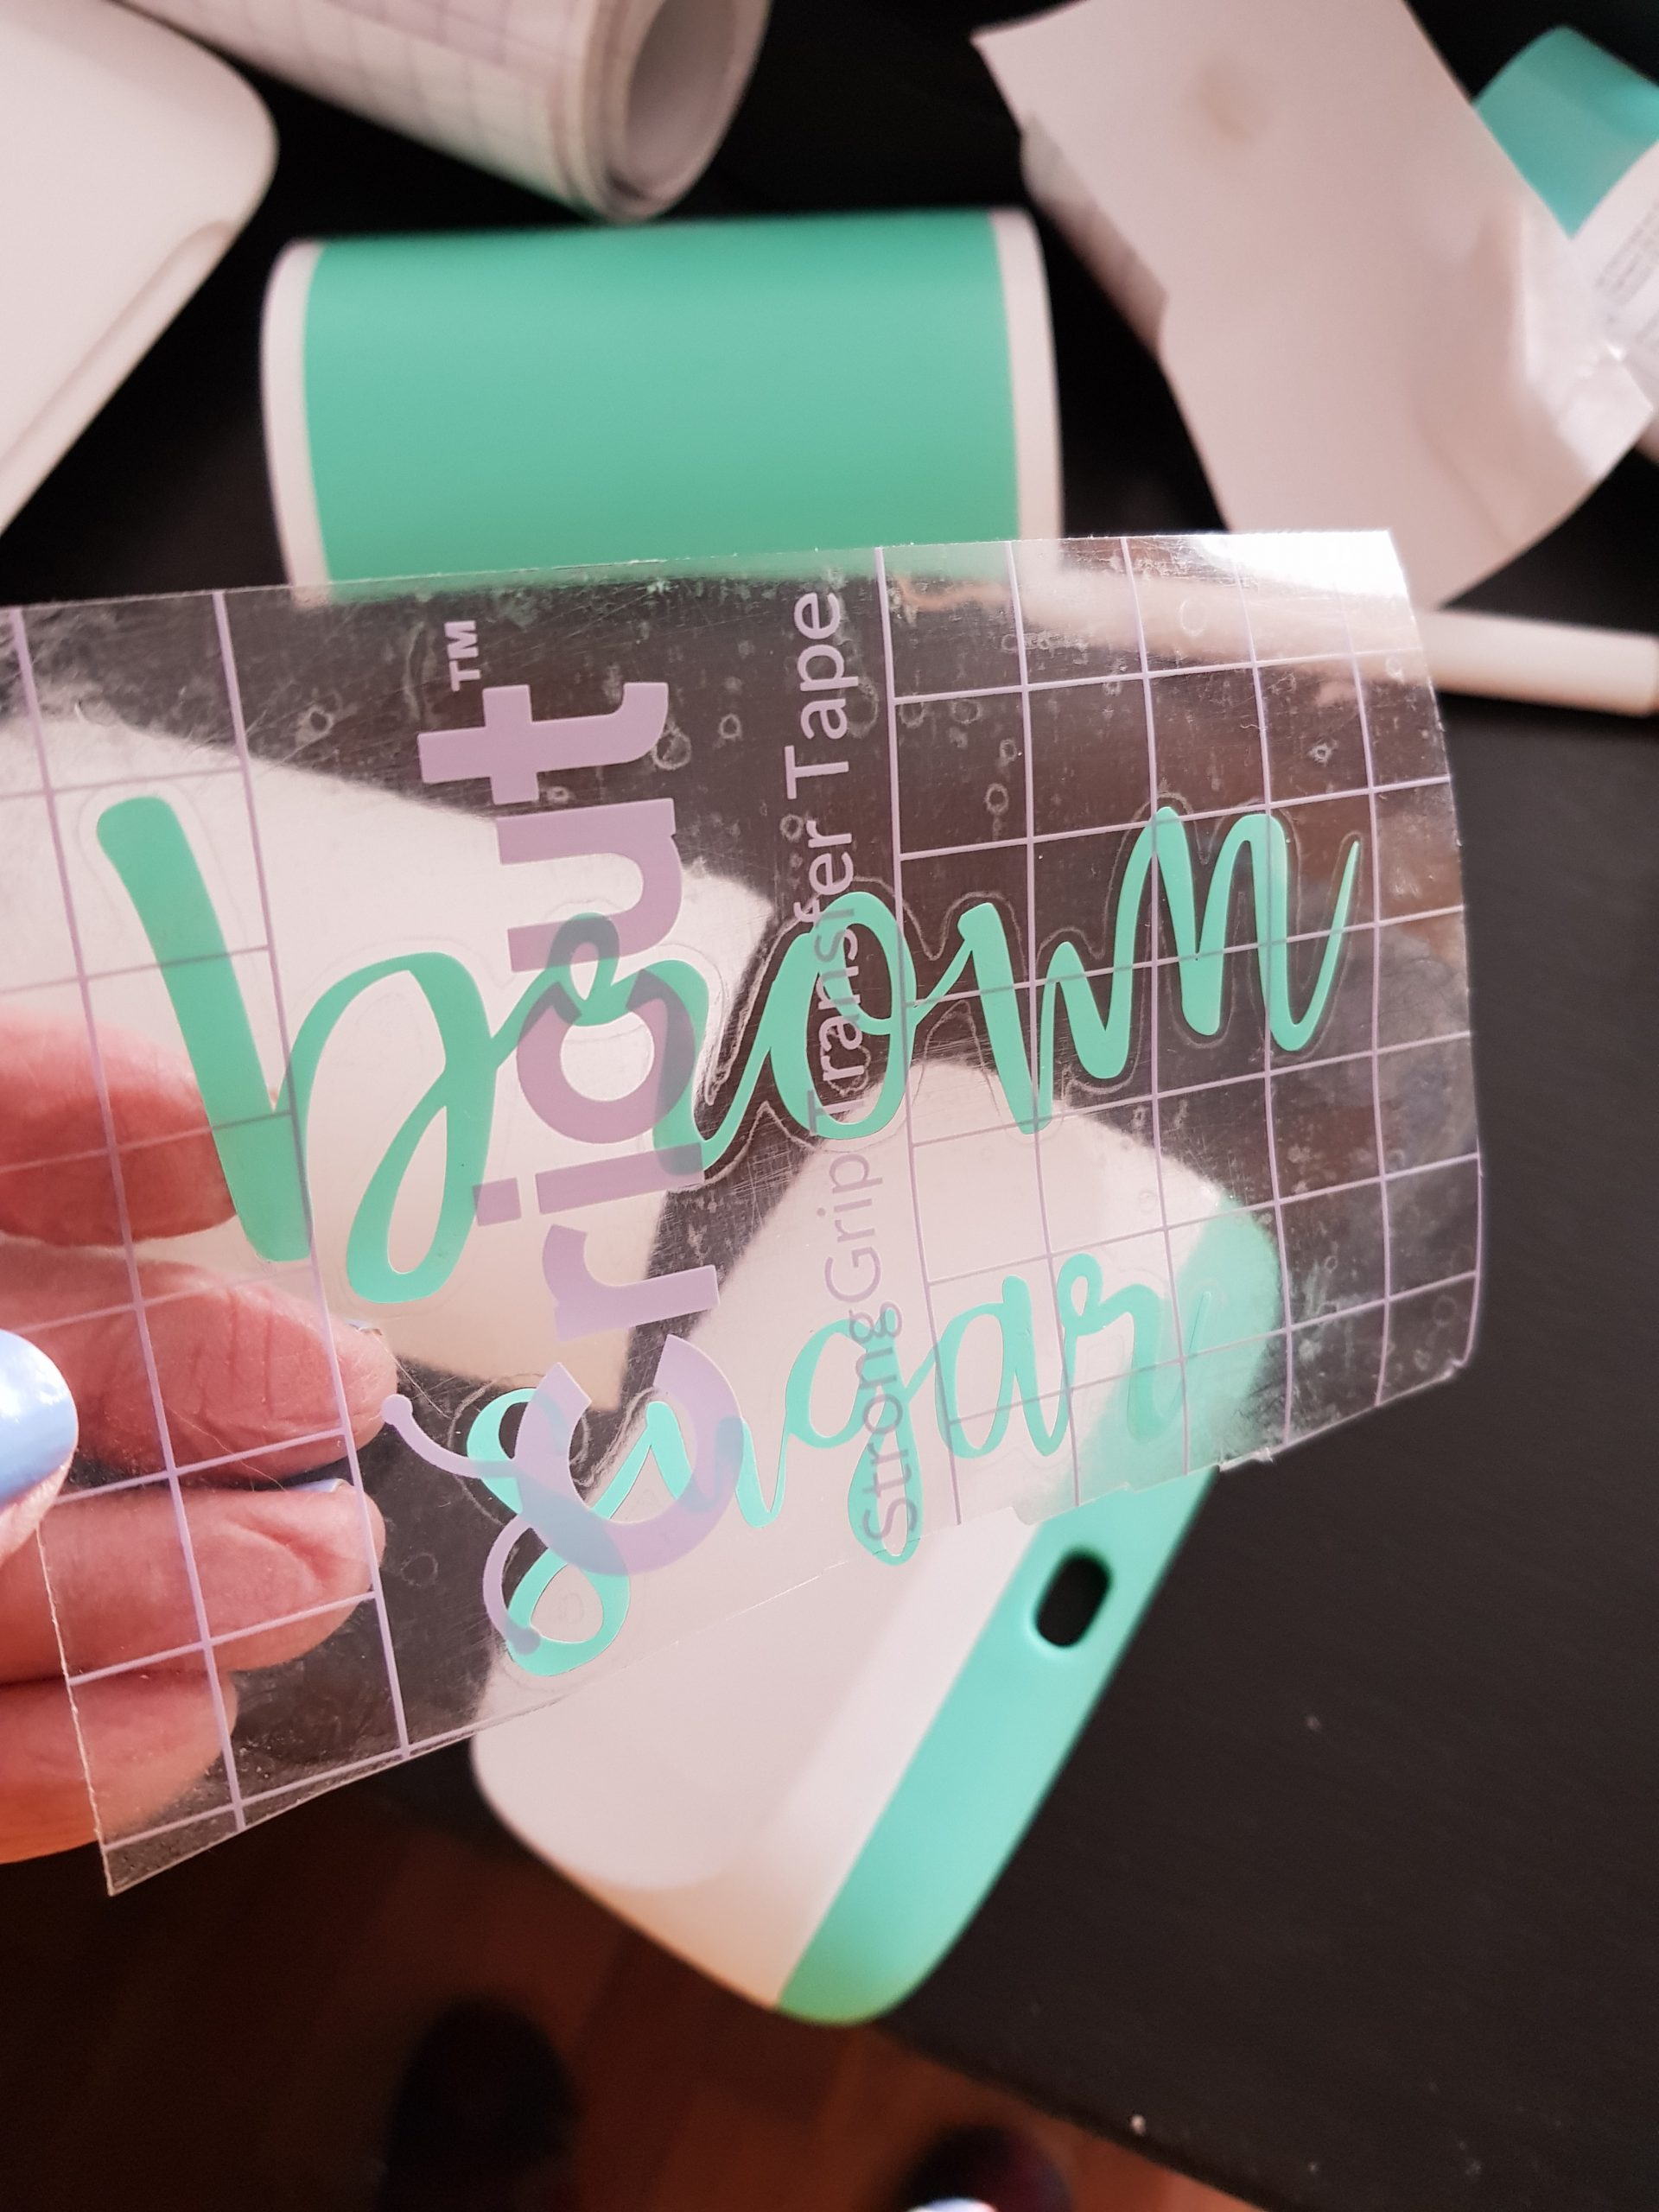
- Next, take out a roll of Cricut Transfer Tape.
- Cut the transfer tape to the size of the full design (6:07 in the video) you are adding to the canisters.
- Remove the protective paper sheet (6:07 in the video) (this can be a little tricky to do, I fold the corner and use my weeding tool to separate the paper if you have trouble getting it apart), and apply it to the design, covering the just weeded, and pre-cut label.
- Burnish the vinyl pantry label well onto the transfer tape! (6:19 in the video) Forwards, backward, and sideways with the burnishing tool.
- Next, remove the cutting sheet (6:34 in the video), take the label on the transfer tape to the canister, and carefully place the label (that has been burnished and is on the transfer tape) place it onto the canister exactly where you want the label placed. (7:09 in the video)
- Burnish the DIY pantry label in place (7:24 on the video) on your canister, storage container, or pantry storage container.
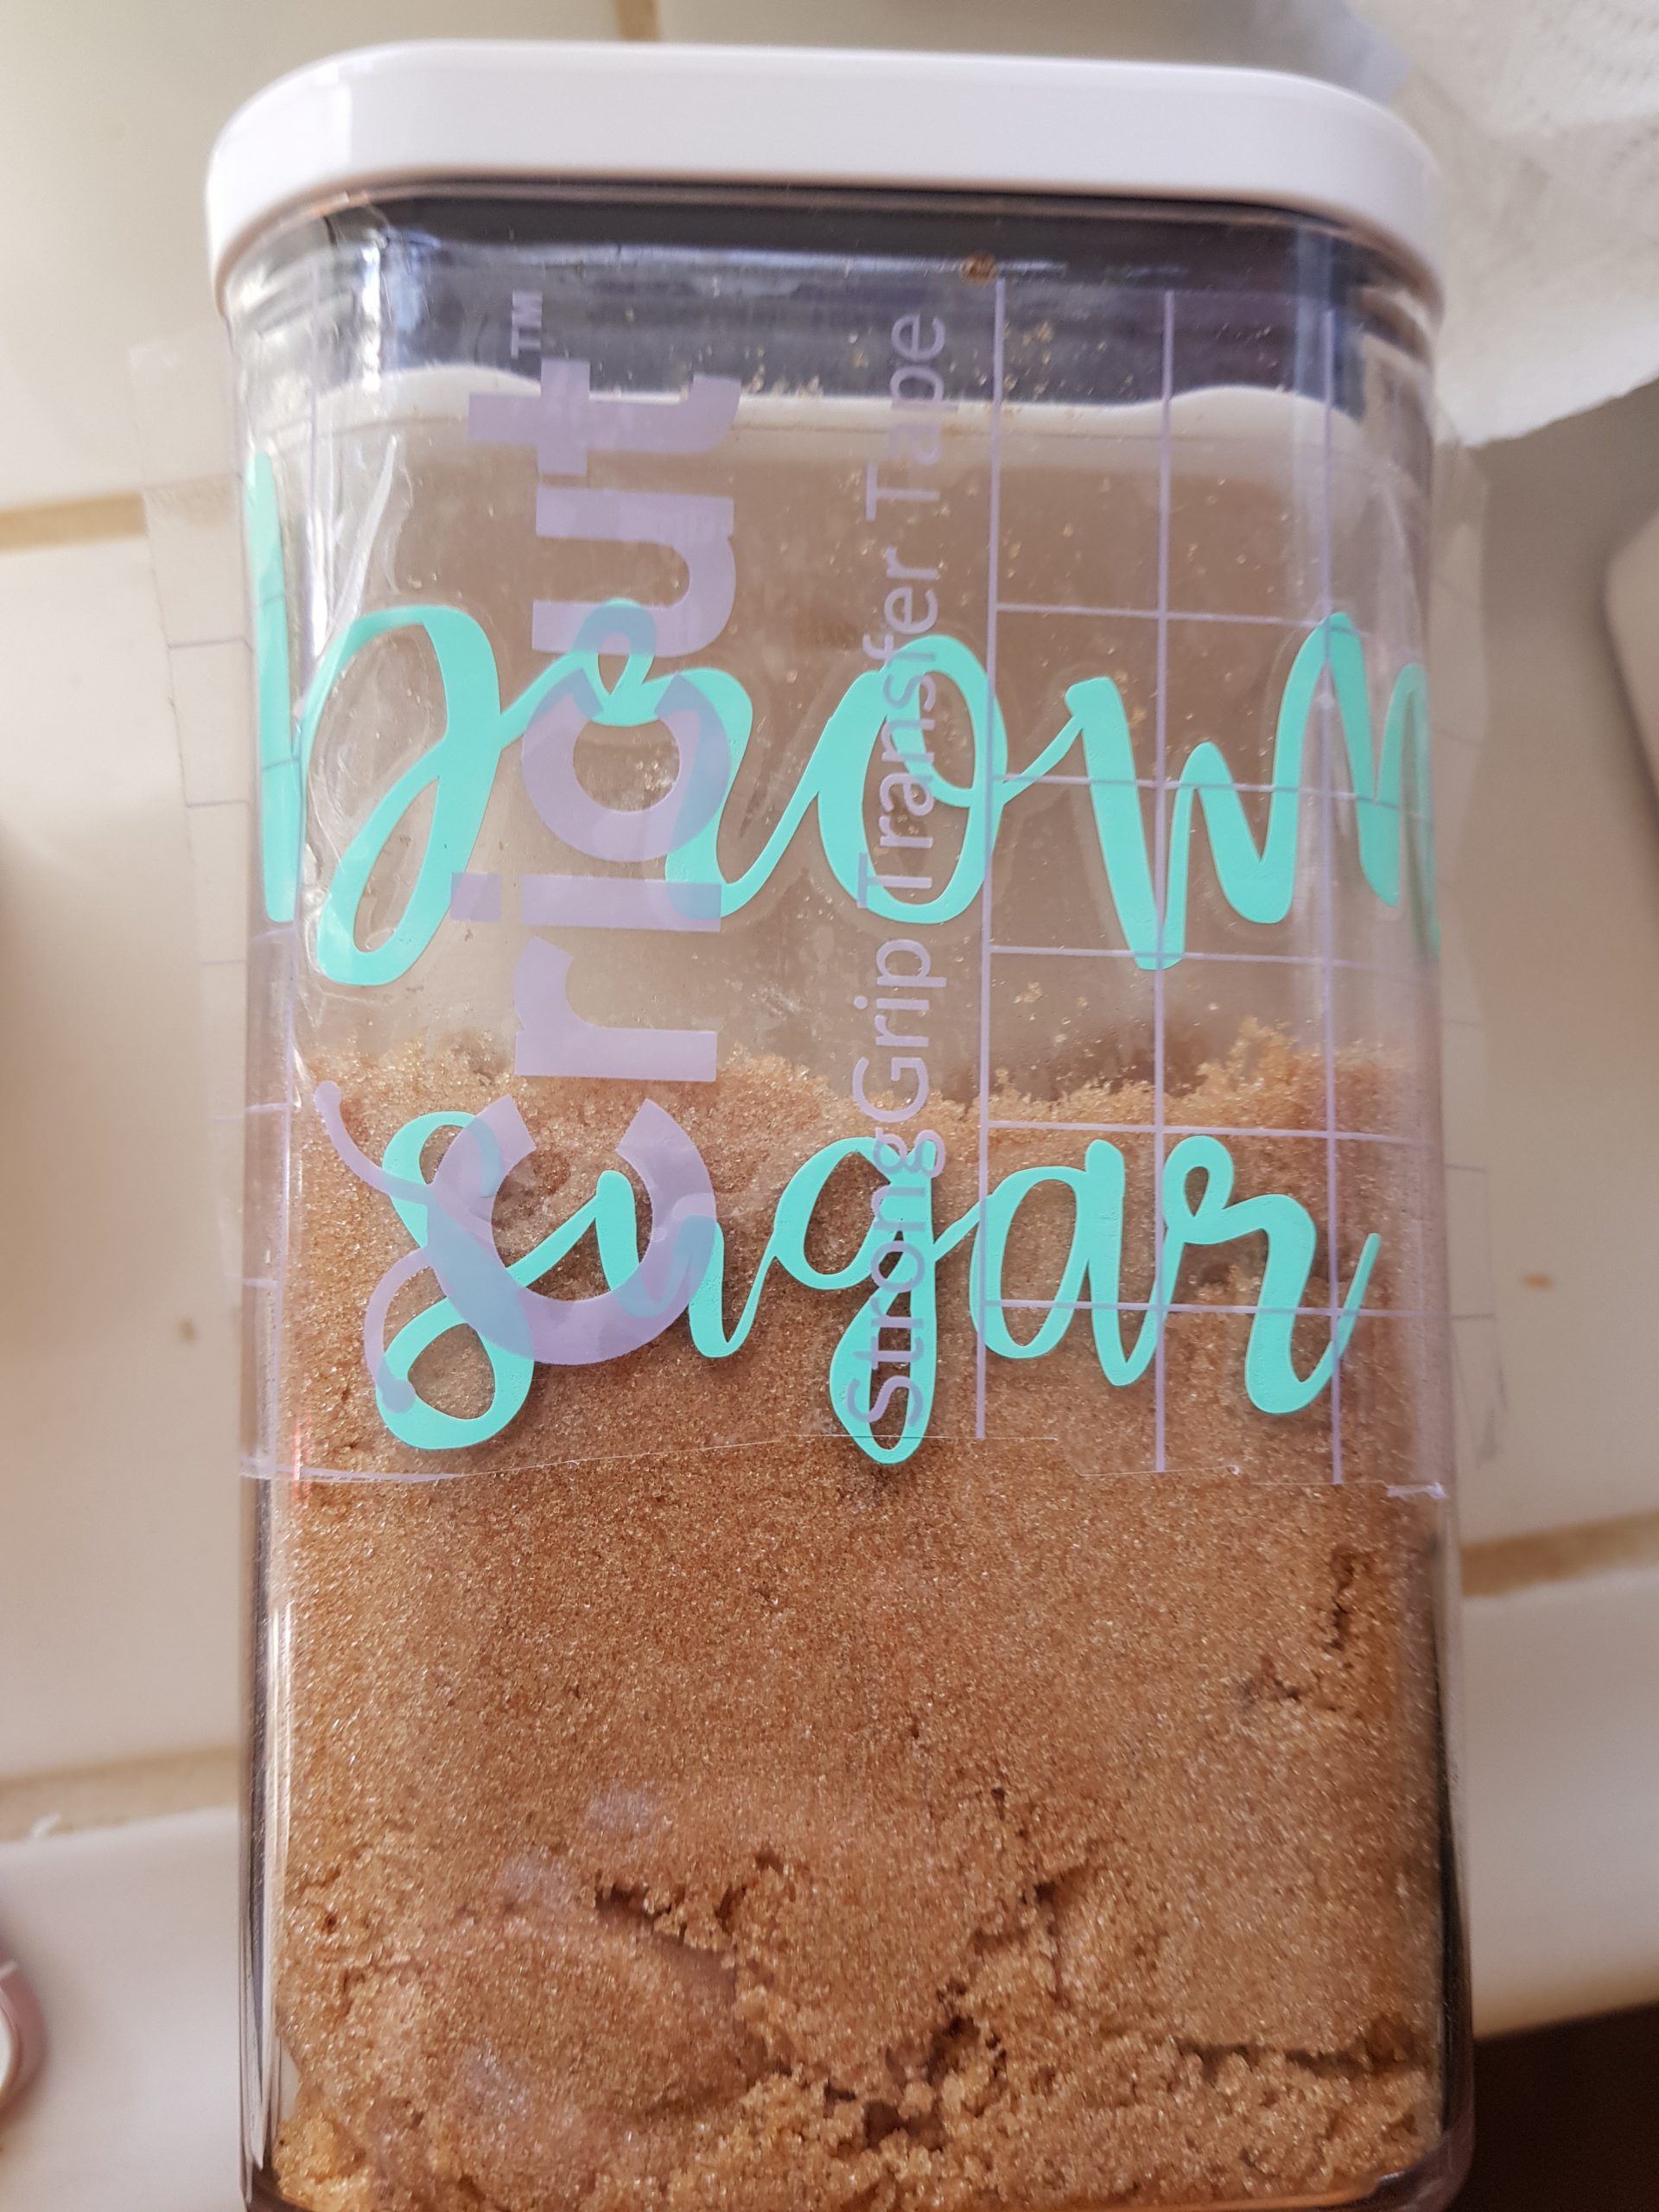
- Carefully, remove the transfer tape. (7:48 on the video) If the vinyl label doesn't stick. Place the transfer tape back down and burnish it again several times. Repeat the process. Do this until you have fully removed the vinyl label. (NOTE: I don't recommend having containers filled when doing this!)
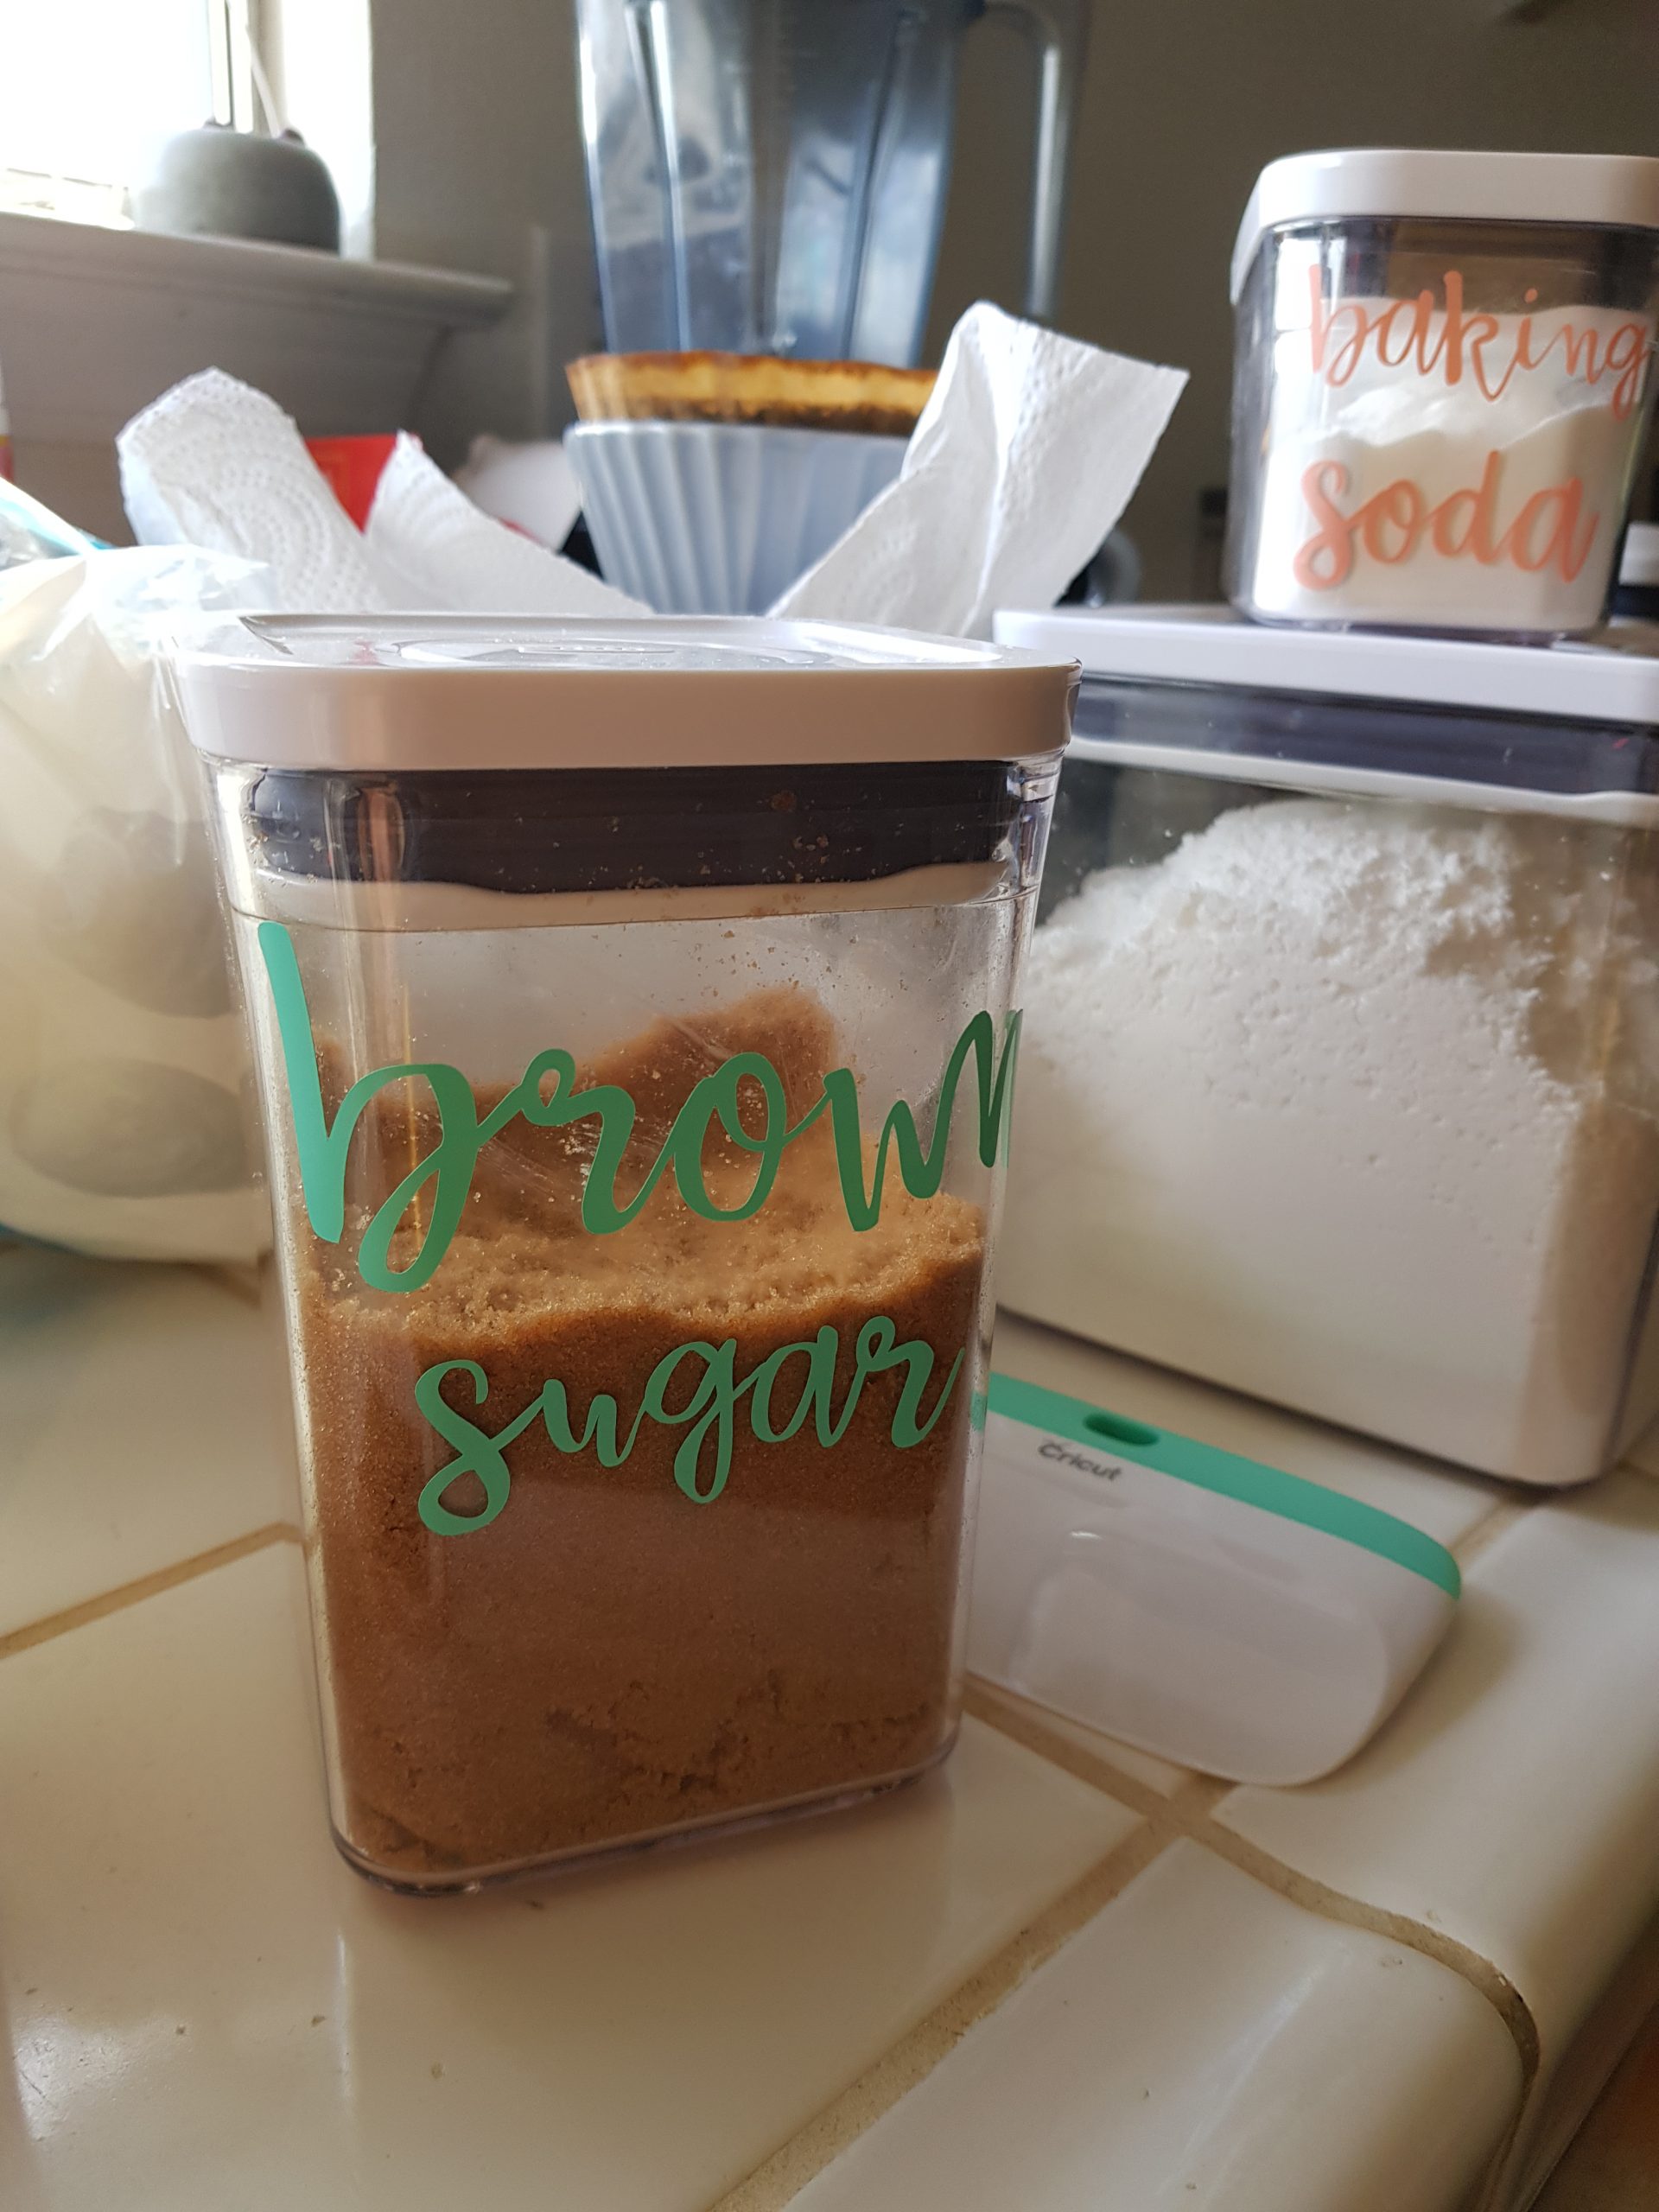
- Now your pantry label is in place.
- You can refill or fill your container!
- Add your labeled containers to your pantry.
- Repeat the process to make other labels!
- Enjoy getting organized and making labels!
DIY Pantry Labels
Vinyl Label For A Spray Bottle
Tips for making vinyl labels
- You don't have to worry about clicking the mirror image (for this project). The reason for this is that you are printing the vinyl labels exactly how they will be placed onto the containers.
- Be sure to clean your containers and have them dry.
- Use a cotton ball with rubbing alcohol to clean the container surface. This is where you will be going to stick the vinyl label onto your canister or container. (It must be dry)
- Start with empty containers. (new or old)
- NOTE: The lids may pop off when laying them sideways while working on the containers.
Can you cut more than one vinyl label at a time with the Cricut Joy?
Yes! If you make the labels and they fit onto the dimensions of the Cricut Joy Smart Vinyl and cutting space, you can! Preview cuts to ensure they are laid out properly to cut the designs. Be sure to weld and group items.
What do you need to use the Cricut Joy?
If you don't have a wireless computer or laptop, you might like to use an iPad for designing or a cell phone to make and layout your designs. You can create and cutting from the cell phone is super easy! Just use your Bluetooth settings and the Cricut Design Space App. The app is available for desktop computers, laptop computers, and cell phones, and tablets…
- I did all my designs on the computer and saved them.
- Then cut the designs by opening up my saved designs on my cell phone.
- After, I cut straight from the prompts by using the cell phone.
(My computer doesn't have a wireless remote. Something on my to-do list)
Using the Cricut Joy is so easy! I hope that helps you to get started with making a Cricut Joy project. Or consider adding the Cricut Joy to the craft tools you own! Right now, you can get the Cricut Joy Bundles on sale! Scroll to the bottom of the post for the links.
- Pantry Organizing Budget-Friendly Ideas
- 10 Easy Pantry Organizing Ideas
- Modern Stackable Pantry Storage
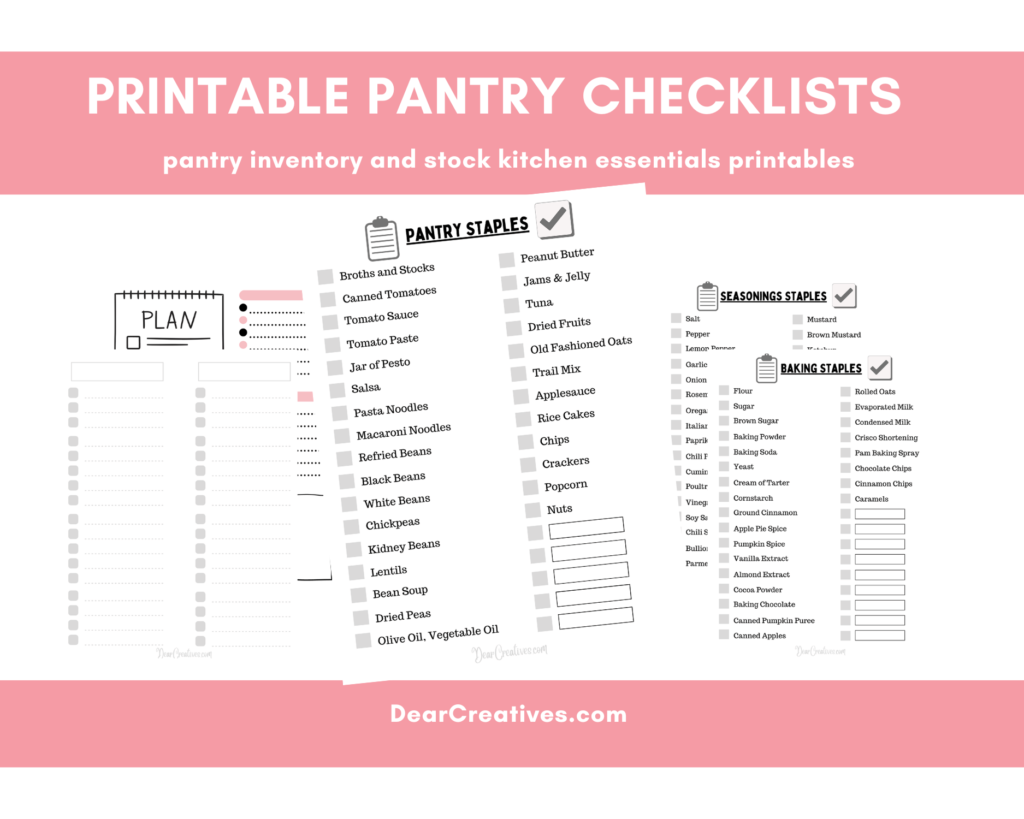
Need help managing your pantry?
Get these Printable Pantry Staples Checklists!
My thoughts about Cricut Joy
The big question you might be thinking is – Was it worth purchasing the Cricut Joy? I think so! It's perfect for making small projects!! It's small and easy to store anywhere.
I love that the Cricut Joy is easily portable. You can craft it on the go and take it anywhere. Honestly, I might get my daughters one for Valentine's Day or their birthdays! I think they will love crafting with Cricut, too! And, I think you will too.
I picked a font and colors of vinyl I loved. What vinyl colors will you pick? Colored vinyl or black or white? I can't wait to do more projects with this die-cutting machine.
- New here? Be sure to Subscribe.
- Pin it for Later
- Follow us on Pinterest
- Shop our favorites on Amazon
Cricut Joy Video Tutorials that will help you!
- Did you get a new Cricut Joy? Here is a video tutorial on how to set up a Cricut Joy. + beginner project for Cricut Joy.
- How To Make Labels With Cricut / DIY Pantry Labels Video Tutorial -(You will find the designing tips helpful.) You will need to make adjustments for the Cricut Joy. (measurements and Smart Vinyl size) You can see how the Cricut Design Space works, how to upload designs, and how to adjust designs in Cricut Design Space. For cutting on the Cricut Joy, there are no buttons to push; you just make it via the Make It prompts.
- This Cricut Joy video is for designing and making labels with Cricut Joy. She uses Smart Label Writeable Vinyl OR get it (here) Smart Label WriteableVinyl and Cricut Joy Pens. As she goes into the video, she shares a lot of tips for designing and cutting.
Where to shop for die-cutting machines, supplies, and sale items for Cricut crafts and projects?
- Shop for Machines or Supplies for Cricut at Cricut
- Shop for Cricut machines and supplies from Target
- Shop our Cricut Amazon list. I grabbed all my machines and supplies online and had everything shipped to my door.
- Go here for the latest Cricut Sales
- Shop The Latest Cricut Joy Sales and Cricut Joy Bundles!
Have you designed or tried to make your own DIY pantry labels? Or tackled a labeling project like this? I have a list of things I'm making labels for! I'll be sure to share more projects soon. Happy Cricut Crafting!
- New here? Be sure to Subscribe.
- Pin it for Later
- Follow us on Pinterest
- Shop our favorites on Amazon
Looking for more Cricut Projects to make?
- DIY Spray Bottle Labels
- Free Projects In Design Space
- How To Make A Bunny Banner With A Cricut
- Fall Pumpkin Banner
- Burlap Utensil Holders and Name Tags DIY With Cricut + SVG FILES
- DIY Iron-On T-Shirts and Onesies Like A Pro
- Crafts
- Back to School Crafts (DIY mini journal)
Need more ideas for organizing your home?
Home organization posts
- Free Spring Cleaning1 page Checklist (plus tips)
- Free 9-page Fall Cleaning Checklist (plus tips – keep you on track any time of year)
- Be Your Own Super Hero Home Organizing Tips Series + *pantry
- Easy DIY Closet Organizing Tips Tools And Tricks
- Craft Room Organization Storage Ideas Tips And Tools
- Craft Room Storage DIY
- 25 Craft Room Organization Ideas
Pantry Ideas
- Budget-Friendly Pantry Ideas: How to Organize Your Pantry – Before/After. The day I lost it over my disorganized pantry and how I fixed it.
- 10+ Pantry Organizing Ideas For The Kitchen Pantry
- Do you need a grocery list for getting pantry staples? Printable Grocery Lists
- Pantry Storage + Pantry Storage Tips
- How To Organize Your Kitchen Spices