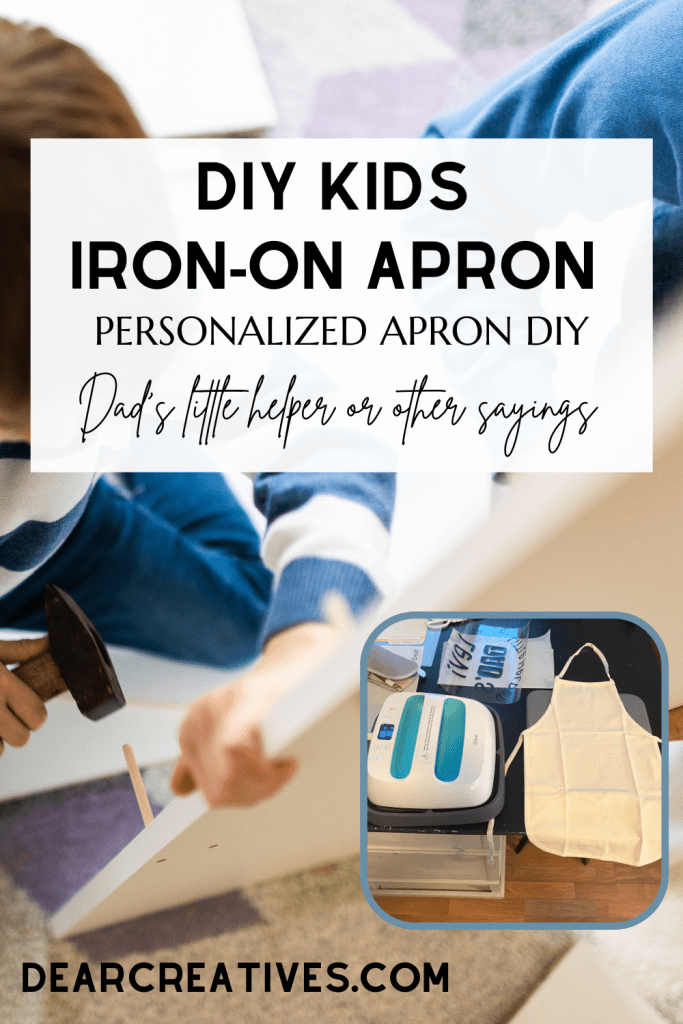
DIY Iron-On Apron – Personalize Aprons – Cricut Craft
Are you looking for a fun way to dress up your kitchen style or make a personalized gift? Today I'm showing you how to make a DIY Iron-On Apron! In this tutorial, I'll show you exactly how I customized a kids' apron, but keep in mind that this same easy process works for aprons of any size—whether you are making one for a baker, a crafter, or even the perfect bridesmaid gift. Using your digital cutting machine makes this project so fast and professional. If you're looking for more inspiration, you can find all my latest Cricut Craft Ideas here!
You can make it super easy on yourself and purchase a kid's apron or an adult's apron to do this project. Or sew an apron and then add the iron-on material. But, opted to make this a quick and easy gift by using a store-bought apron. Looking for something else to make with the Cricut?Or new to crafting with one? View all our Cricut Crafts.
I hope this Cricut tutorial helps you make a few gifts for your family and friends for birthday gifts, Christmas gifts, or just to give them a special homemade gift!
Why You'll Love Making a DIY Iron-On Apron
- It is a no-sew craft! You use a premade or presewn apron.
- Beginner Cricut Craft
- If you do sew, you can make the aprons and add iron-on to personalize them. Note: Use 100% cotton fabric or cotton canvas fabric.
- So many ways to personalize them by name or gift idea. See all the creative ways to make and use the aprons at the bottom of the post.
DIY Iron-On Kid's Apron
For this DIY, you will need a kid's apron (I got mine in a pack of 5), iron-on material, a Cricut die-cutting machine, EasyPress or Iron, and a design file. (or design your own file). I used Cricut Design Space to make the design (it's free with sign-up).
- The design I used was Dad And Tools. file #M26F5861E in Design Space.
- The font I used was Spring Break.
- I customized the design using these elements that are available from Cricut Access in Cricut's Design Space (Note: You can buy the files individually inside Cricut Design Space or use the membership for all access and savings for designing files).
- There are many ways to make designs or get SVG files. (Esty -SVG Files For Cricut) (Cricut Access – What is it and comparison of membership levels) (Design Files HungryJpg. bundles, weekly freebies, and designs for crafters.)
Can you use this iron-on Tutorial for adult aprons? Yes!

Note: Yes! You can use the same instructions for adult aprons, too! Just use different design options (you can find them via the links above) and adult aprons (or an adult apron like this).
Embellish an apron with iron-on material. It's fun and easy to decorate an apron with this Cricut craft. Give the finished apron with iron-on as a homemade gift for birthdays, holidays, and celebrations like Christmas.
DIY Iron-on Kid's Apron Using a Cricut
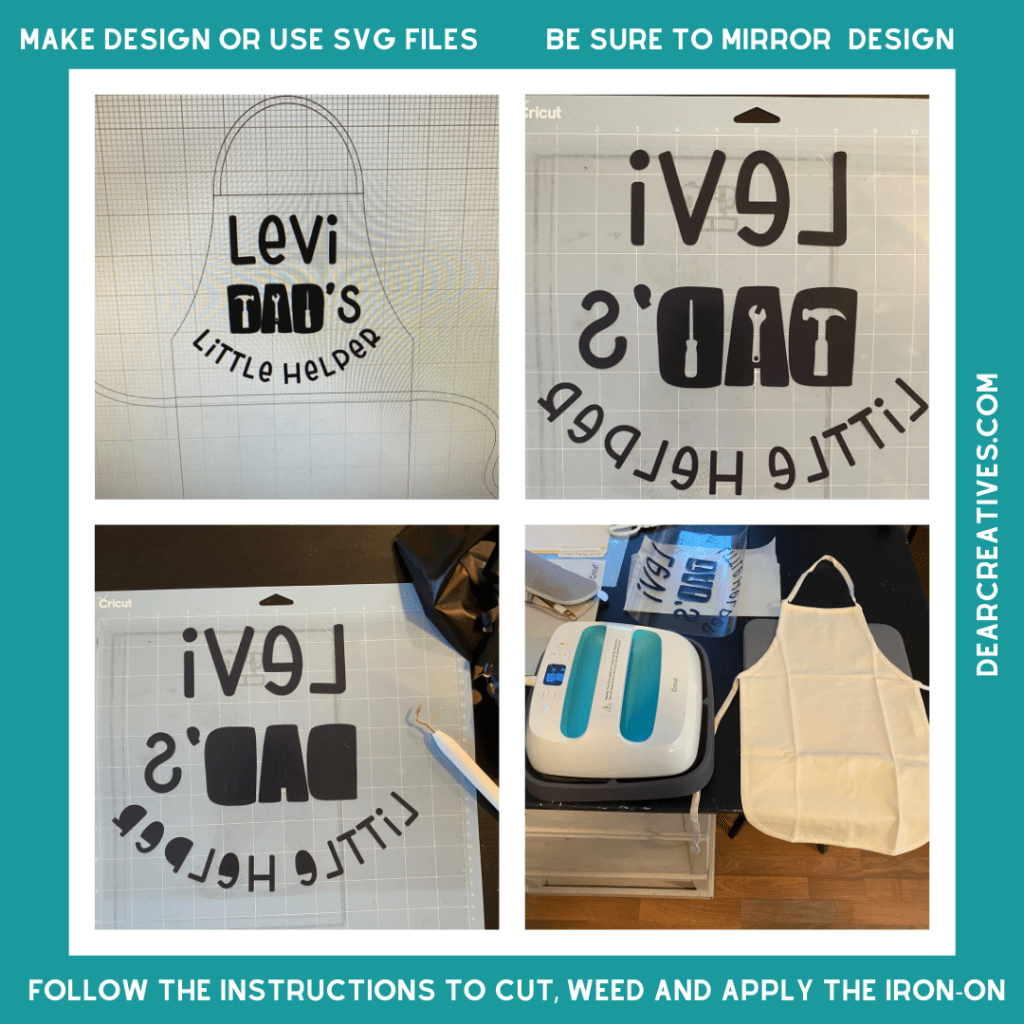
This Cricut project is perfect for even beginner Cricut users! Just make sure to take your time, mirror the image when using iron-on materials, and pick the proper settings. Let's make this craft!
How To Apply Iron-On To a Kid's Apron Or DIY Adult's Apron
Supplies for Your Personalized Apron Project
- Kids Apron (5 Count Kid's Apron Cream or White) (2 count Kid's Apron with pocket)
- Iron-On Material Available in colors: black and white. (I used black iron-on ) Or you can get Smart Iron-On that doesn't require a mat.
- Cricut Machine– (If you don't own a digital cutting machine yet, you can compare Cricut Machines . The comparison chart is helpful!) (I used my Cricut Maker)
- EasyPress (recommended) or iron
- EasyPress Mat
or towel
- Computer, laptop, or cell phone for using Cricut Design Space
How to Apply Iron-On Vinyl to an Apron: Step-by-Step
Instructions
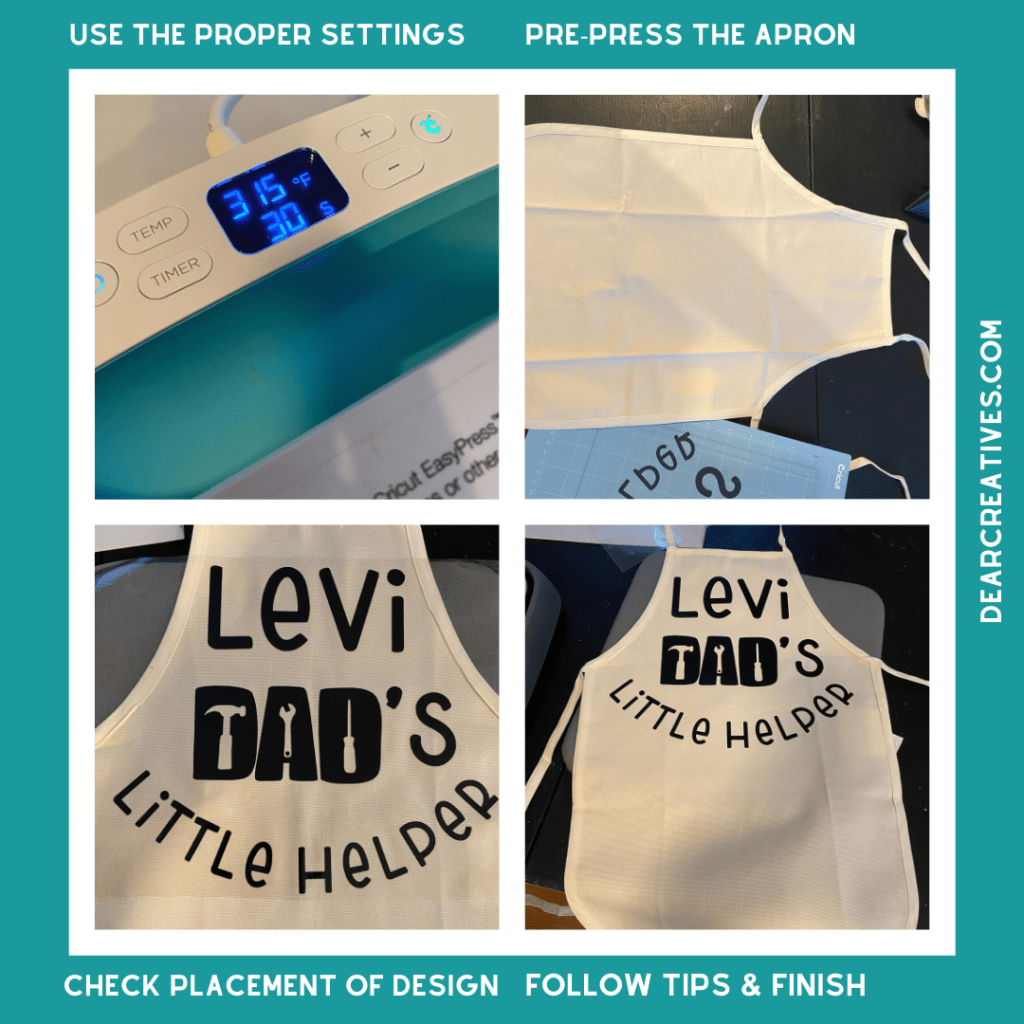
- Press the apron that you will be applying the iron-on to.
- Make or purchase your design file. (To design one: Cricut Design Space is free, and no special skills are needed. OR search and buy SVG designs in Design Space) Or buy and upload an SVG to Design Space.
- Once your design is made, be sure to save your file and give it a name! (Always preview your cut file, and make adjustments as needed.)
- For apron placement (and designing), I like to use their mock-up aprons in Design Space (there are kids' and adult mock-up aprons). This way, you know how it will look.
- When you are ready to cut your design, be sure to MIRROR your image. Ensure the iron-on material will work properly. (The option will be in the prompts. Remember to preview the cut prior to the final go for making it!
- Follow the steps in Cricut Design Space to cut out and make your apron's design.
- After it is (the design) cut, unload it from your Cricut. Next, you will weed the design. NOTE: This is taking off excess material that is not going to be for the iron-on design. It will leave it on the iron-on film. Do not remove it from the film until after you have pressed the design. It is a transfer material for placing the iron-on onto the fabric/apron.
- Pre-heat your EasyPress (Look up the settings for press time here HEAT GUIDE. Go through prompts for what machine you are using, types of iron-on, and pick fabric material (cotton or cotton blend or other material, whether you are using a mat or towel…).
- Place your pre-pressed apron on the EasyPress Mat (or towel). I use a protective heat sheet over my design. But I'm not sure if they sell it anymore. You can use Parchment Paper.
- Then, when the EasyPress is ready. And the design is placed on the apron. Press it with EasyPress for the recommended time. (Google – or go to Cricut Heat Guide) and follow the prompts. You will press the front, then flip it over to press the back according to the directions with heat settings.
- Peel the excess transfer film off according to those same directions. It will tell you when it's warm to the touch to take it off or cool. Do not remove it when it's too hot to touch.
- Tips: Allow 24 hours after application before washing, and read all the directions with your package of iron-on materials.
Who was the lucky boy who got this Dad's Little Helper apron? My grandson Levi. I can't wait to update it with a photo of him wearing it. Do you like making homemade gifts?
Tips for Heat Pressing Large Fabric Surfaces
Tip: Since aprons are larger than pouches, ensure your surface is completely flat. If your apron has pockets or thick seams, use a pressing pillow inside to ensure the vinyl gets even pressure.
What to do if the iron-on starts to come up? What to do when the iron-on vinyl is not sticking to the fabric?
Place it back down and redo the process on that spot for a little bit more time. Do not over-process it can damage/warp the iron-on materials.
Helpful videos for using iron-on materials
This video tutorial is super basic on how to use Iron-on.
Helpful videos for how to iron on aprons
- Cricut Iron-On Apron Video Tutorial (She uses an iron; I recommend using the EasyPress.)
- How To Layer With Iron-On Materials (This is a helpful video for using different colored iron-on or HTV for your projects and aprons!)
With these additional resources, videos, and our tutorial, you will be making iron-on aprons and gifts in no time flat!
Be sure to see my tutorial for making iron-on t-shirts and onesies like a pro (below)!
Where to get supplies and blanks for Cricut craft projects?
Practice this technique, and you can use iron-on to customize other projects. Use customizable blanks for tote bags, pillow covers, make-up bags, t-shirts, and more!
Happy Crafting! And Homemade gift-making! Do you like personalizing gifts? Have you tried using iron-on materials yet?
- New here? Be sure to Subscribe.
- Pin it for Later
- Follow us on Pinterest
- Shop our favorites on Amazon
10 Creative Ways to Customize Your DIY Apron
- Personalized Bridal Shower & Bridesmaid Gifts: Make each bridesmaid a custom apron for a “baking themed” bridal shower or a fun “Cupcakes & Champagne” party. Add names or “Bridesmaid” in a pretty script font.
- Dance & Cheer Team Bake Sales: Create matching aprons for team members to wear during fundraisers or bake sales to look professional and unified.
- Kids' Art & Craft Smocks: Little ones love having their own apron for painting, messy crafts, or protecting their clothes while playing with figurines and “little things.”
- School Home Ec & Cooking Class: Personalize an apron with a student's name to use for school cooking projects or as a custom back-to-school gift.
- Baby Shower “Diaper Cake” Topper: Use a tiny infant-sized apron with an iron-on “Little Chef” design as a unique and practical baby shower gift.
- Garden & Flower Arranging: Customize a heavy-duty apron with pockets to hold shears, seeds, and gardening tools.
- The Ultimate BBQ/Grill Master: Make a fun, punny apron for the grill master in your life—perfect for Father's Day or summer cookouts.
- Teacher Appreciation “Art Teacher” Gift: Create a colorful, stenciled, or vinyl-designed apron for an art teacher to wear in the classroom.
- Baking & Holiday Cookie Exchanges: Design “Official Cookie Taster” aprons for your annual holiday baking day with friends.
- Seasonal Gifting: Don't forget to customize these for Valentine's Day “Sweetheart” baking, Mother's Day, and holiday gift baskets!
Are you looking for more crafts to make?
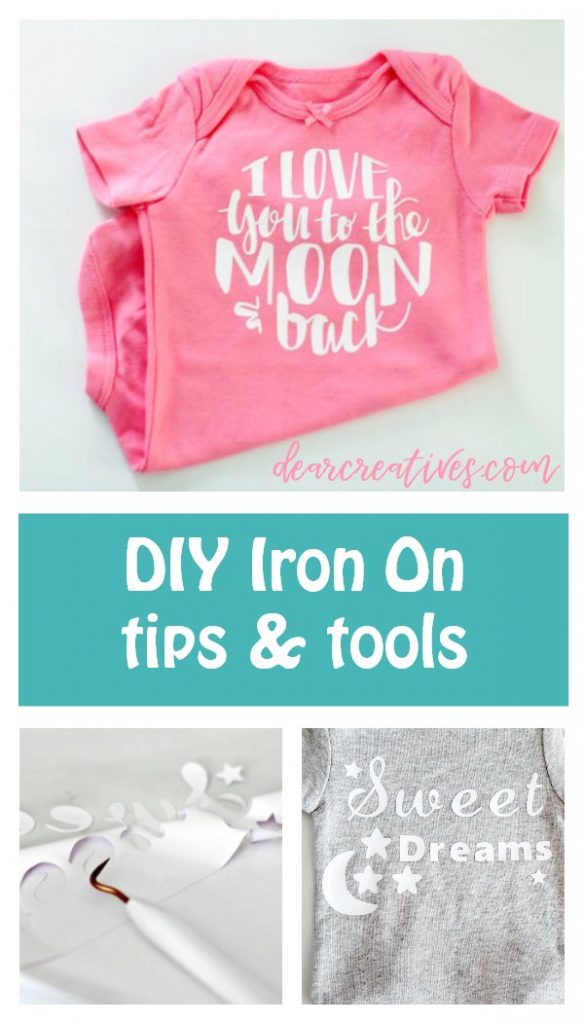
- DIY T-Shirts and Onesies Like a Pro!
- Are you organizing your home? Try this Cricut Craft and make DIY Pantry Labels
- How To Make Vinyl Bottle Labels (For spray bottles or other glass or plastic bottles)
- Free Projects In Design Space
- How To Make A Bunny Banner With A Cricut
- Fall Pumpkin Banner
- Burlap Utensil Holders and Name Tags DIY With Cricut + SVG FILES
Stay tuned for more easy projects to make with Cricut!
Where to shop for die-cutting machines, supplies, and sale items for Cricut crafts and projects?
- Shop for Supplies from Cricut (use the link above)
- Or shop for Cricut machines and supplies from Target
- Shop our Cricut Amazon list. I grabbed all my machines and supplies online and had everything shipped to my door.
- Shop The Latest Cricut Machines and Bundles!
Happy Crafting!