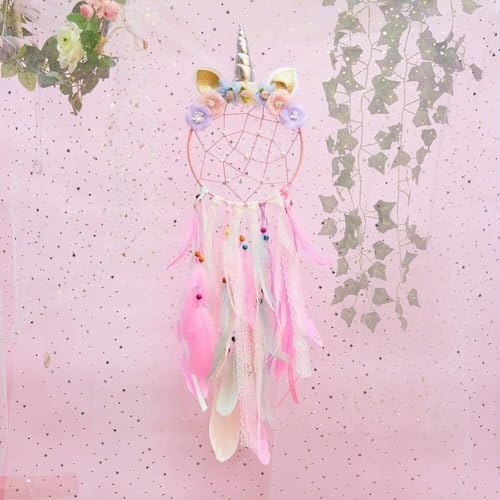
Easy to Make Unicorn Dream Catcher DIY Plus Video for Adding Webbing
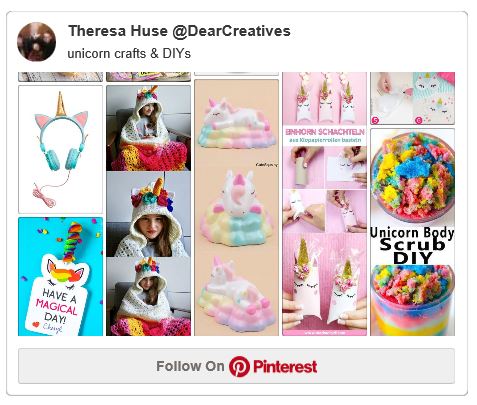
- Learn How to Make A Unicorn Dream Catcher. We have been obsessed with unicorn crafts and Unicorn DIYs ever since they popped on the scene. I have a Pinterest board with all things unicorn, which I'll share later in the post.
If you have kids who love unicorns or you love unicorn crafts then this post is for you. You will love making this DIY Unicorn Room Décor. We show you how to make a Unicorn Dream Catcher without the web. You can easily add the webbing. You can see how to create the webbing too. Find a video tutorial at the end of the post to add that to your unicorn dream catcher.
My littlest granddaughter just turned two and is obsessed with unicorns. Do you know someone who loves them too? If you said yes, pin and share this project with them.
Unicorn Dream Catcher
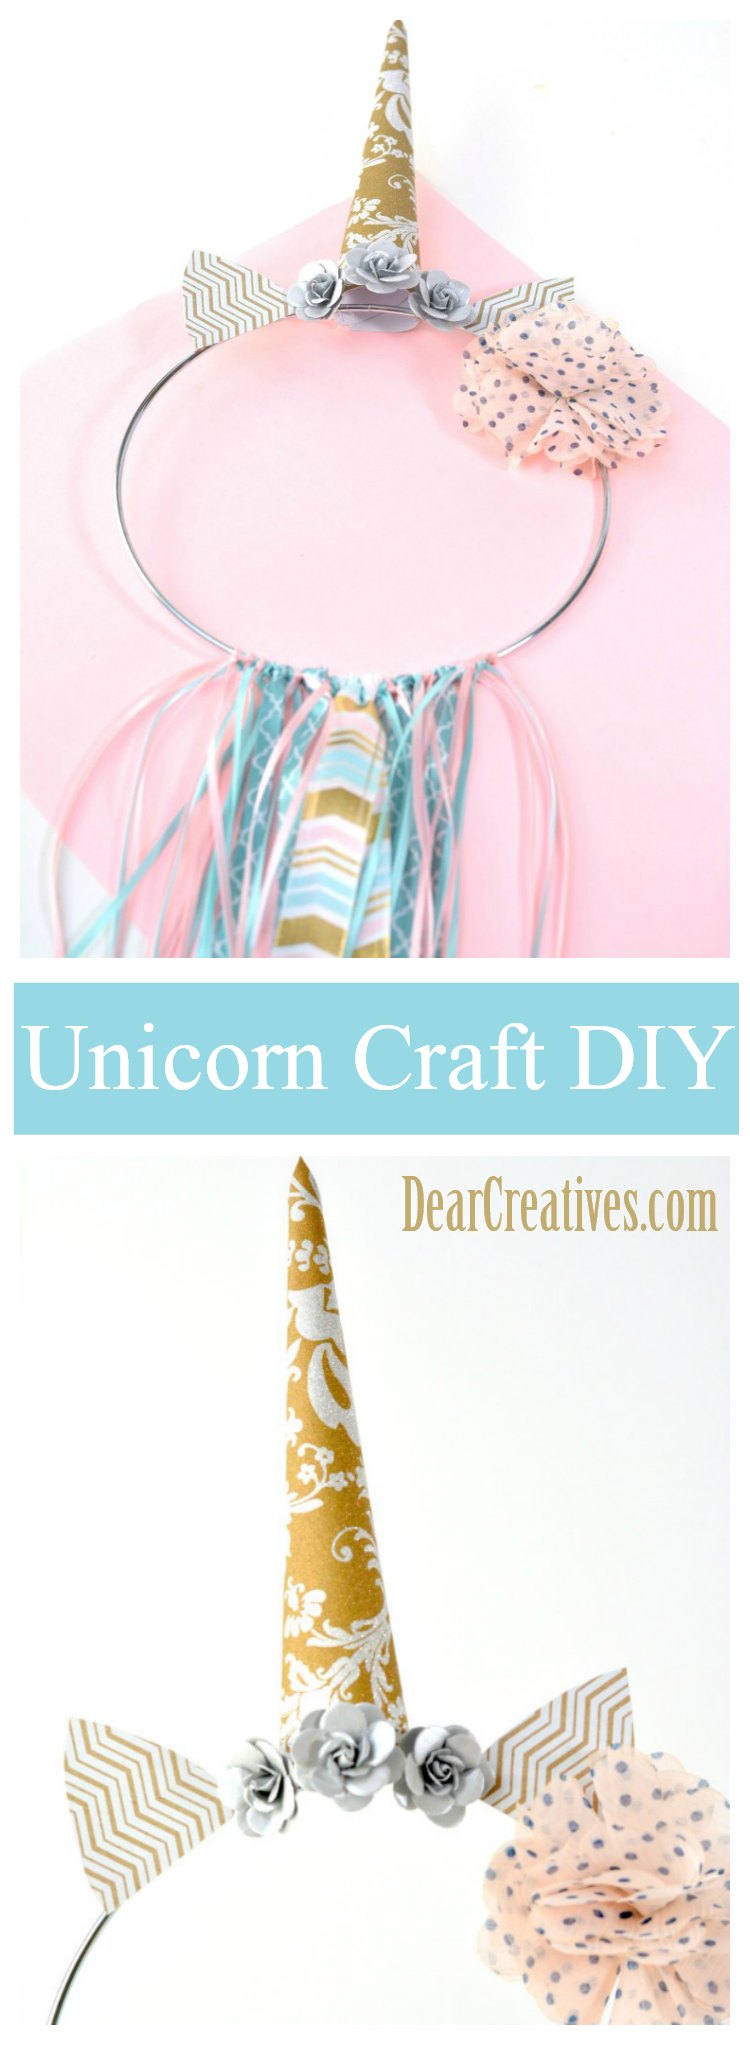
This easy Unicorn Dream Catcher can be used for party décor or hung on a kid's bedroom wall. Add the webbing or leave it just with the flowers, and ribbons. This tutorial is just a jumping point for you to make a kid's unicorn dream catcher. The video tutorials show many ways to create them for adults too.
How to Make a Unicorn Dream Catcher
Craft Supplies For a Unicorn Dream Catcher
Supply List
- Glitter cardstock paper
- Decorative cardstock paper
- Scissors
- Decorative flowers
- Hot glue gun
- Various ribbons
- Small metal craft hoop

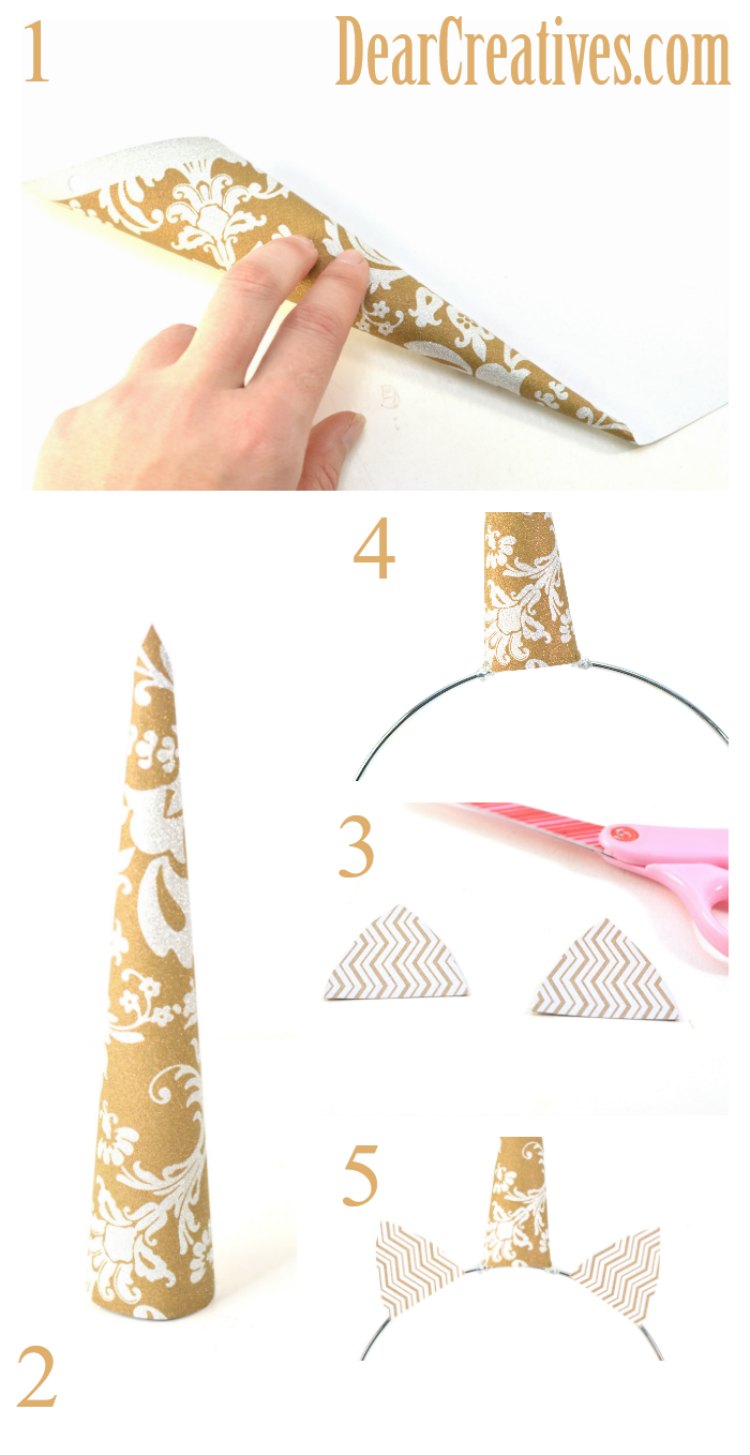
Image Shows Steps 1 – 5
Instructions
How to make a unicorn dream catcher
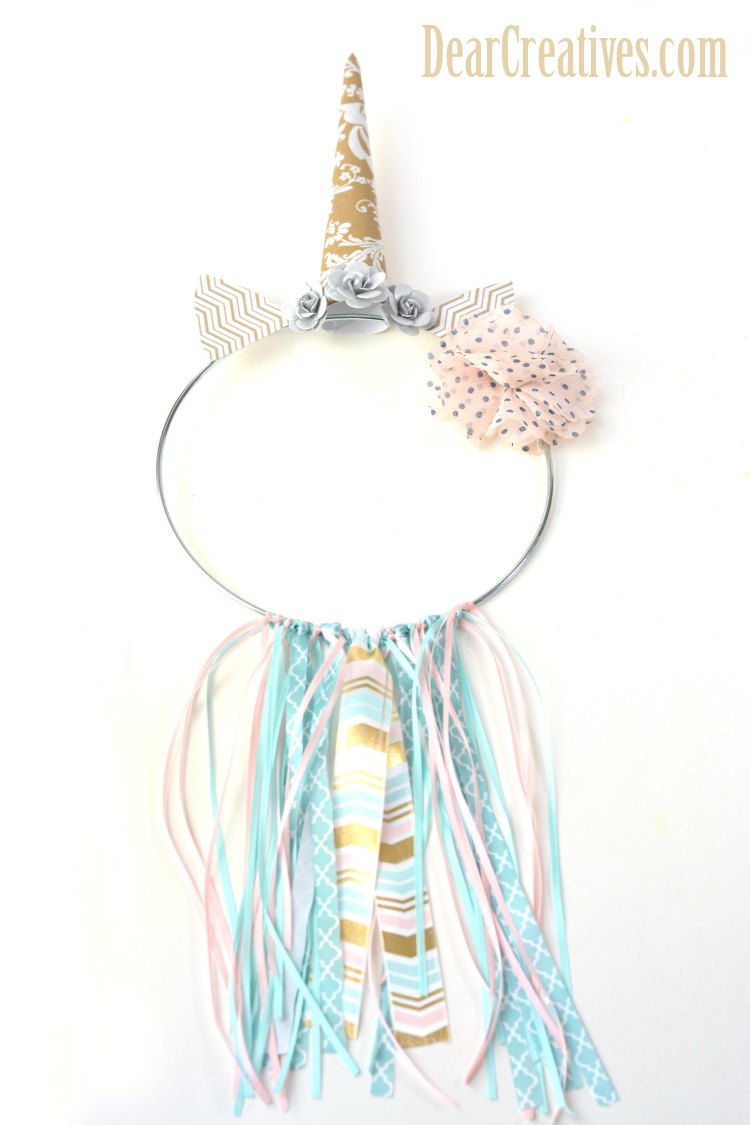
1. Start by rolling a corner of a piece of glitter card stock paper into a cone shape. You want the top to be pointed, and to radiate down into a cone at the bottom. Cut the rolled cone out, keeping it rolled at all times.
2. Use hot glue to secure the rolled paper in the back. Trim the top to a tip that you are happy with, and cut the bottom (so that it is level all the way across).
3. Cut out two ear shapes from decorative card stock paper.
4. Hot glue the unicorn horn to the top of a metal hoop. Hold it in place until the glue has hardened. Do not worry if the glue shows, you will cover this up later.
5. Use the hot glue gun to attach the two ears to the top of the metal hoop, one on either side of the unicorn horn.
6. Attach some decorative flowers along the base of the unicorn horn and the ears to cover up and glue spots.
7. Cut various lengths of the different colors and widths of ribbons. Tie them in knots at the bottom of the metal hoop, allowing them to hang down on the bottom.
8. You can attach a loop of ribbon at the back of the top of the hoop behind the unicorn horn. This is if you would like to hang your unicorn ribbon ring.
Additionally – You can add feathers and crystal beads to the dream catchers too.
How To Make Webbing For a Dream Catcher
- Do you want to add the webbing to your dream catcher? I thought it would be easier to share a few different tutorials.
- I've included one to view at the bottom of this post.
- This video shows how to make a web for a dream catcher. But, you wrap the thin string around the outer edging, then cross over the hoop to create a free-form web, hot glued into place.
- Or hot glue a doily to the back of the ring. See an example here of a dream catcher with a doily.
- Dream Catcher Webbing String – Natural macrame cord, Waxed Nylon String, Waxed Nylon String, Nylon String Rattail Silk Cord
There are a couple more helpful tutorials below to create your easy-to-make dream catcher. Here are the rest of the step-by-step images to help you make your unicorn dream catcher.
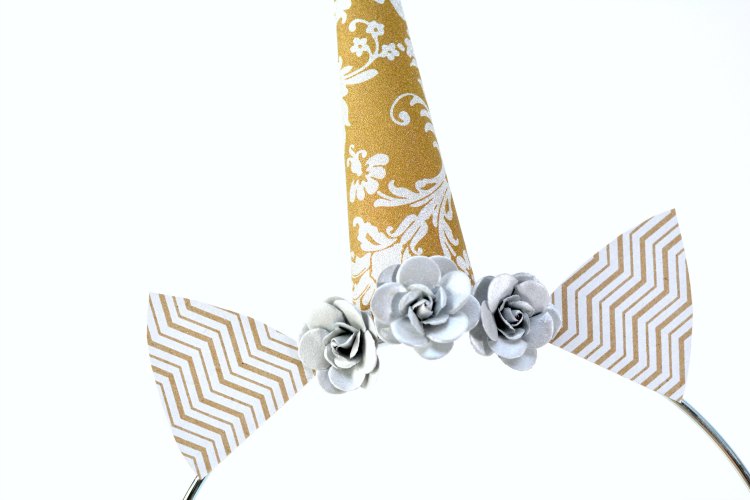
Image Step 6 – Adding the decorative flowers.
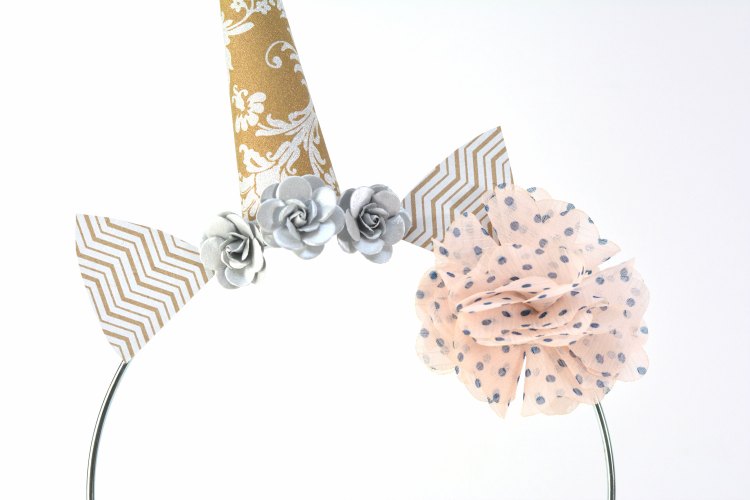
Add one or two larger decorative flowers too, and move on to step 7.
Lastly, cut and add the ribbons following the directions in steps 7 and 8.
Will you add webbing to your dream catcher? If you want to add webbing to your dream catcher follow the tutorials in step 9 above and here we've listed a few. Or use this Dream Catcher Webbing Tutorial (with beads optional)
- New here? Be sure to subscribe.
- Pin this craft for later
- See more spring craft ideas
- More Unicorn DIYS
- How To Make A Dream Catcher
Are you looking for more unicorn crafts and DIYs?