Spring No Sew Banner & Tutorial
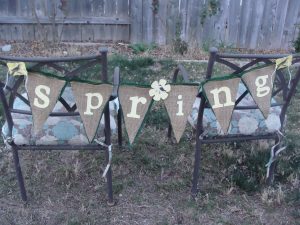
Dear Creatives, I was feeling a little creative & decided to create a spring banner. At first I was going to sew one & then I thought there are so many sewn ones how about creating a no-sew spring banner that anyone can do. So I hope you like it.
How To:
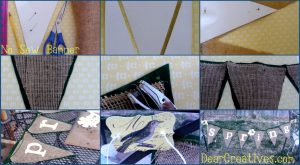
- You will need a ruler, pencil, straight pins, scissors, hole punch,card stock paper 1 sheet, thin burlap, felt, covered wire or string, cut out letters (or you can paint them on) spray adhesive, fabric glue (Yes, Tacky Glue…)
- The first thing to do is cut 6 triangles of the burlap
- Then cut 6 of the felt just slightly bigger.
- line up your banner pieces of felt & punch a hole in the corners where they will meet when you thread covered wire or string through
- I used spray adhesive to spray burlap & adhere to top of the felt (do this part outdoors or in a well vented garage area) wear a mask if indoors!
- Then I used a paste glue called Yes to glue down letters ( I cut them with a Cricket) you can use any cutter, scissors & hand cut or hand paint lettering {spring}
- Yes is super strong glue, other brands will do, make sure it adheres fabric & papers. Tacky glue…
- Slip the covered wired or string all the way through I allowed plenty of room for hanging end to end & then cut. Be careful not to stretch out holes in felt, patience is needed for this part
- On each end I took a gift tag & punched holes on each side & threaded string across the back knotting the fronts. I slid the covered wired through the back ( one on each side)
Hope I didn’t forget any steps! Here is what the finished Spring banner looks like. Link to banner template below! This was all made from materials I had laying around waiting for life in my stash from yard sales or left over projects. Don’t you just love it when you can make something for next to nothing though?
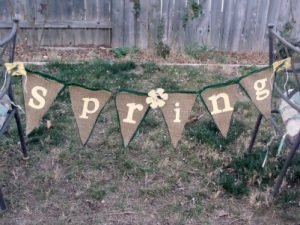
It was later in the afternoon just as the sun was getting low, the yard is still winter like with signs of spring. This is a super easy project & can be modified to suit your tastes with just simple changes of fabrics, words & colors.
Note: to make the triangle I just used 81/2″ x 11″ card stock found the center at the bottom & used a ruler to meet at each corner at top then cut it out. But I did include a photo graph that can be printed for a template. Also the lettering was about 3 1/2″ max to fit center looking large enough to see from far away.In the past I have used Stencils to cut out letters by hand.
What have you made for spring? What’s on your crafts project list?
Be sure & link up your creative projects or posts right here in the link-up!


Thanks for stopping by and linking up. I hope you’ll come by again next week.
Sandy
Cherished Handmade Treasures
Very Cute! TFS! From the Creative Corner Blog Hop.
Holly
http://hollysstampingaddiction.blogspot.com/
Hi Holly,thanks for popping in & returning the visit.
Hello,
I like your cute Spring banner. Thanks for explaining how you made it.
God Bless
Barb from Australia
Hi Barb, Glad you liked the banner, it is so easy to make one! I hope you get to try it!