Easy DIY Projects: 2 Quick And Easy DIY Jewelry Necklaces
I love creating diy jewelry. Today’s projects are how to make a Fringe Leather Necklace and an easy DIY Pendant Necklace.When it comes to jewelry making I still consider myself a novice but, with that said it’s never stopped me from trying to get a new skill under my belt or hone a craft I love. There is something sweet about hand crafting a jewelry piece and creating a piece go give to someone or even keep for yourself. Today I’m sharing two easy DIY projects that involves jewelry. By the end of this post you’ll be able to create, craft your own easy DIY projects of either of these necklaces.
Not what you are looking for? See all tutorials for diy jewelry.
I have a feeling this won’t be my last jewelry post either. I’m kind of in love with it and have another in the works. Jewelry making is always a craft I have wanted to try getting into. What stopped me? Not seeing any classes available near me or signing up for an online class, thinking I couldn’t do it without taking a class and not having the supplies for this type of diy project. After a little research I debunked my deterrents and went for it!
Fringe Necklace
I even thought you needed a bunch of tools to get the pieces made. Well, maybe you do if you are really getting into it but, for these projects I’ll show you that it doesn’t take much to create your own DIY jewelry necklace. I used a miniature needle nose pliers, side cutters, good scissors and a ruler. That’s it! Later in the post I’ll share the exact tools and supplies needed for making these necklaces. These two projects are very easy DIY necklaces.
DIY Fringe Leather Necklace
Tools needed for these easy jewelry crafts
Each of these easy DIY projects uses some or all of these tools, with the exception of the Quick and Easy Nylon Stone Necklace.
How to make a fringe jewelry necklace
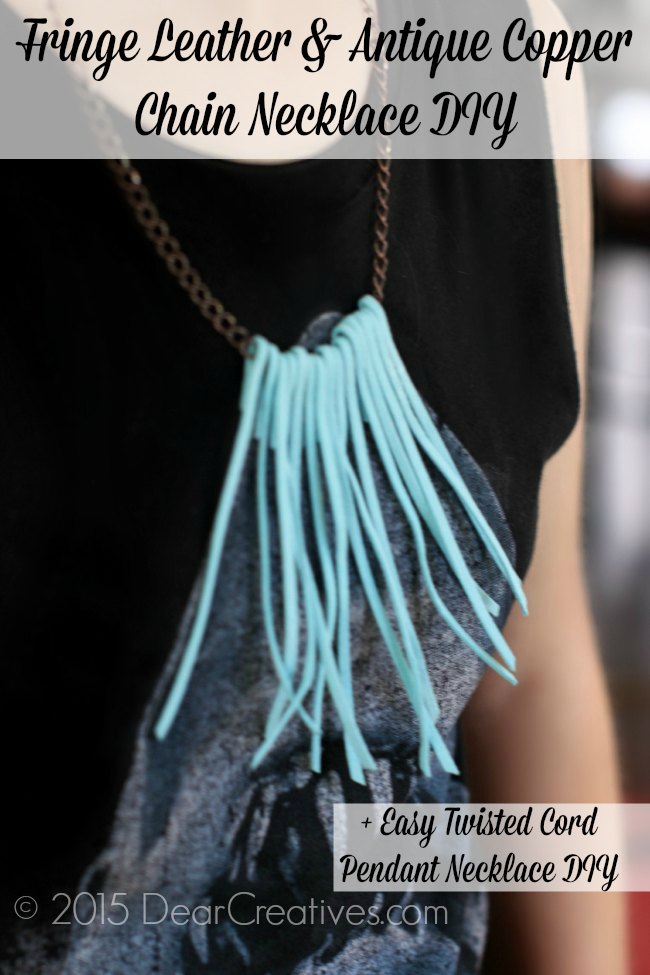
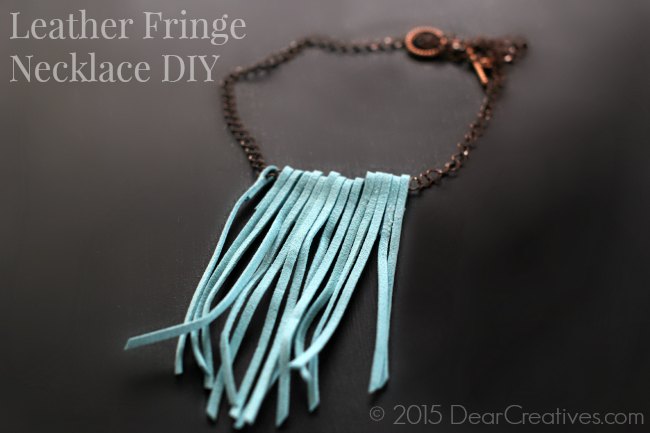
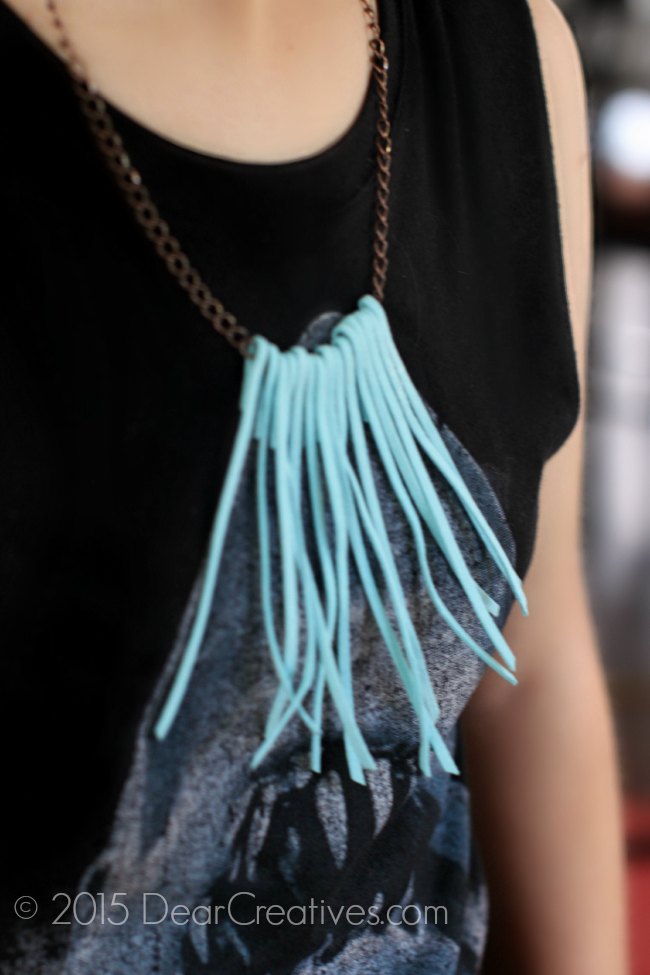
Sammie and I had been seeing so many fringe necklaces lately that I knew that I wanted to try making something similar. To create this suede fringe necklace you use thin suede cording. Cut it into 15- 20 pieces of the same length. Cut antique copper flat curb chain to your desired length (mine was 20″) Have on hand a copper twisted toggle and copper jump rings for making your clasp, scissors, ruler and needle nose pliers, E6000 glue, paper towels, wood chop stick or Popsicle stick then follow these steps.
Make a Fringe Necklace
- Cut antique copper chain to desired length (20″)
- Attach the clasp and jump rings first to the antique copper flat curb chain at each end with your needle nose pliers
- Cut suede fringe into 6-6.5 inch lengths (15-20)
- Next take out your E 6000 glue
, wood stick for smearing onto one side of suede (Work on a covered surface. I used tin foil)
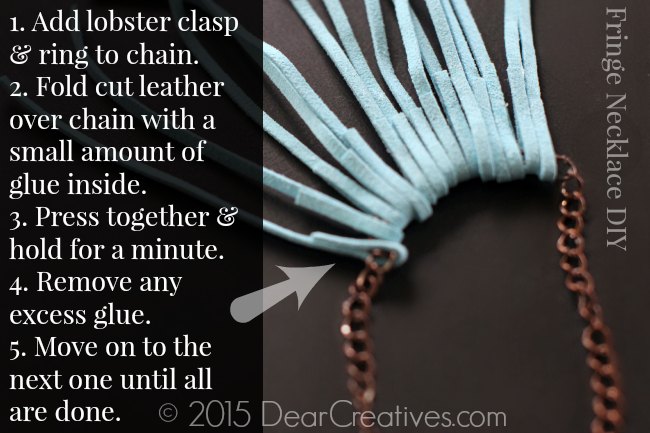
- Loop a piece of suede over the center of the chain adding glue to the back side and adhering glued piece to the back of the looped over suede
- Attach each piece with the same step above adding to each side equally with looped over suede, cleaning up edges as needed with a paper towel as you go along
- Tip do not over glue
- When all the suede pieces are glued and laid over the necklace chain lay the suede necklace and chain on a clean piece of foil or wax paper and allow glue to fully dry!
- Later I lined up the suede, starting from the center cutting in a diagonal using a ruler to eyeball line from each side (in-vision a large V but, less pronounced.)
- After I laid the suede down and put a book on it to straighten the curl
- At this point your done or you can paint the tips!
Jewelry supplies needed for suede diy fringe necklace
- Suede Cord Turquoise 3 mm Wide
1.5 mm thick /30 ft SUE100
- Antique Copper Flat Curb Chain 5 X 6 .3 mm
CPPL7 (I ordered 4 units to make more than one)
- Copper Toggle Twisted 16 mm
CP4004019
- Copper Jump Rings 5mm
50 piece CP22GOJR05 (a small bag is under $2)
Jewelry Crafts
Pendant Necklace DIY
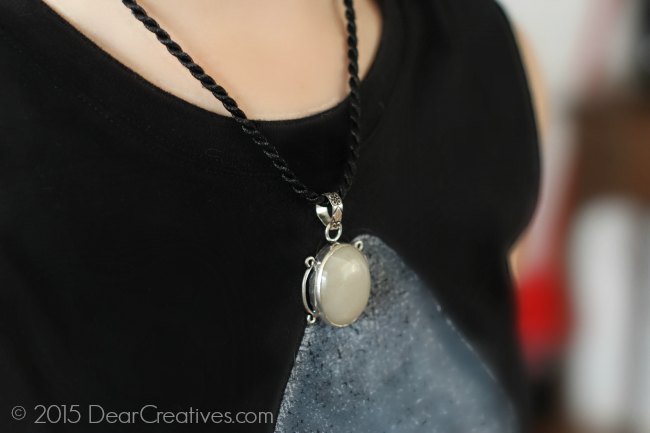
This project happens to be the quickest and easiest of the two. A perfect to do a project with a child or teen (or even yourself) grabbing a pack of twisted nylon cord and a pendant with a ring is going to be your easiest jewelry DIY project ever! The nylon cords I used are finished on the ends and have a loop for attaching behind your neck. You just slide the nylon cord through the pendant’s ring and that’s it!
This would be a perfect project for anyone, not to mention it looks pretty when done. TADA! Let’s just say with a pack of ten cords and a bunch of pendants you’ll have a lot of handmade gifts wrapped up easily. Bridal shower favors, birthdays, holidays like Mother’s Day…. you get the idea.
Jewelry Supplies need for the gem stone on the nylon twisted cord diy;
- Multi- 10 pack of twisted nylon cord
necklaces NYLNTWMUL3 (18 in. long each)
- Base Metal Pendant with your choice of stones BASMPEND06 (includes ring for lacing)
For today’s easy DIY project supplies list I’ve included the sku numbers in case you’d like to make the exact items. I hope this makes it easier for you!
- New here? Don’t forget to subscribe
- Pin it for Later
- Follow us on Pinterest
- DIY Jewelry – Jewelry Crafts Pinterest
Today’s jewelry post was brought to you by House of Gems. These are my 100% honest opinions, text, images and tutorials being shared by me. We hope you’ll pop by to visit them and check out their supplies. You’ll enjoy making these DIY jewelry necklaces or something else for yourself or to give someone. Here’s a bit more information about House of Gems.
House of Gems
- House of Gems is an online supplier of bead and jewelry making supplies retail / wholesale.
- There is a community with video tutorials
- They have a library of tutorials and more
- They offer a frequent buyer discount of 20%
- They have international shipping
Have you ever hand crafted or made jewelry before? What have you made? What would you try to make?

I really love making jewellery! your necklaces turned out really cute!
Hi Ntina, Thanks for stopping by & the compliment. I hope you share your jewelry at the party sometime her on DC.
What a cute necklace! I love the blue color you chose, very nice!
Hi Lauren, Thanks we picked two colors the teal and a burgundy suede. I haven’t made the burgundy yet but, when I do I’ll share.
What fun necklaces! I like quick and easy projects that are cute so thank you for sharing!
Hi Julie, Thanks for dropping by! Hope you get to make something sometime soon.
Okay, now this is really cute! I may even try to do this since it looks so easy.
Thanks Stacie! Hope you do get a chance to make some pretty jewelry! Have a diy party with your daughter & be sure to share what you make with me or linkup at the party so I can see!
The necklace is super cute – I like it!
Ah, Thanks Winnie & glad you stopped by. See you again soon.
I used to make jewelry all the time with my mom. I love the fringe necklace!
Thanks Stacia! I appreciate the compliment & the visit.
I love the leather fringe idea. I have lots of leather cord and I never thought to glue it before!
Hi Amy, I thought that would be the easiest solution to creating it. It worked really well. I loved the projects I saw when I visited your blog btw.
Love how your fringe necklace turned out! I don’t know why I haven’t tried making my own jewelry yet; jewelry is one of my favorite accessories! Thanks for linking up at Creative Spark; hope you’ll come party with us again today 🙂
Thanks Emily! Thanks for hosting and stopping by. I hope to get caught up so I can party again soon.