DIY Cricut Christmas Ornament: Joy to the World Project
Get the guide for one of our latest: Easy Cricut Christmas Projects! Are you looking for an easy, customized project to add sparkle to your holiday season? This DIY Cricut Christmas Ornament is the perfect answer!
Today, I'm sharing one of the most fun and Easy Cricut Christmas Projects you can tackle: creating a beautiful wood ornament. This project is ideal whether you're decorating your own Christmas tree or creating handmade gifts to give to friends and family. Are you looking for more creative ways to use your machine? Check out my latest Cricut Craft Ideas and more projects like these DIY iron-on zipper pouches!
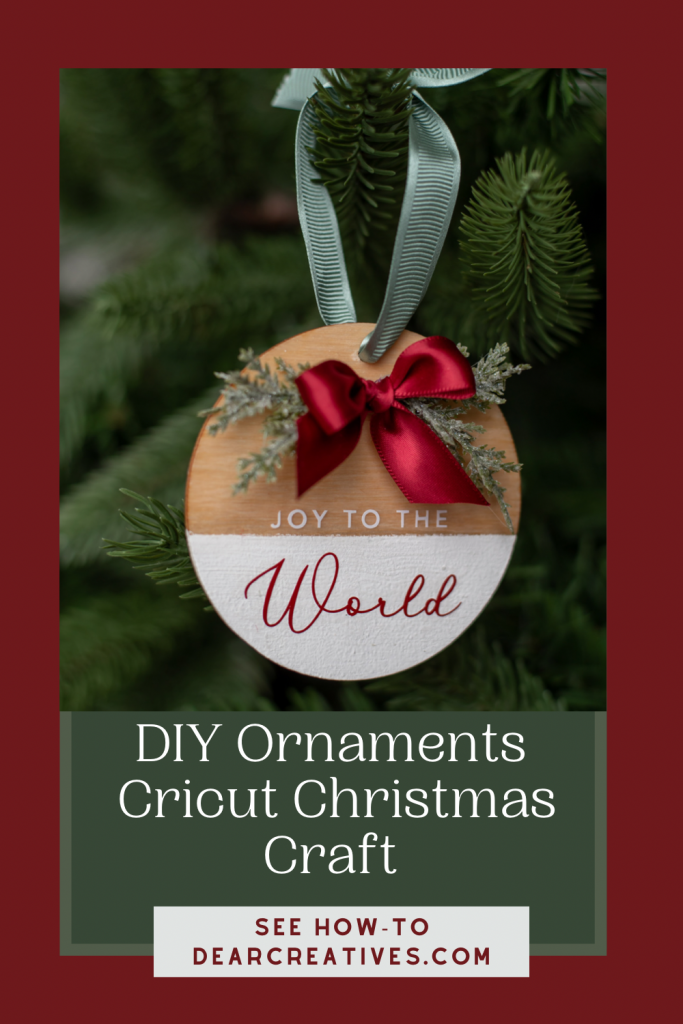
We used the “Joy to the World” saying, which is cut perfectly using the Cricut digital cutting machine, and finished the wood slice with a touch of white paint and festive ribbon. It’s truly a stylish, custom piece! Best of all, this post includes the exact font name we used, making it incredibly easy to customize your own holiday sayings.
See how simple it is to make this stylish ornament with your Cricut. Let's grab our craft supplies and get started on this perfect Christmas gift idea!
Are you looking for something else to make? Are you new to Cricut Crafts or considering getting one? Check out our hub for Cricut Crafts here.

Customizing Your Cricut Ornament: Fonts and Sayings
This Christmas ornament says Joy To The World, but the design is completely customizable! The holiday sayings are easily created in Cricut Design Space, cut from vinyl, and applied to the wood round. This flexibility means you can use any word or short Christmas saying you want to personalize your gifts. Below, you will find the specific font name we used and the complete instructions on how to make these gorgeous Christmas ornaments with wood rounds.
Cricut Christmas Ornament – Joy To The World

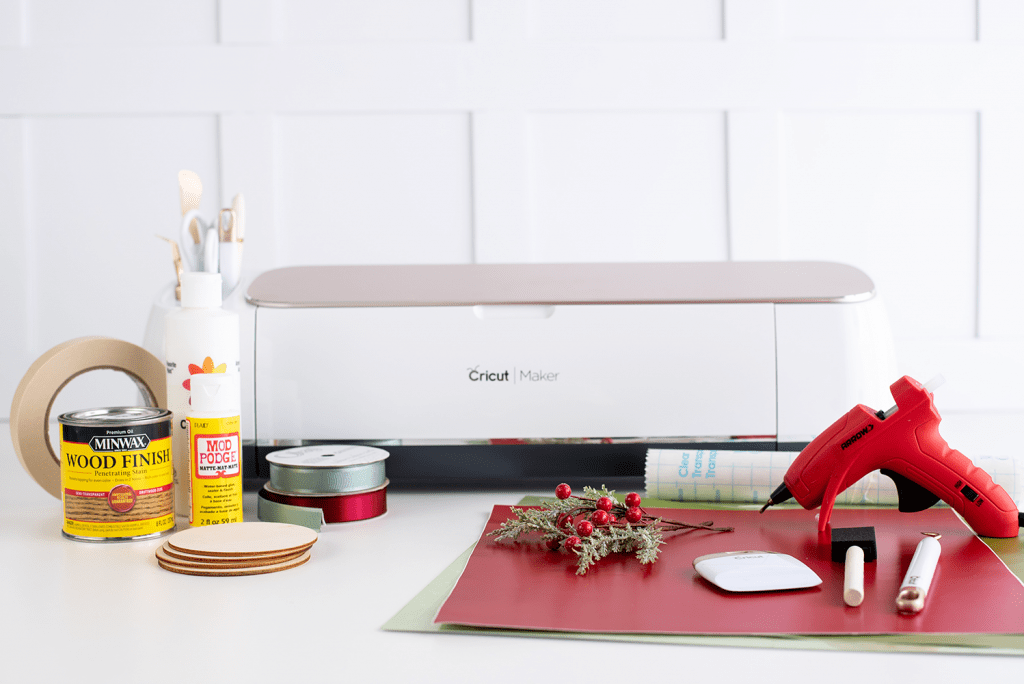
Supplies Checklist for your Cricut Ornament
Cricut Equipment and Vinyl
- Cricut Machine
- A standard grip Cricut mat
- Permanent vinyl (color of your choice)
- Transfer tape
- Scraper tool and Weeding tool from your Cricut Tool Set
Paints, Stains, and Finishing Projects
- Acrylic Paint (color of your choice)
- A Paintbrush (for paint) or a Foam Brushes (for sealer and Mod Podge)
- Painters tape or masking tape
- Mod Podge (for sealing the surface where you apply the cutout vinyl)
- Stain (Skip this step if your wood round is pre-stained.) Another option is (Gel Stains)
- Pre-cut wood rounds
Ornament Assembly and Embellishments
- Ribbon color of your choice (5/8” size)
- The Greenery (small floral greenery or picks of your choice)
- Hot glue gun
How to make this “Joy To The World” Christmas Ornament with a Cricut
Step-by-Step Instructions: Making the Wood Ornament
Step 1
Staining and painting the wood round
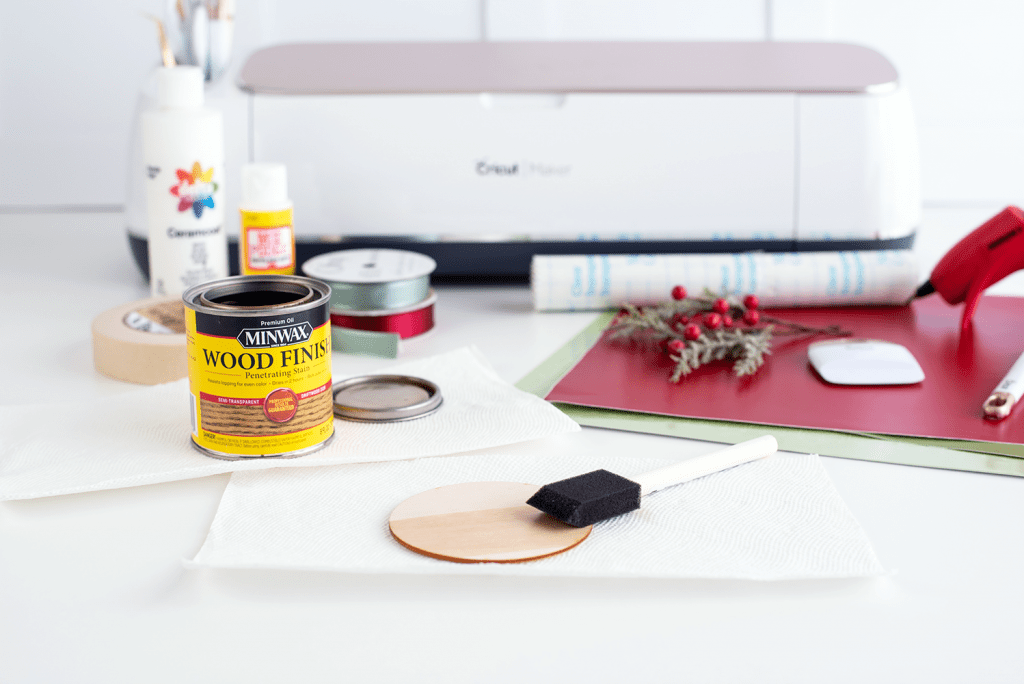
- If you need to stain your wood round, begin to apply stain to the wood round. If painting, it is best to use matte paint. However, this may require 2-3 coats.
- If staining, be sure to stain in a well-ventilated area.
- Allow 24-48 hours for stain and paint to completely dry and soak into the wood.
- Use masking tape or painter's tape to create a crisp line for a two-toned painted look.
Step 2
Adding the Mod Podge before the vinyl is applied
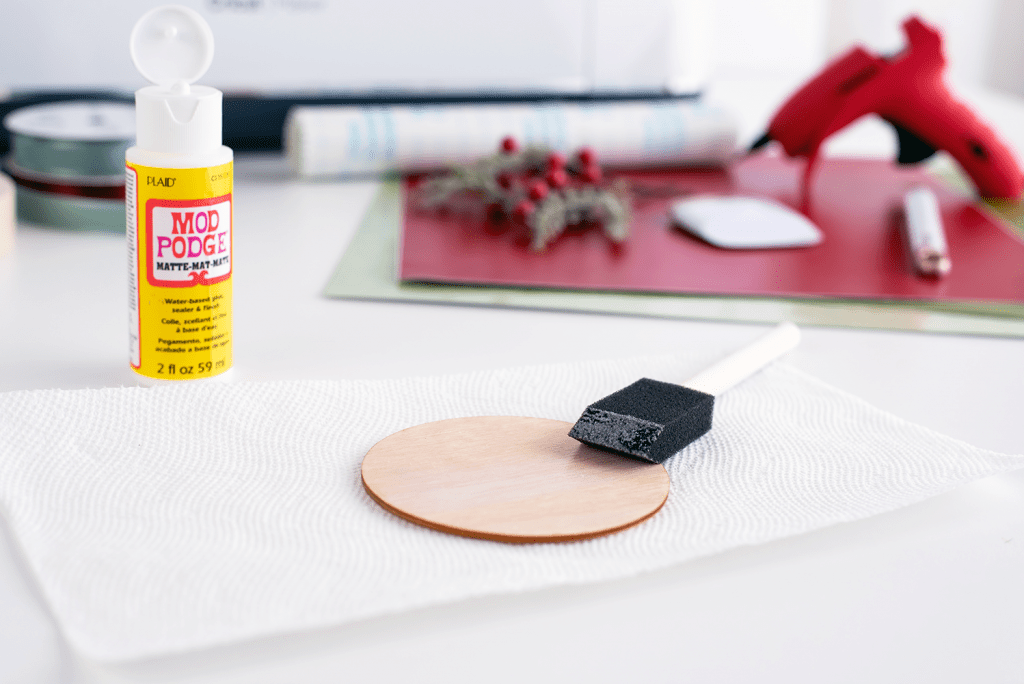
- Once the stain and paint are dry, add a layer of Mod Podge as a sealant to the front of the round where the vinyl will later be applied.
- If there is no barrier between the stain and the vinyl, the oils in the stain will break down the adhesive on the vinyl.
Step 3
Making the design in Design Space
- In Design Space, prepare your design or phrase by using the text tool. Size according to the wood round used.
- I used the fonts Avenir and Montens. If you don’t have this font, you can use any sans serif and script font.
- **NOTE: If using a script font in design space, don’t forget to kern your letters (kern = connecting the letter to cut as one piece).
Step 4
Loading and cutting the vinyl with Cricut
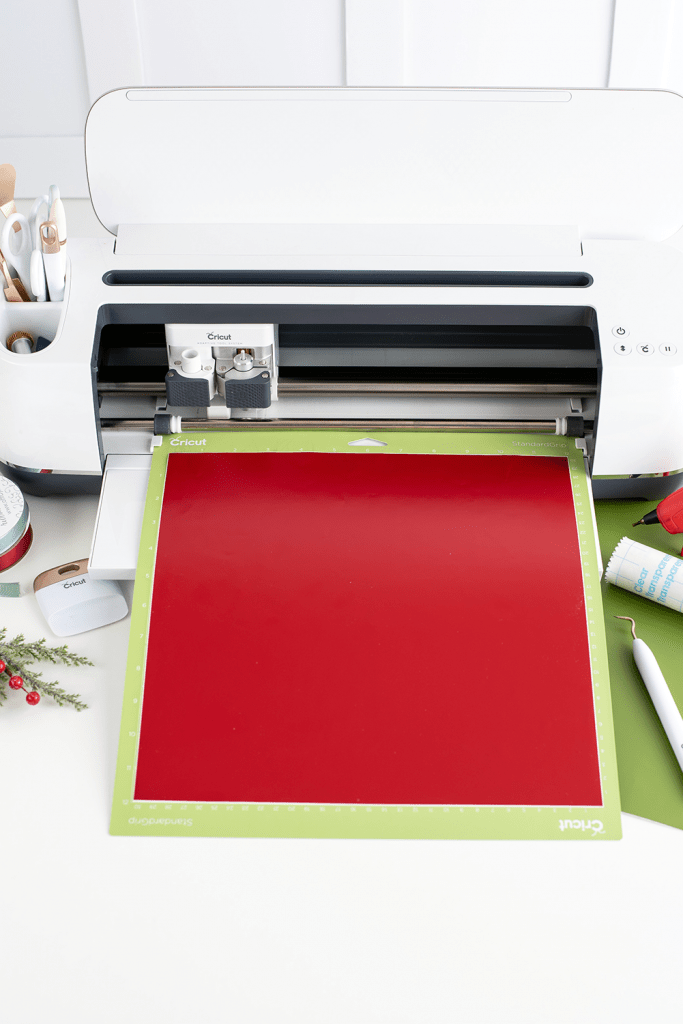
- Once designed and sized accordingly, select “make it” in the design space.
- Adjust the machine setting or material dial to a custom washi sheet.
- Fonts that have small, delicate cuts in the letters will use this setting to help them cut smoothly.
- Load the permanent vinyl to your machine on the standard grip mat and hit “go”.
Step 5
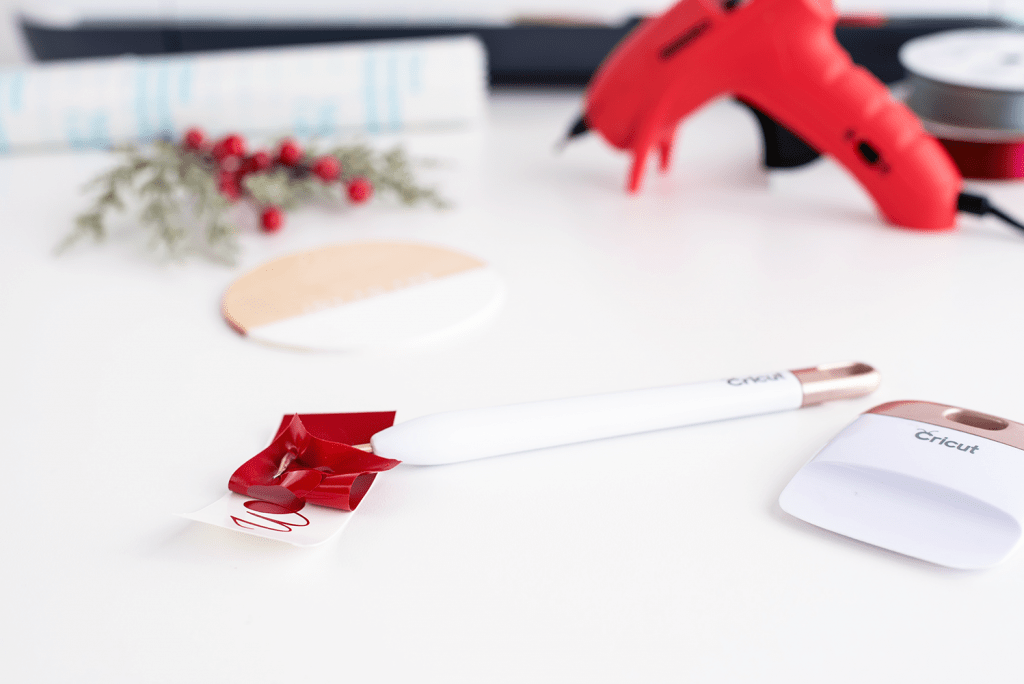
Weeding around the letters
When the cuts are complete, begin to weed around and inside the letters of the vinyl by using your weeding tool (looks like a dentist's pick).
Step 6
Applying the transfer tape and getting the design onto the project's surface
- After the designs are completely weeded, cut off a piece of transfer tape the size of the vinyl and apply the transfer tape using pressure with the scrapper tool.
- Note: This is done in order to get the vinyl off its carrier sheet and onto the project's surface.
Step 7
Pulling the vinyl off the carrier sheet away from the transfer tape

Turn the entire design face down and begin to gently apply pressure and pull the vinyl’s carrier sheet off and away from the transfer tape.
Step 8
Placing the vinyl with the transfer tape on top of the wood round
Place the weeded vinyl with the transfer tape on top of the dried wood round.
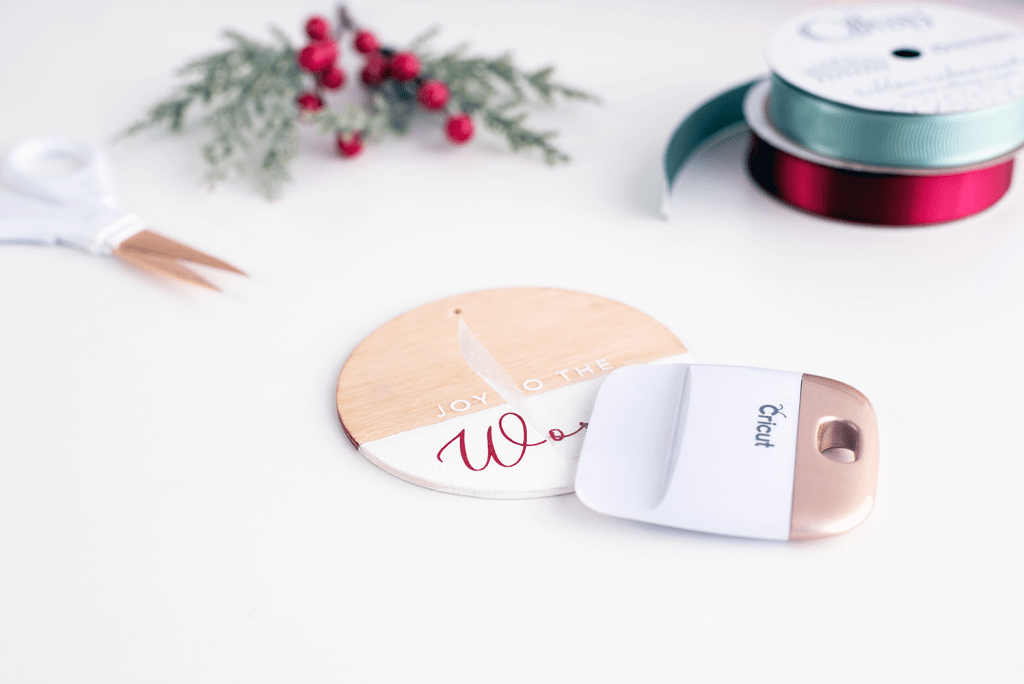
Step 9
Applying pressure, removing transfer tape, and leaving the vinyl on the project
- Once enough pressure has been applied, slowly remove the transfer tape and, very carefully and slowly, roll it away and off the round.
- The vinyl will remain on your project.

Step 10
How to attach the greenery (or other embellishments) to the ornament with a hot glue gun and add a ribbon loop for the ornament.
- Lastly, using hot glue, attach the greenery to the wood and top with a small bow.
- Thread the ribbon through the top to create a hanging attachment.
- *NOTE: If the wood round does not have a pre-made hole, create one using a small drill bit. Or hot glue a loop to the back of the ornament.
Now, the “Joy To The World” Christmas Ornament is ready to hang! Or give as a homemade gift!
- Now your ornament is ready to hang on the tree, from a garland or mantle. Or give it as a homemade Christmas gift to someone special.
- If you didn’t make it yet, pin it for later!
What types of easy Cricut Christmas projects will you make? Happy Crafting and Happy Holidays!
- New here? Be sure to Subscribe.
- Pin it for Later
- Follow us on Pinterest
- Shop our favorites on Amazon
More Cricut Crafts, Easy Cricut Christmas Projects, and Christmas Crafts To Make For the Christmas Season!
- Cricut Makers can also be found on Amazon.
- Christmas Craft Ideas
- Craft Ideas
- DIY Aprons With Cricut and Personalize Aprons
- How To Print And Cut Stickers On a Cricut
- Are you organizing your home? Try this Cricut Craft and make DIY Pantry Labels
- How To Make Vinyl Bottle Labels (For spray bottles or other glass or plastic bottles)
- Free Projects In Design Space
- How To Make A Bunny Banner With A Cricut
- Fall Pumpkin Banner
- Burlap Utensil Holders and Name Tags DIY With Cricut + SVG FILES