This post contains links to affiliate websites, such as Amazon, and other affiliates. We receive an affiliate commission for any qualifying purchases made by you using these links. This is at no additional cost to you. We appreciate your support!
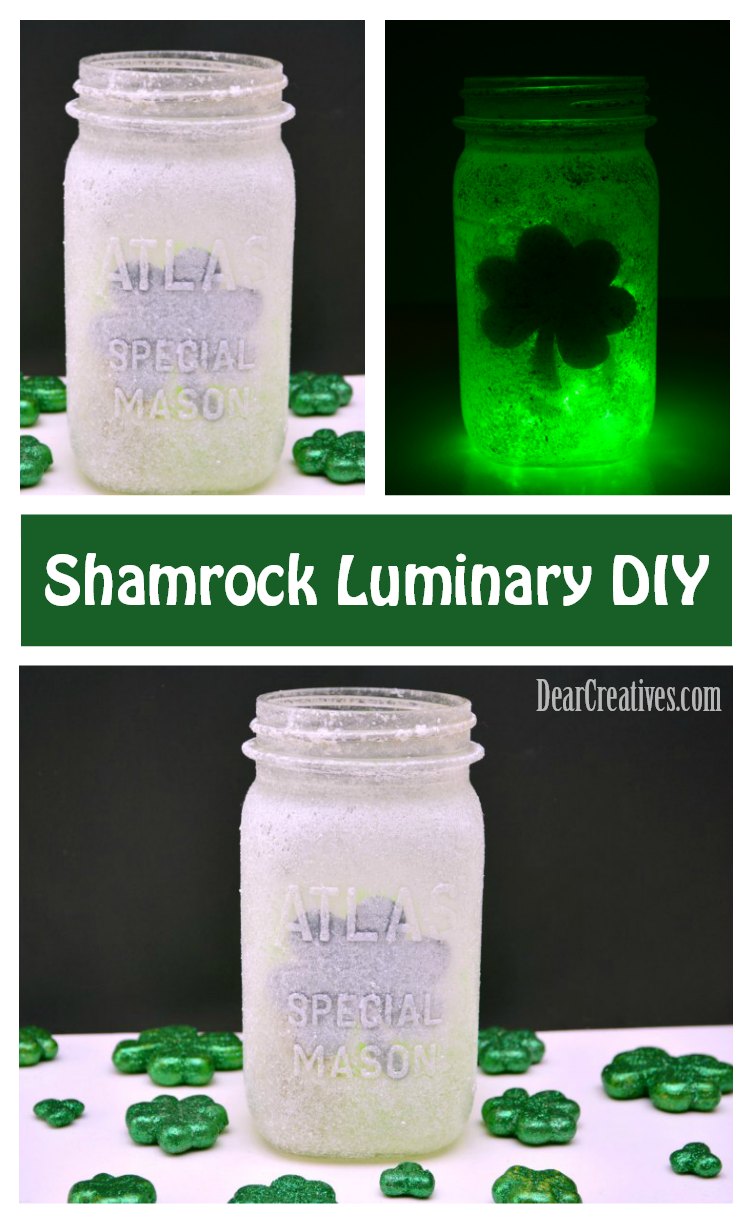
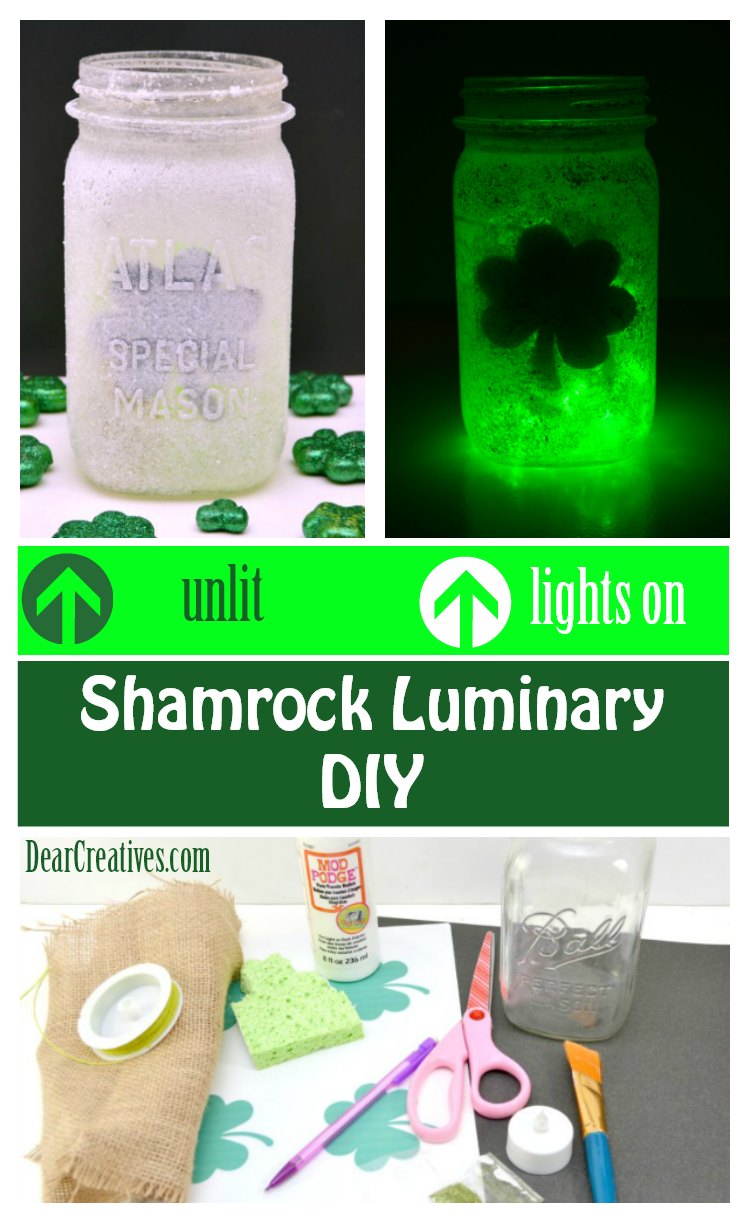
Today I’m sharing a Frosted Luminary DIY project that is perfect for adding a lucky, cozy glow to your space. Honestly, I love how a simple mason jar can completely change the vibe of a room! This project is one of my favorite DIY home decor ideas because it uses a shamrock design and fairy lights to look high-end while staying incredibly budget-friendly. It’s the perfect way to spend a creative afternoon indoors when you want to refresh your style for St. Patrick's Day.
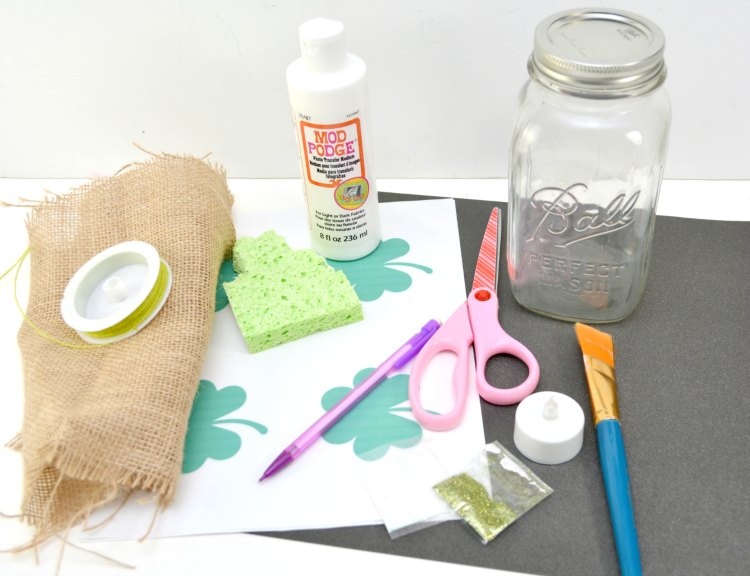
This project is a great way to update your space; it’s an easy craft idea that takes very little time to complete. You don’t need many supplies for this frosted glass tutorial—just some mason jars, a shamrock stencil, frosting spray, and fairy lights for that magical glow. I personally love how these look on a mantle or as a seasonal centerpiece! If you love organizing and decorating with jars, be sure to check out my Cricut Jar Ideas too!
If this isn't the craft for St. Patty's Day you want to make, go here to see all our St. Patrick's Day Crafts
Easy Frosted Luminary DIY for St. Patrick's Day
And if you are looking for other crafts to make, here's where to find our spring craft ideas.
Frosted St. Patrick's Day Luminary DIY
This one of our many mason jar crafts. Let's get started on today's craft idea.
Find links to get the free clover templates below!
Step-by-Step: How to Frost Mason Jars with a Shamrock Design
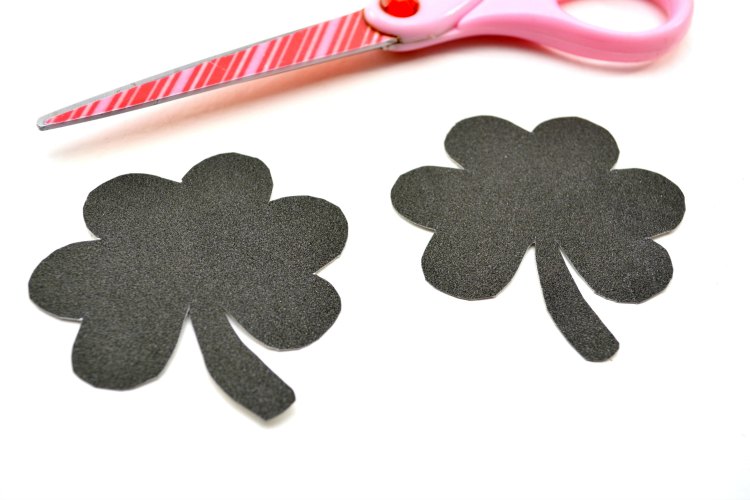
Begin by cutting the shamrock shape freehand or grab the free printable Shamrock Template. This is slightly different than the freehand one. You can use this one or search here for other 3 and 4-leaf free – clover templates.
Trace the template onto a piece of black glitter card stock and cut it out. You can use just one shamrock, or cut out two, one for each side of the jar.
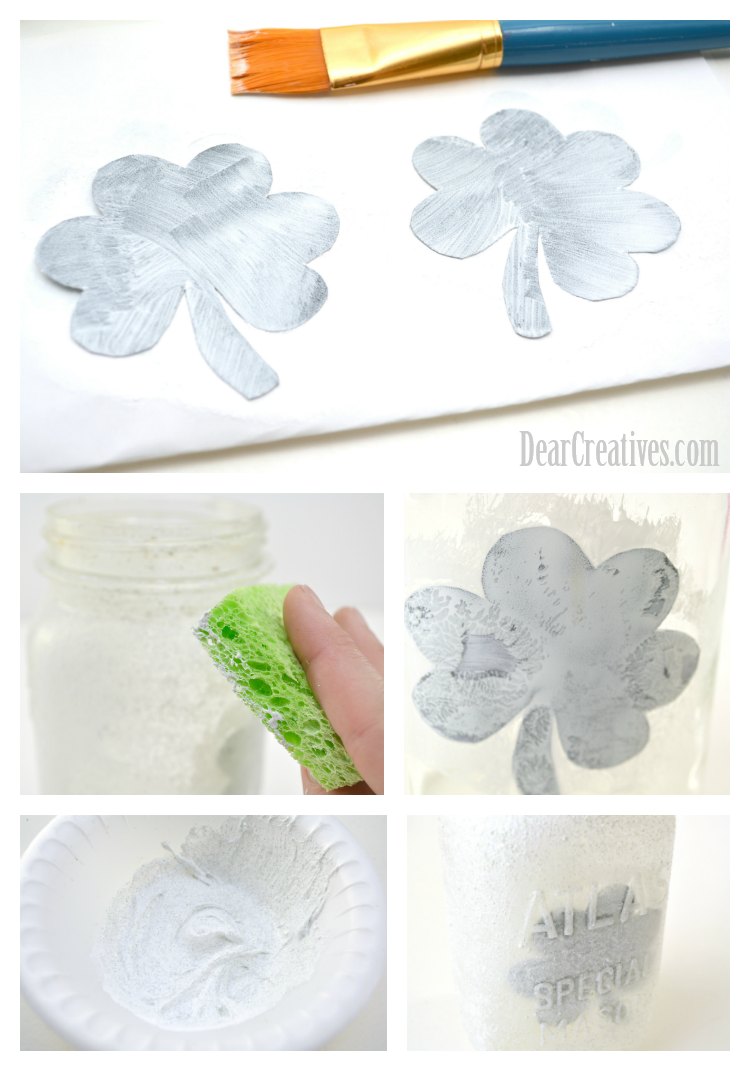
Paint mod podge all over the front of your black cardstock shamrock shapes.
Place the cardstock shamrock with the Mod Podge on it into the inside wall of the jar with the Mod Podge side against the jar. Paint some additional Mod Podge onto the back of the shamrock shape while it is attached to the wall inside the jar.
Pour some mod podge into a bowl or other container, and mix in some iridescent glitter as well as some green glitter. We used lime green colored glitter to keep things light and frosty.
Dab a small sponge into the glitter mixture and dab off the excess on the side of the bowl. Gently tap the glitter mix onto the jar with the sponge, tapping it along the entire surface. You can do two layers of the glitter mixture on the outside of the jar to create a truly frosty appearance.
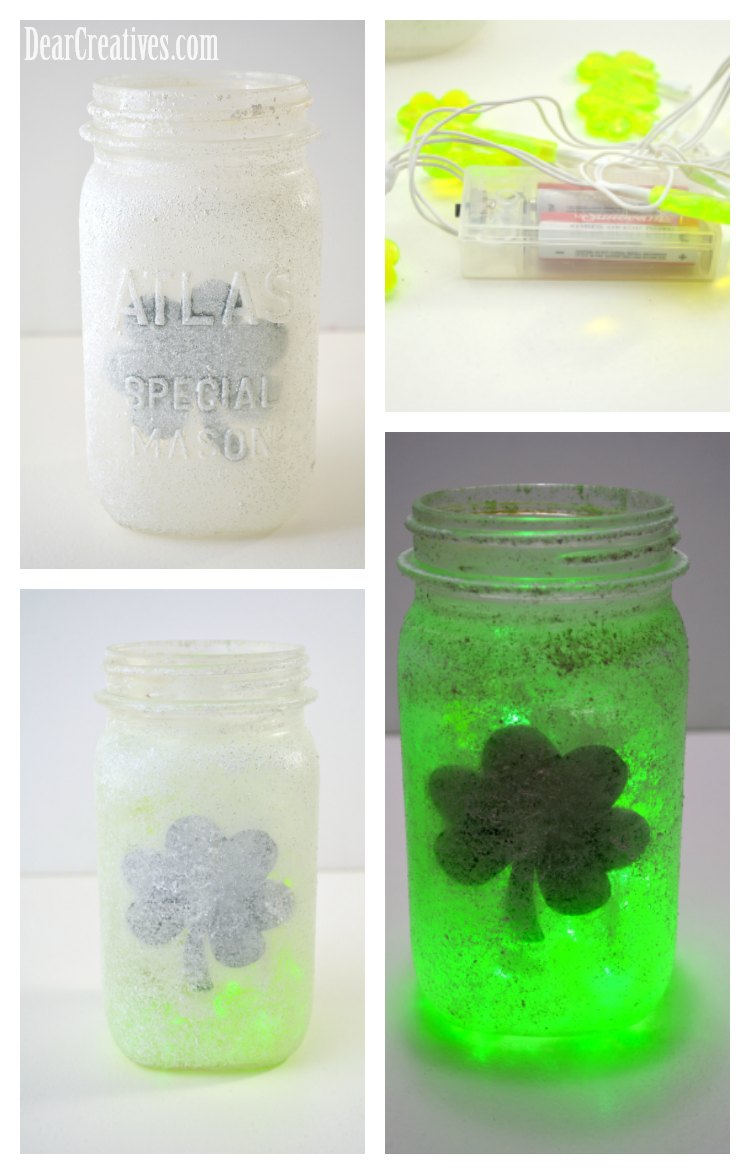
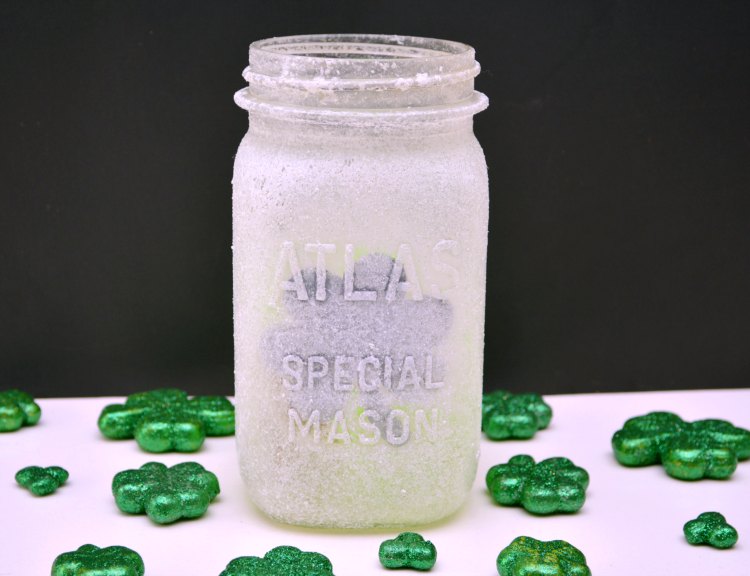
Let the jar dry completely.
Place a battery-operated tealight candle, fairy lights, or a battery-operated green shamrock mini light set like the one shown in our photo. These small Shamrock light sets can be found at the Dollar Tree and Amazon.
These images show how it looks, not lit and lighted with the fairy lights.
Styling Your DIY Luminaries with Fairy Lights
Table Centerpiece: Place a trio of these jars along a green or neutral table runner to create a stunning St. Patrick’s Day centerpiece.
Musical Charm: Set a luminary on a piano top next to some sheet music to add a soft, magical glow to your practice space.
Curio & Shelves: Tucked into a curio cabinet or nestled between books on a bookshelf, these jars add unexpected light to dark corners.
Entryway Greeting: Style them on an entry console table to give guests a warm, lucky welcome as they enter your home.
Mantel Display: Mix the luminaries with some gold coins and greenery on your fireplace mantel for a festive, layered look.
Dresser Top: Set it there and scatter faux 4 leaf clovers around.
and green