This post contains links to affiliate websites, such as Amazon, and other affiliates. We receive an affiliate commission for any qualifying purchases made by you using these links. This is at no additional cost to you. We appreciate your support!
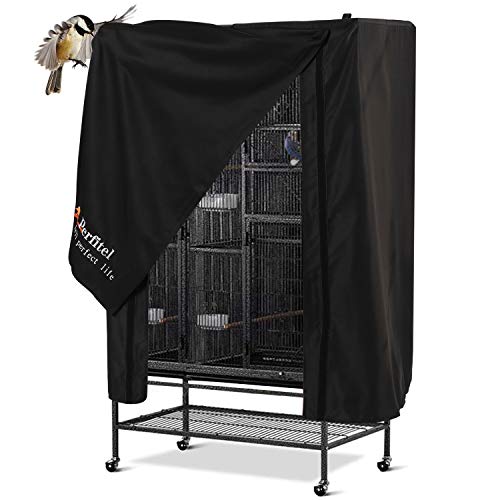
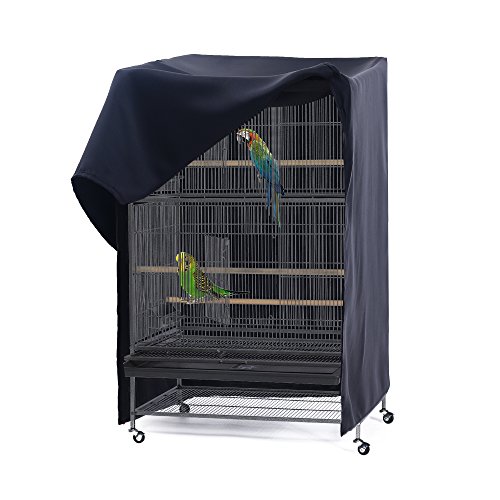
If you’ve ever wanted to make a DIY bird cage cover, this sewing project will show you how. This project was originally created as part of a fabric challenge sponsored by Joann Fabrics. While that contest has ended, the sewing tutorial and bird cage cover pattern are still helpful if you’d like to make your own custom cover.
I created my own custom pattern to fit my bird cage and combined fabrics when I ran short — proving you don’t need perfect yardage to create something beautiful and functional. In this post, I’ll share how I measured, cut, and sewed the cover step by step so you can make one too.
Are you looking for something else to sew? See all our sewing projects to pick from.
Why Use a Bird Cage Cover?
Bird cage covers are an important part of keeping birds healthy. They ensure the birds get 8-12 hours of uninterrupted sleep. Bird cage covers block light and help reduce noise. They also help prevent drafts and keep a warm, comfortable temperature for birds. Which is very good for the winter months. Best of all, they create a calm environment and protect the cage at night.
DIY Bird Cage Covers
It was time to update my large birdcage cover for my large bird cage and also make one for my parakeet bird cage, too. I thought, why not make it myself? And share how I made it to help you make your own. I didn't use a pattern, but I have linked to several at the end of the post. But I share how you can make your own pattern using paper bags or drawing paper that comes on a roll.
Pick light, airy cotton fabric.The fabric needs to be breathable. If you run short on your fabric, pick something breathable and, if possible, coordinating. Consider the fabric changes to be part of the design as I did.
How I Measured and Created My Pattern
First, measure the bird cage from bottom to top (typically, the front and back of the cage will be the same size.
Then, tape together the bags to create the size you need.
Hold this up to the cage. Using a pencil, make lines tracing the cage shape.
Cut the shape, giving it 1/2 inchto 1 inch extra to allow for seam allowances.
You will do the same for the top of the cage, measure the width front to back and side to side.
Decide if you want an opening or not. If yes, add a seam where it will be and allow for seam allowances on both sides. You will also have to sew on ties or add a closure of some type.
Since my bird cage had a rounded shape, I made the pattern all in one piece over the tops and sides to meet with the front and back (when sewing). You just need to make your pattern according to your page shape and allow for seam allowances.
I made the DIY bird cage cover to slip over the top. I didn't want to fuss with extra seams or adding strings. But you can easily add these to yours by planning it out and allowing for seams on either side of the opening, too
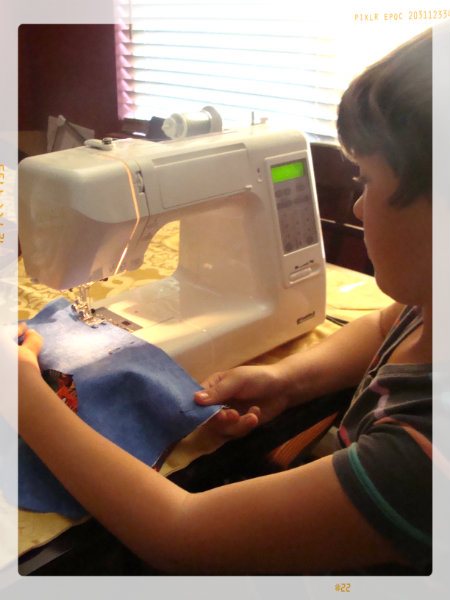
DIY Birdcage Cover Sewing Tutorial
Instructions
How to make a bird cage cover
Making the Pattern
Detailed instructions above.
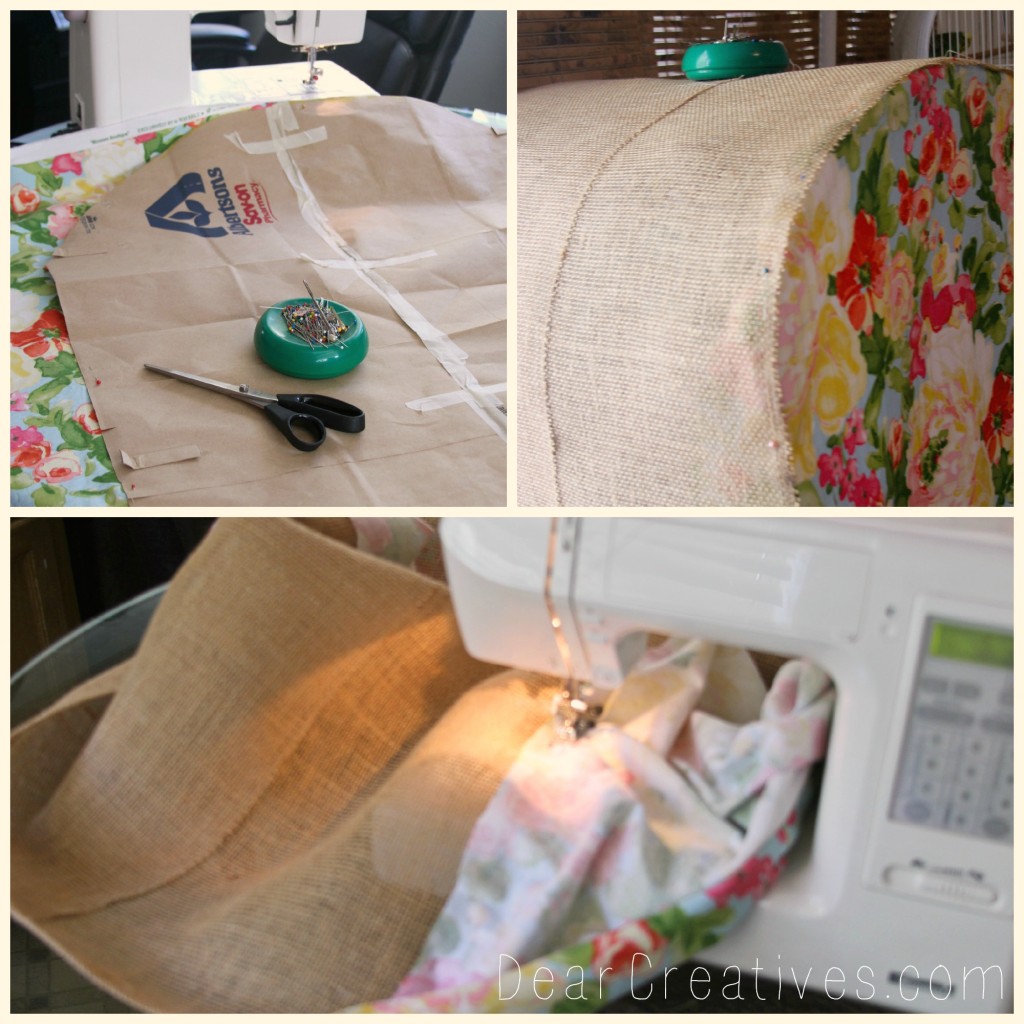
I used grocery bags to make the pattern, taping together as needed. Lay your bags or pattern paper against the cages, and trace the lines to make, then cut your pattern.
Make each side a panel (for this cage, I made one panel, one strip over the top side to side), 3 pieces total.
Cutting the Bird Cage Cover Pieces
Next, allow for seam allowances and seam lines, cutting it out with at least 5/8 inch to 1 inch extra when cutting your fabric out.
Cut out your fabric.
Pin in place together before sewing, to ensure your fit. Make any adjustments needed.
To do this: Place over the cage, and make adjustments to the fabric by repinning as needed.
Sewing the Bird Cage Cover Together
Remove pin placement (pins) as you sew.
Sew the sides one by one (front and back) to the burlap strip (measured from one edge of the cage to the other).
Trim seams.
Turn inside out.
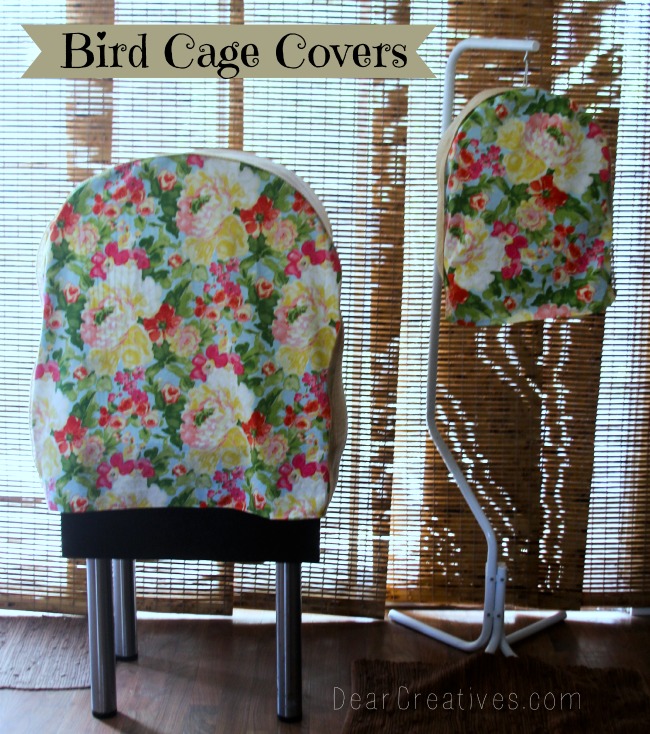
Your bird cage cover is ready to use!
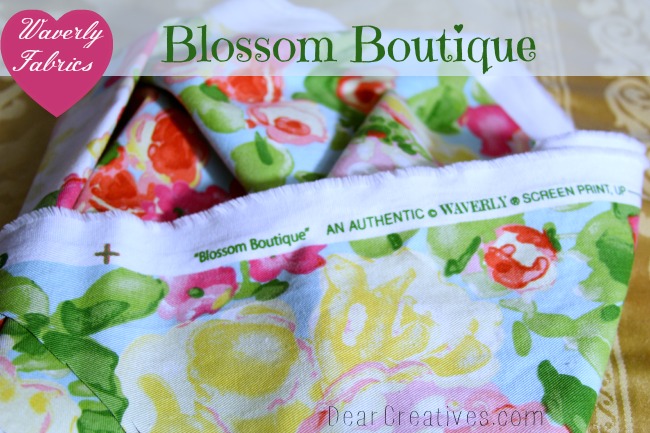
I decided on using some light, airy, burlap fabric I already had in my fabric stash, along with the Waverly fabric, to let light and air in for the birds. I pinned everything in place and sewed away.
Disclosure: I did receive Waverly Fabric to create with for the #Waverize it project at the time of the original posting. We hope this tutorial helps you to create your own DIY bird cage covers.
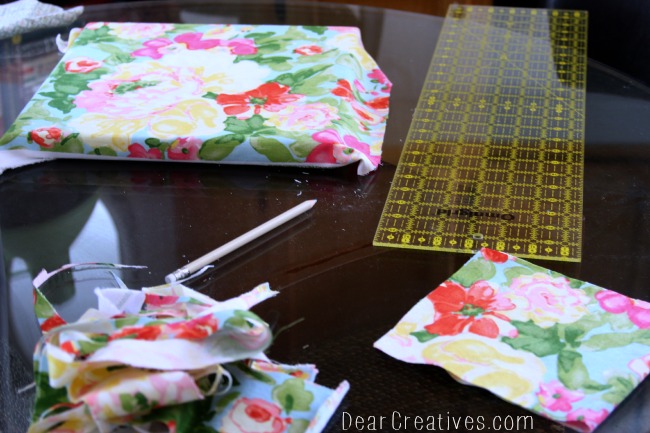
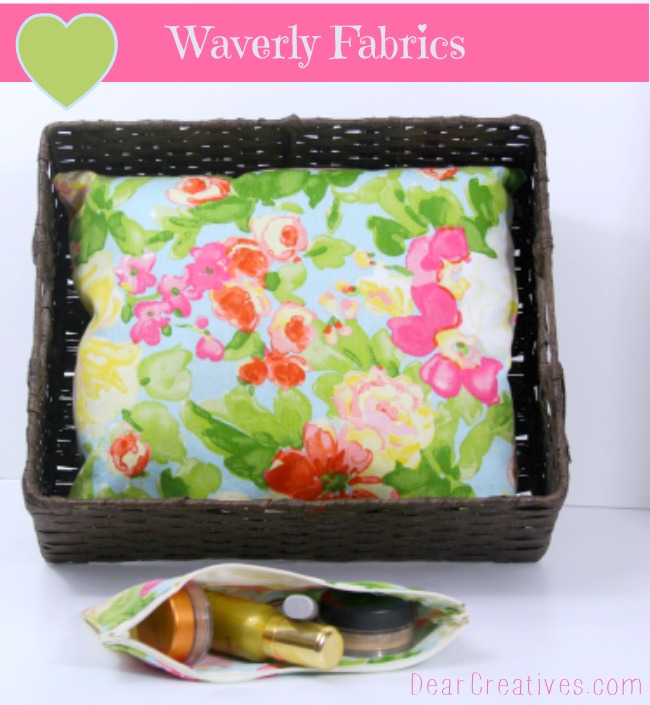
Then I had leftover fabric, so I wrapped an 8 x 10 canvas, made a zipper pouch, and a cat pillow bed. I used every last piece of that lovely Waverly Fabric.
Of course, I am going to share what I made, but first, I want you to know that you can make something too!!
Final Results for Our Finished Custom Bird Cage Covers
I added a burlap fabric in one continuous piece to be on the sides and top, connecting it to the Blossom Boutique Waverly Fabric. This allows for light and air for the birds. We live in Central, Ca. It gets quite warm over half the year, so I wanted it unlined. But you can easily line the covers to adjust for your needs if you live in colder climates.
Measure fabric, sew a pillow, and stuff a pillow. When measuring, make sure it will fit in the basket that the cat or kitten will sleep in. I couldn't get my kitty to get into the bed for the photo, lol, trust me, he loves his bed. Here's how to sew a pillow. If you want to make one.
We love my bird cage covers. My new makeup case was made like this zipper pouch: How to sew a zipper pouch.
I love how this Waverly Fabric Blossom Boutique ended up going with our home decor so well. I just might have to grab some more fabric to make living room pillows.
So cute, Theresa!! Love that floral fabric!! Wanted to let you know, too, that I received my skincare kit from Dermagist the other day – excited to give it a try!!
Hi Kim, Thanks for letting me know!Hope you enjoy the products. & loved your dog crate cover.
Hi Theresa, Thanks for Stopping by Crafty Allie. I’m glad you found me, because I am really enjoying your blog!
~Allie@http://thecraftiestallie.blogspot.com/
Hi Allie, Thanks for stopping by! Glad you are enjoying the blog. I hope to see you again soon & if you didn’t already your welcome to join in the weekly parties. It’s open all week for entries.
How creative! and I LOVE the fabric. You put it to good use.
Hi Katy, Thanks for dropping by. Me too. Can’t wait to see your project when I get a chance to pop by.
Wow those are happy birds for sure Theresa! The fabric is lovely and the covers are very cute! What a great mama you are! Thank you so much for sharing your gorgeous pet creation at the Fluster Buster Party! Come join us again next week, Lizy party co host
Thanks Lizy, I didn’t know you were co hosting it. It’s hard to make it to parties each week, but I’ll try to get around more often! xo
Super cute idea! Tha fabric is gorgeous! Thanks so much for sharing! Would love to have you visit my blog sometime.
Have a fabulousday!
Hugs and love from Portugal,
Ana Love Craft
http://www.lovecraft2012.blogspot.com
Hi Ana, Dropped by your blog & it’s lovely! Makes me wish I could travel there! All my best
Thank you so much for joining All Things Pretty I hope to see you back