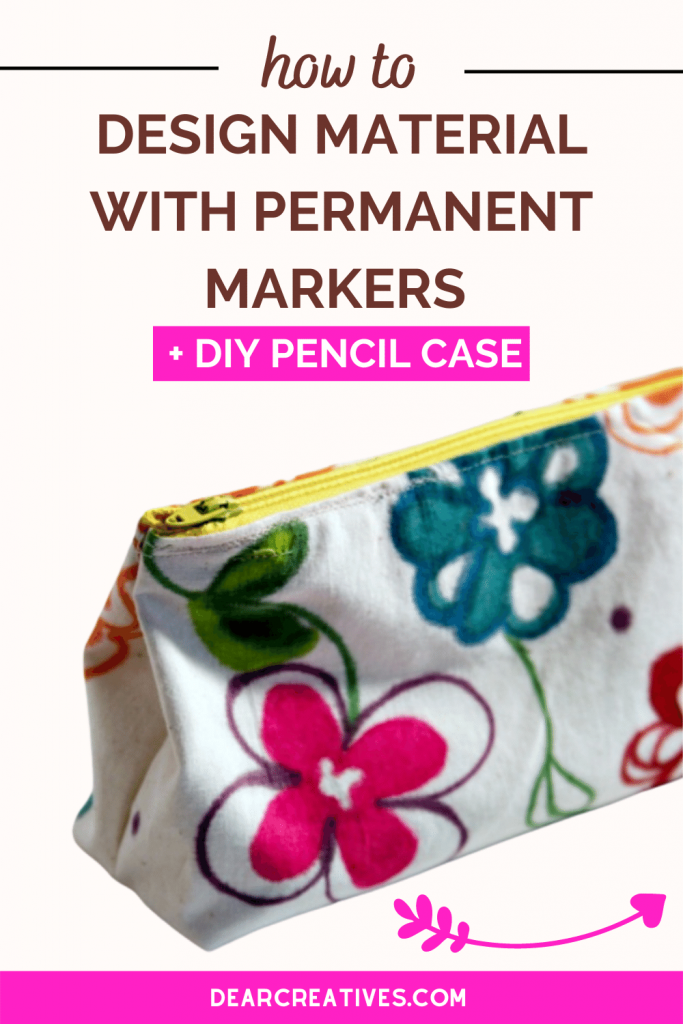
Design Material With Permanent Markers + DIY Zipper Pouch
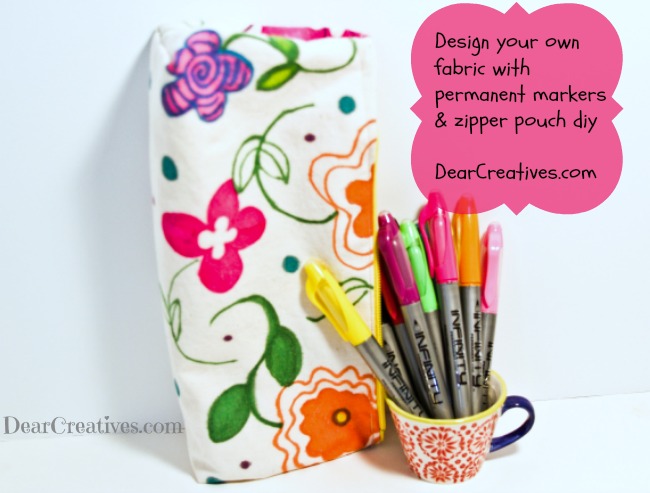
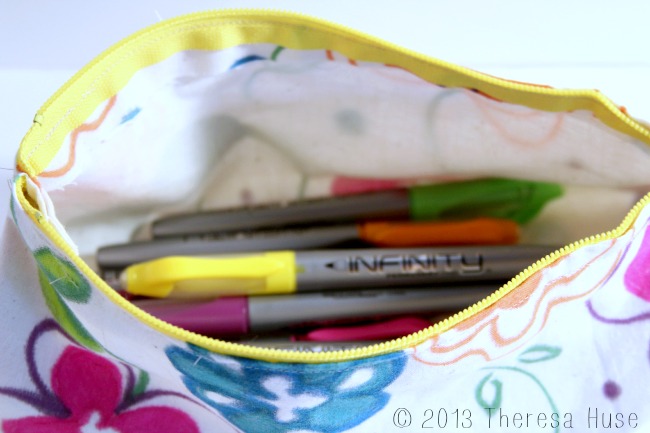
How To Design Material With Permanent Markers – I decided to design fabric with permanent markers and make a zipper pouch (pencil case) to hold all my new pens in. Today I thought I would share how you can make your own and also how to add designs to fabric with permanent markers!
Enjoy this tutorial on how to design your own material. If you don't want to make a zipper case out of it you can purchase canvas pouches to create your designs onto with permanent markers. I'm also sharing the best markers to add designs to the fabric. Find the tutorial and tips below. Plus, I've linked to some helpful video tutorials at the end of this post.
DIY Material With Markers
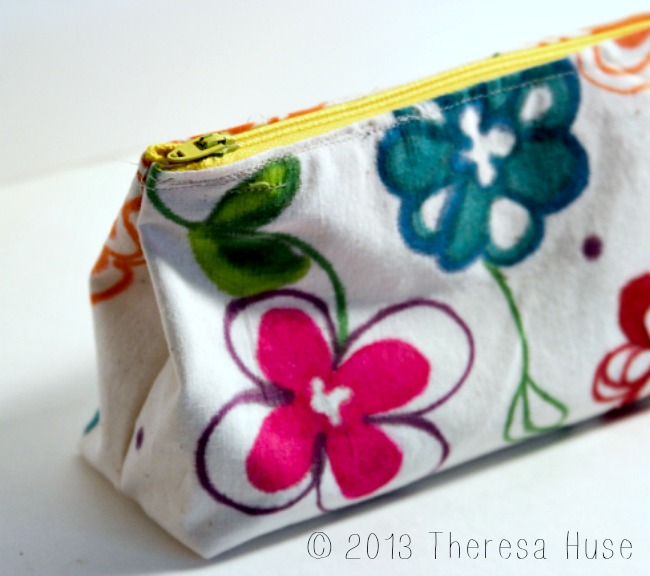 Not only did I decide to make the zipper pouch I decided to use my permanent markers to make my own fabric. This is an easy process and I will share that too! Who's ready to get their craft on today?
This is an easy adult craft or teen craft. Also, kids who are old enough to use permanent markers can make this with help. It's a fun project for anyone who wants to make their own fabric. And add designs to fabrics with markers. We have listed a few of the best markers for doing a project like this below.
How To Design Your Own Material
It's easier than you think! I did receive the pens I used in this post for free. This post was made years ago, I have updated the post to include helpful resources so you can craft and sew your own projects. I still have this zipper case. Let's get to it and make this!
Design Material With Permanent Markers
How to make your own designs on fabric with permanent markers
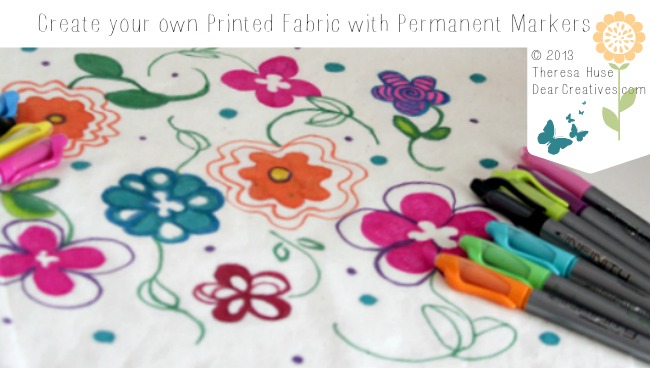
- Grab some pre-washed muslin fabric (I cut 4 pieces approximately 13 x 22″ each) preferably pressed and with your permanent markers.
- Then create your design on 100% cotton, cotton muslin, or muslin fabric.
- Don't worry about being perfect, if you get bleed lines incorporate them into the design.
- To avoid bleed lines – Use a light hand by not pressing hard onto the fabric which will help keep it from bleeding.
- How To Set Fabric Pens – Note – For this project, I didn't use fabric pens I used permanent markers
. But, Setting the ink is the same process. If you do use fabric pens, follow the directions on the box. Products may vary for setting. Once done with the designs. Let the design on the fabric dry for 24 hours, and press with an iron to heat set. Protect your iron by covering the fabric with waxed paper. Do not hold the iron in one place. Move the iron over the surface and only for a few minutes at a time until you have covered the entire surface of your design on the fabric.
- You are done adding designs to the fabric!
- Now assemble the designed pouch into a zipper pouch, pencil case with zipper.
Notes: If you don't want to make the zipper cases you can use BLANK COTTON CANVAS BAGS like this. You can also use this technique on other cotton or muslin blanks such as canvas bags, tennis shoes…
Recommended Fabrics for Adding Designs To
The top three pen types to use for making designs on fabric
- Sharpie Markers
- Fabric Pens
- Acrylic Pens like this or like these Acrylic Pens


Continue on to see How to assemble the zipper pouch and DIY pencil case. I've linked to a few helpful videos at the end of the post.
How to make and assemble the zipper pouch
DIY Pencil Case
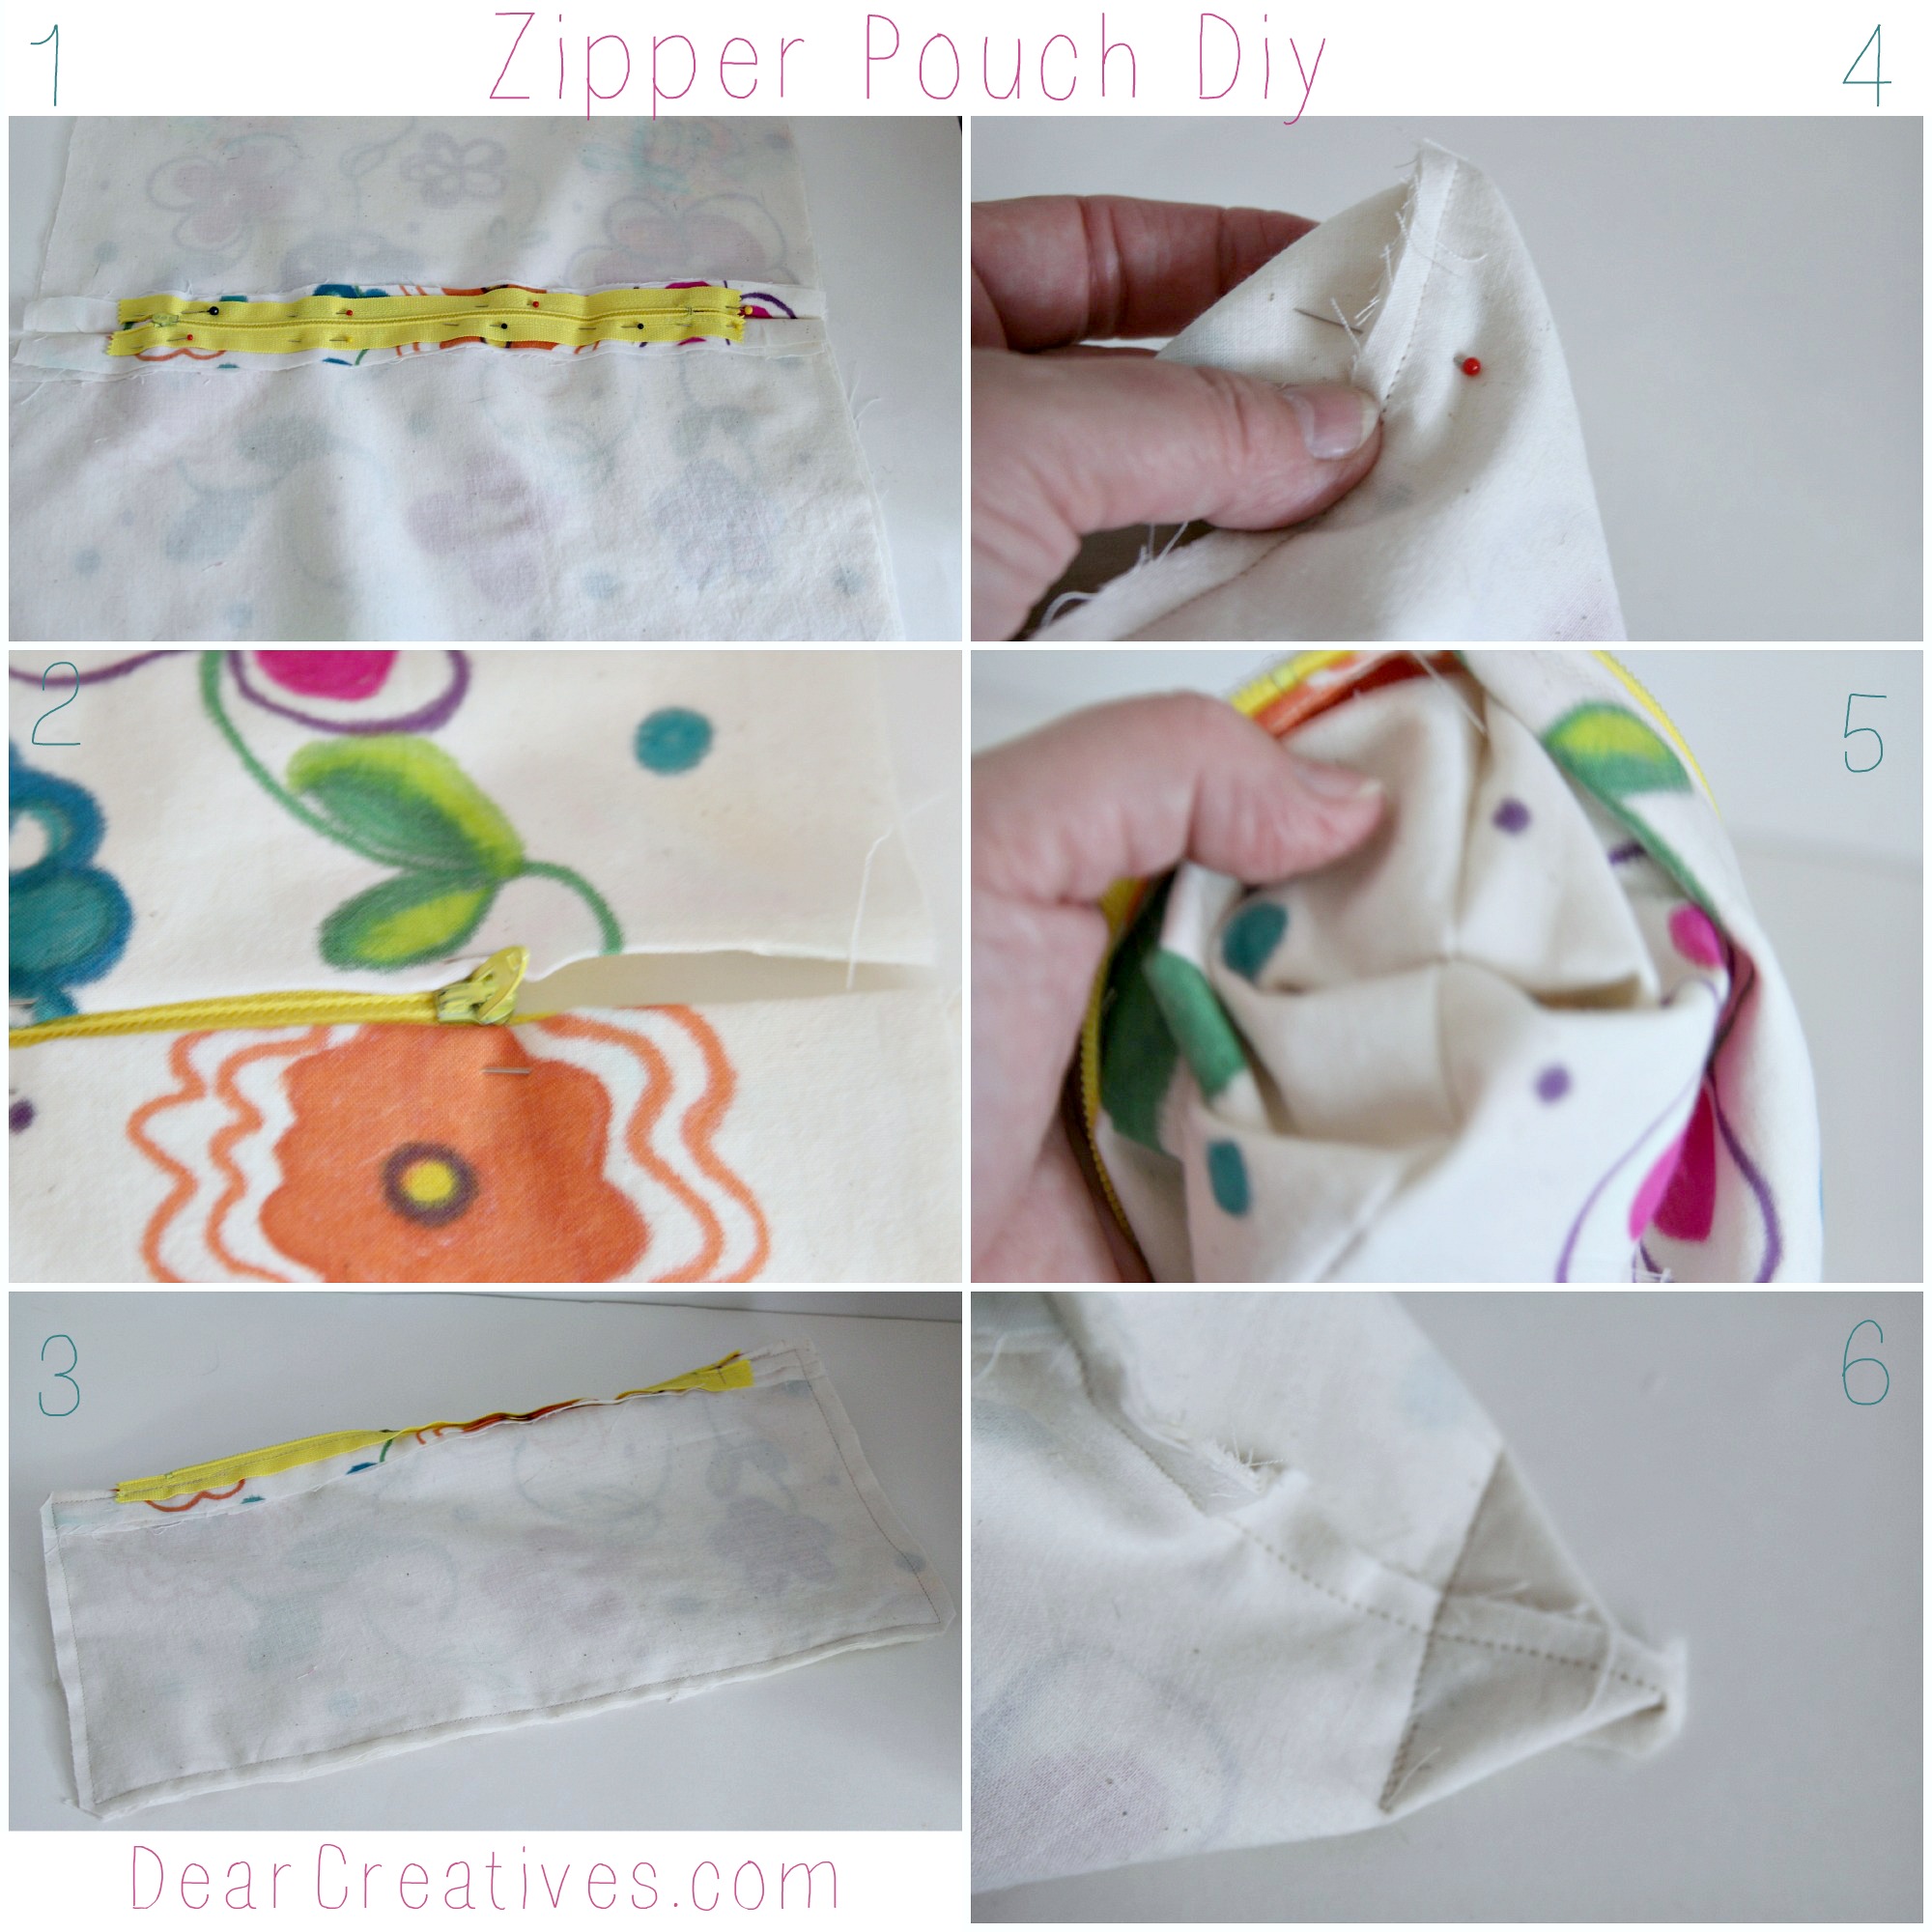
Now for the sake of easy viewing, I added these 6 steps into a collage (click to see full size)
Use a zipper size 9-13″ will be perfect
Use Pre-Washed Fabric With your Designs 4 pieces approximately 13 x 22″ each
- Lay right side fabric face down, place lining on top then iron back a seam (do this twice) Now with right side fabric face down on a table pin (or hand baste) your zipper to each side in place. (zipper pull facing down to the table)
- When you flip it over it should look like this image. Then sew your zipper into place.
- Pull open the zipper slightly, fold the fabric in half right sides together, and pin and sew around all sides meeting the zipper area that is already sewn. (this is why you need the zipper slightly open) Now turn it inside out. Check sewing, clip edges, and corners.
- To create a boxed bottom fold corner as shown and pin
- Check placement to make sure seams match
- Then sew a straight line across (you can trim or tack extra fabric on the inside)
In case you need how to see to add in a zipper and how to
- If you need to wash the pencil case I recommend you use cold water and wash separately on gentle or hand wash ( Notes: If you use warm water, bleeding may occur).
- Now toss in your pens, pencils, and other school supplies. Then grab your paper, and go have fun!
Hope you are able to make one of your own zippered pencil-pen pouches and create your own fun fabric designs. If you use this tutorial be sure to share what you made with me at my weekly party, via comments or by a link, or by emailing me. I'd love to see it!
Are you new here?
-
Be sure to subscribe
-
Pin it for later
Related Zipper Pouch And DIY posts you may enjoy
- 10 Zipper and Non-Zipper Pouches DIY s and Tutorials
- Wide Mouth Zipper Pouch
- Easy DIY Improvement Projects
Have you made a zipper pouch or created your own fabric designs?
Classes you can take for improving your sewing that is online
- All-you-can sew video workshops on creativebug.com 3 subscription models: 1 month, 3 months, & 6 months!
- Sewing Studio
- Sew Sturdy Travel Organizers
Related video content that may help you
What was the last thing you sewed?
Looking for crafts to make or things to sew?
Follow me on social media and let me know if you tried this project by tagging me on Instagram or Twitter @DearCreatives or commenting on my Facebook page.


This is so cute!!
Hi Paula, Thanks for stopping by & for your comment. Glad you like it.
What a great idea!!!! Designing your own fabric sounds fun. Your design is really cute! I found you via the Social Sunday blog hop.
Navy Wifey Peters @ Submarine Sunday Link Party
Hi T’onna, Thanks for stopping by & leaving me a comment. I’ll be sure to drop by soon. It is fun & I really did this one pretty quick just to share how. Glad you like it. Thank you!
This is soooooooooo creative of you !
I love your idea and I LOVE the result
BEAUTIFUL !!
Hey Thanks Winnie!
Really neat! Woo…I hate working with a zipper. That was my least favorite skill in school. However, once you get past that part, it seems pretty simple and cute!
Hi Sharon, Thank you. They can be a bit tricky at first. I am no expert. I think I’ll share a link list of some good tutorials for them soon. Trick use zipper foot, makes it easier: unzip zipper part way down, then as you get to zipper stop & zip it up (keeping needle where your at) then continue sewing. Hope that makes sense for any newbies.
I love this project! Such a great idea! I’d like to invite you to share it at my Twirl & Take a Bow party. Have a great day!
Leslie
Thanks Leslie, I’ll be sure to try & pop by!
Wow! Just LOVE the fabric you designed and the pouch you sewed. Pinning to try later! stopping by from the All Things Pretty linky.
Christine 🙂
http://www.myepicureanadventures.com
Hi Christine, Thanks! Glad you like it & thank you for pinning. Hope you do get to try it.
I would love for you to share and link up at my weekly TGIF Link Party if you haven’t already this week. Your favorite posts, most popular, recent or new! The party is open every Thursday night and closes Tuesday’s at midnight. Followed by (Not SO) Wordless Wednesday! http://apeekintomyparadise.blogspot.com/.
I would be honored if you join us and follow to stay connected Have a wonderful week!
Hugs, Cathy
Cool! Thank you for spreading JOY and sharing at the Oh What a HAPPY Day party.
Holly at Not Done Growing
Hi Holly, Thanks for coming by for a visit. Happy to visit, it’s been awhile.
what a fun idea! Thank you for sharing at the Thursday Favorite Things Hop xo
Hi Katherine, Thanks for dropping by.
Stop by House on the Way tomorrow to see your zipper pouch featured! Have a great week.
Ah, Thanks Leslie! I sure will! I appreciate the feature! All my best!!
What a fun idea for designing your own print, and the pouch looks easy!
Hi Noreen, Once you get the hang of switching out feet & sewing the zipper with a zipper foot it is easy. Hope you make your own!
That looked like even I can do it! I am not good at sewing but I think I can try that! Thank you for teaching me! I am stopping by from Inspire Me Monday Blog Hop. I look forward to your visit at http://www.homemaker-mom.com/2/post/2013/07/old-boxes-with-a-new-purpose.html. Happy creating!
Hi Susie, I hope you do give it a try. Just take it slow when sewing the zipper & you’ll be fine. I shared a few good how to zipper videos you can reference too.