This post contains links to affiliate websites, such as Amazon, and other affiliates. We receive an affiliate commission for any qualifying purchases made by you using these links. This is at no additional cost to you. We appreciate your support!
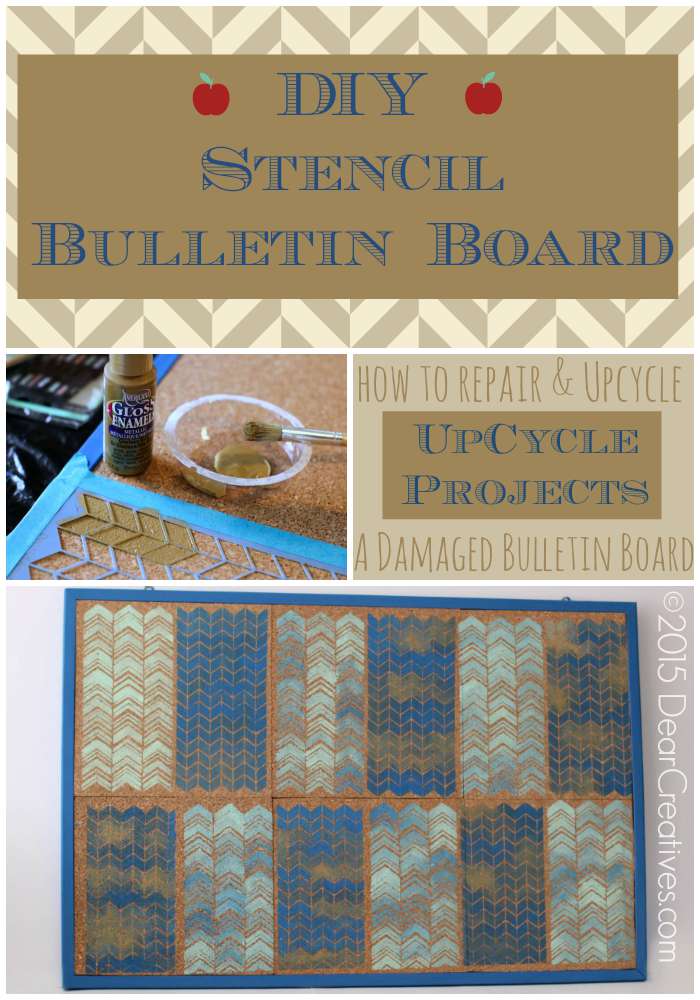
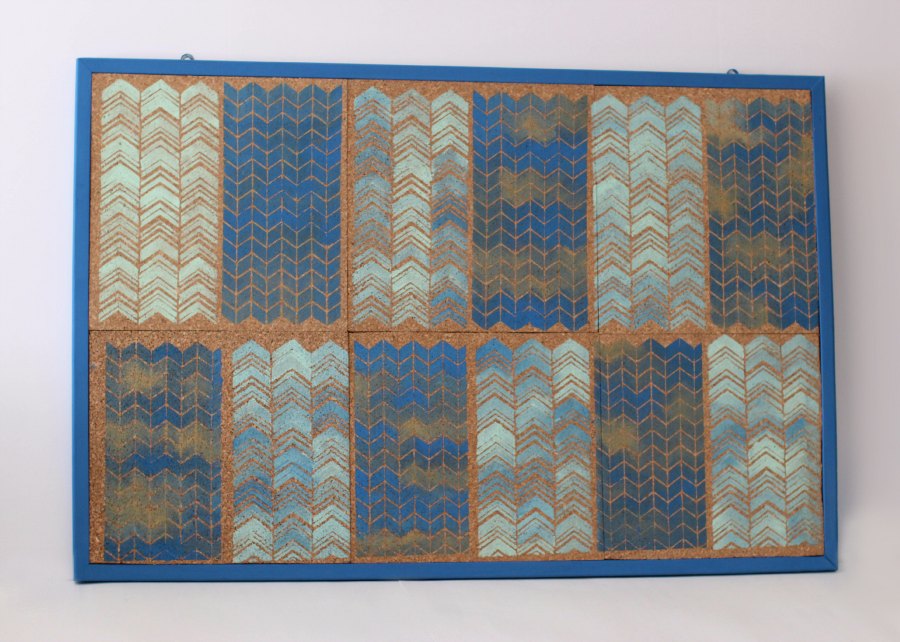
Today I’m sharing an exciting upcycle project that turns a damaged or boring office staple into a beautiful decorative bulletin board. If you’ve been following me for a while, you know I love a good furniture or decor upcycle. This stenciled design is one of my favorites! Using a “split angle” stencil and easy stenciling technique, you can take a basic corkboard and make it look like a high-end piece of home decor. Originally, I made this upcycled project for Sammie's room, but when she moved out, I now use it for my Vision board and bits of inspiration and ideas.
This project is perfect for anyone looking to refresh their home office or command center without spending a lot of money. You only need a few simple supplies to create this decorative bulletin board—some painter's tape, stencils, and your favorite acrylic paints. I personally love how the geometric lines pop! If you enjoy this type of transformation, be sure to check out my other Creative Home DIY Projects for more inspiration.
I love a challenge. What about you? For this DIY you can fix a corkboard or start with a new bulletin board.
I hope today's project will inspire you create your own decorative bulletin board.
DIY Decorative Bulletin Board: A Split Angle Stenciled Upcycle
Stenciled Bulletin Board
I did receive products for free to create my bulletin cork board makeover from Deco Art, and I am a Deco Art blog partner.
Supplies Needed for Your Stenciled Bulletin Board
Paint supplies
Americana Decor® Chalky Finish Paint Legacy 8 oz. #: ADC21-36
Always check your craft stock at home, as you may have some at home.
Note: If starting with a new bulletin board, you will only need the paint, stencil, painters' tape, and stencil brushes. Then jump to Steps 3 and then Step 5 for how to stencil a decorative bulletin board.
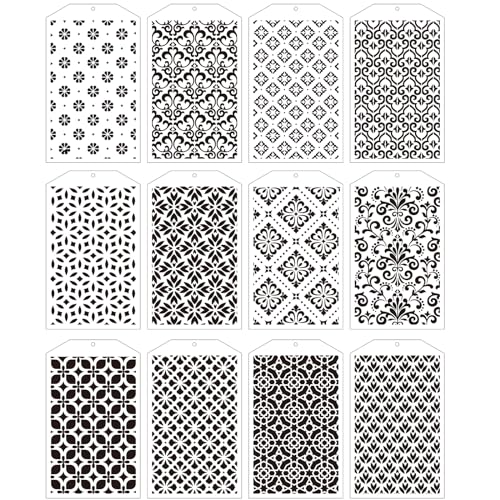
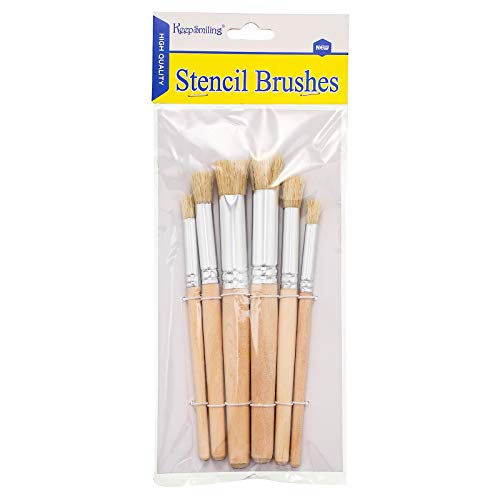
Decorative Stencil of your choice: We used this stencil: Split Angles
INSTRUCTIONS
NOTE:Let the paint dry completely between painting steps.
Step-by-Step: How to Upcycle a Bulletin Board
How to repair a bulletin board
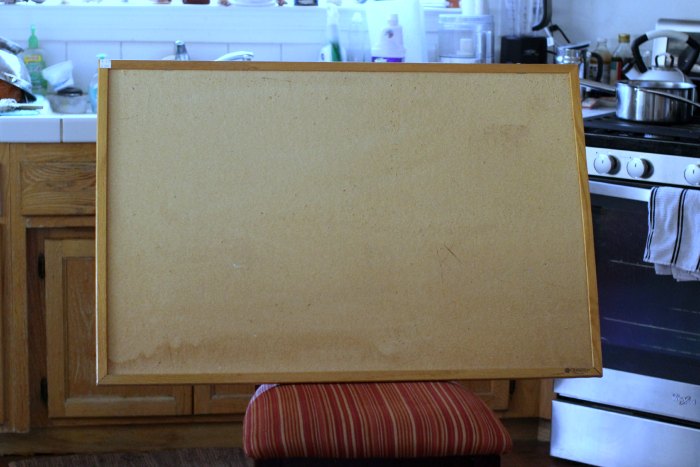
This is what my bulletin corkboard looked like. Let's get started on fixing this bulletin board.
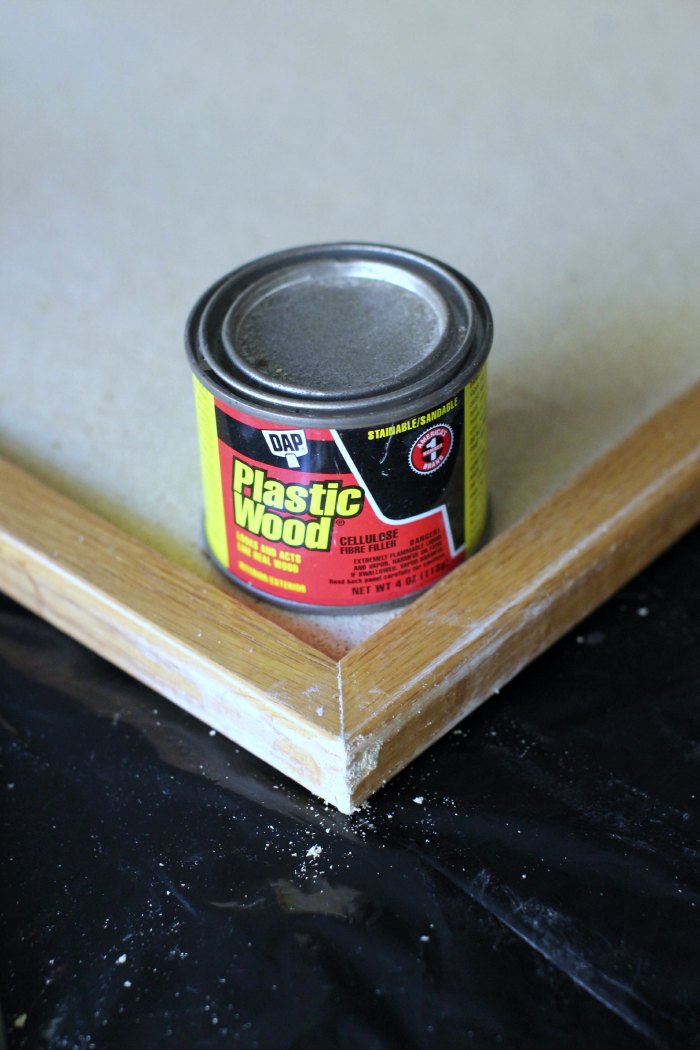
Step 1
If frame needs fixing: Sand wood edges, putty dings, let dry. Make sure to fill all gaps, and let it dry completely. Then lightly sand and wipe dust off before painting.
Step 2
How to Paint the Frame
Tape off the bulletin board as needed: If replacing with cork board tilesit's not necessary to tape off fully. If new, tape off the edges and cover the board with newspaper to protect the surface.
Step 3
Paint the frame with two coats on the front and then on the back. Either use an edge roller or a 2″ brush for painting the rest.
Step 4
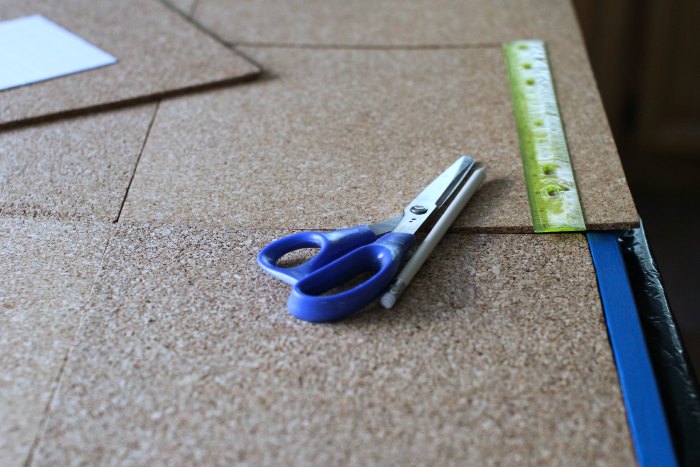
How to add a new layer of cork to an old bulletin board
Lay down cork tiles entirely prior to sticking to the frame.
Cut any tiles as needed to fit the frame.
Use a ruler to mark a straight line, trim as needed to fit in the frame
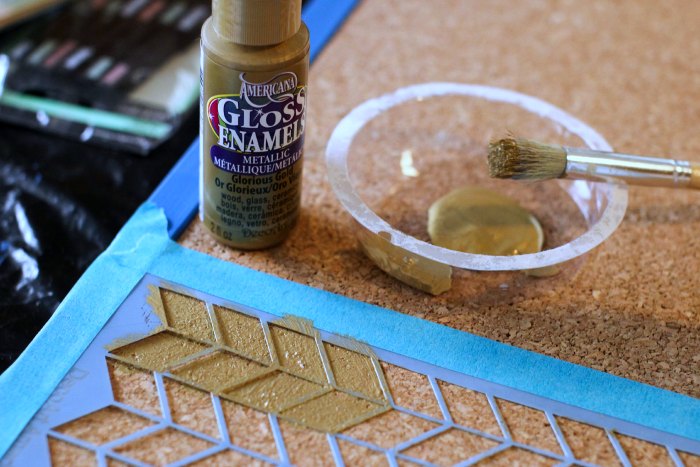
Lay down your stencil and tape to the cork where you want it painted
Tips: Hold down areas as you paint so the stencil doesn't move. Work in small sections as you go along! Have a paper towel for dabbing nearby and use it as needed for quick clean-ups.
Step 5
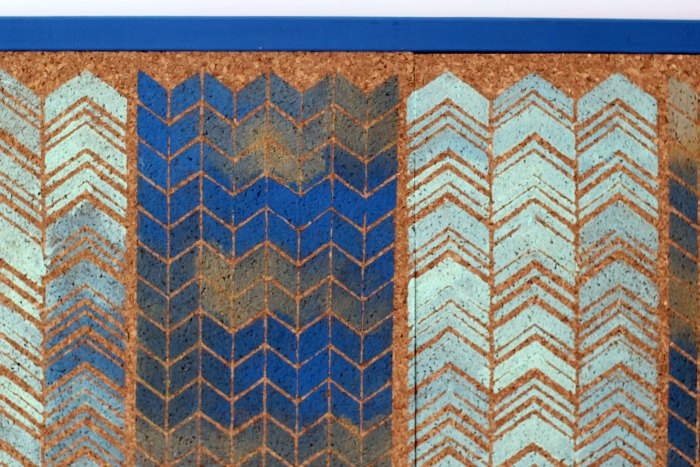
How to stencil a bulletin board
Add paint, then continue to change color without washing your brush if you want a tonal effect.
Step 6
When done with one section, lift the stencil up carefully and set it down on the next section to work on.
Make sure the tape holds down the stencil when moving on, and use your non-painting hand to secure the stencil when working on your corkboard.
Repeat painting steps until done!
Bulletin board ideas
If you don't have to use an old bulletin board. You can always grab a new Cork Bulletin Board
Find more bulletin board ideas at Deco Art – This post was created for and originally published here Upcycled Bulletin Board Tutorial but, I decided to update it and share it with you.
Bulletin boards are perfect for an office, back to school or even a command center or family room.
Sammie used pretty push pins and hung her jewelry from them when she went to her online scheduling and used a day planner.
The great thing about this upcycle project is you can pick any type of stencil to create a pattern with, colors of paint to match your decor, and hang it with Command Strips/Hooks or just by using metallic push pins.
5 Creative Ways to Use Your Decorative Bulletin Board
Gift Idea: Customize the colors and stencil patterns to create a personalized gift for a student or teacher.
Command Center: Use it in the kitchen to keep track of schedules, grocery lists, and school reminders.
Inspiration Board: Place it above your desk to pin fabric swatches, paint chips, and photos for your next project.
Jewelry Organizer: Add decorative push pins to hang necklaces and earrings for a functional piece of wall art.
Photo Display: Showcase your favorite polaroids and mementos in a living room or bedroom.
I hope this inspires you to try decorating a bulletin board or upcycle and make a decorative bulletin board.
Hi Lisa, Thanks for stopping by glad you like the idea. Hope to see you again soon.
Hi Phyllis, I hope you do get to makeover your bulletin board. I can’t wait to see how it turns out. Glad the tips can help you.
What a unique way to add something to pretty much any style of room! You could even still use it as a push board for things. 🙂
Hi Joanna, Yes, you can use it for a push board. I just didn’t take photos of stuff on it. It’s for Sammie’s back to school. It’s totally customize-able. Thanks for stopping by.
#: ADC21-36
. #: DSM19-26
#: DA545-30


up carefully and set it down on the next section to work on.


This is a wonderful idea! Glad to find it 🙂
Hi Lisa, Thanks for stopping by glad you like the idea. Hope to see you again soon.
Hi Phyllis, I hope you do get to makeover your bulletin board. I can’t wait to see how it turns out. Glad the tips can help you.
What a unique way to add something to pretty much any style of room! You could even still use it as a push board for things. 🙂
Hi Joanna, Yes, you can use it for a push board. I just didn’t take photos of stuff on it. It’s for Sammie’s back to school. It’s totally customize-able. Thanks for stopping by.