This post contains links to affiliate websites, such as Amazon, and other affiliates. We receive an affiliate commission for any qualifying purchases made by you using these links. This is at no additional cost to you. We appreciate your support!
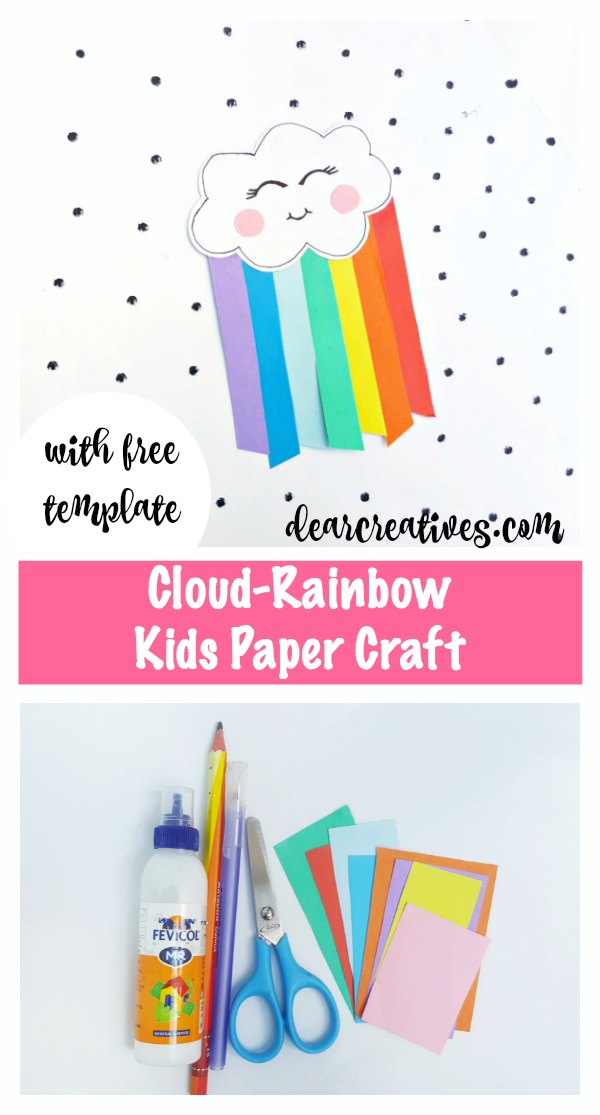
Ready for a fun learning activity and craft project that’s as cute as it is educational? This free Rainbow Cloud Template is a versatile resource designed for classroom use with students or crafting at home with kids and grandkids.
You can easily use this project to teach little ones their colors, and help them practice essential cutting and gluing skills. The best part is that the free template works perfectly for whichever materials you have on hand—whether you want to make a simple paper craft or a lasting felt decoration.
Grab your free pattern below and get ready to create this adorable, kawaii-style cloud and rainbow project today!
Cloud-Rainbow Kids Craft
Paper Crafts for Kids
Materials Checklist: Paper or Felt Rainbow Cloud
Option 1: Supplies for the Paper Craft
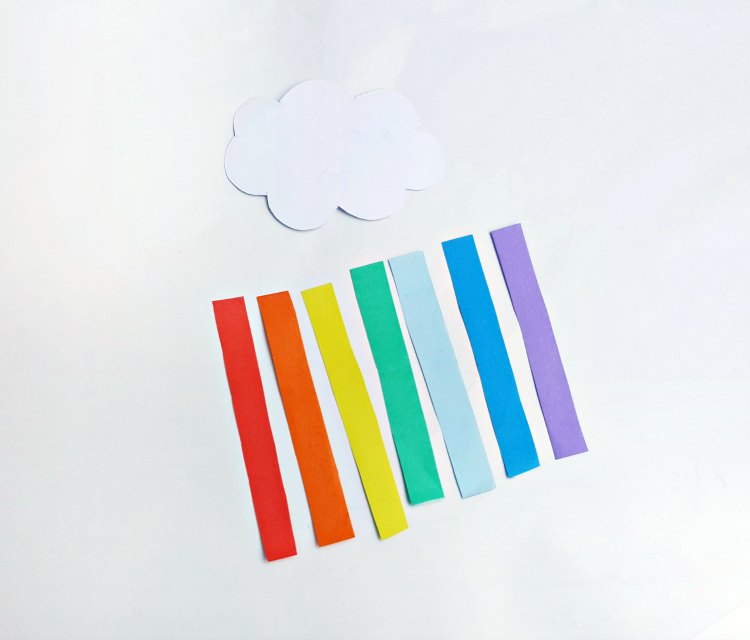
Colored craft papers – 7 colors of the rainbow and pink (and white for the cloud).
White computer paper for printing the template and 1 for the cloud.
Option 2: Supplies for the Felt Craft
Colored felt. – 7 colors of the rainbow and pink (and white for the cloud).
You will find the free template below, in the post.
Step-by-Step Guide: Your Fun Learning Activity
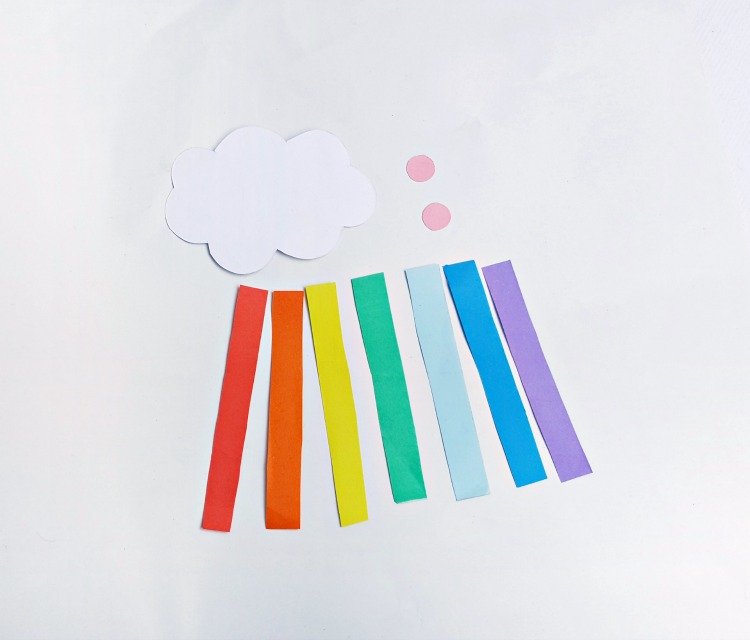
Download, Prep, and Cut the Template Pieces
Step (1)
Gather the selected colored craft papers and the white stationery paper. Trace the patterns from the template on the chosen papers and cut out the patterns nicely.
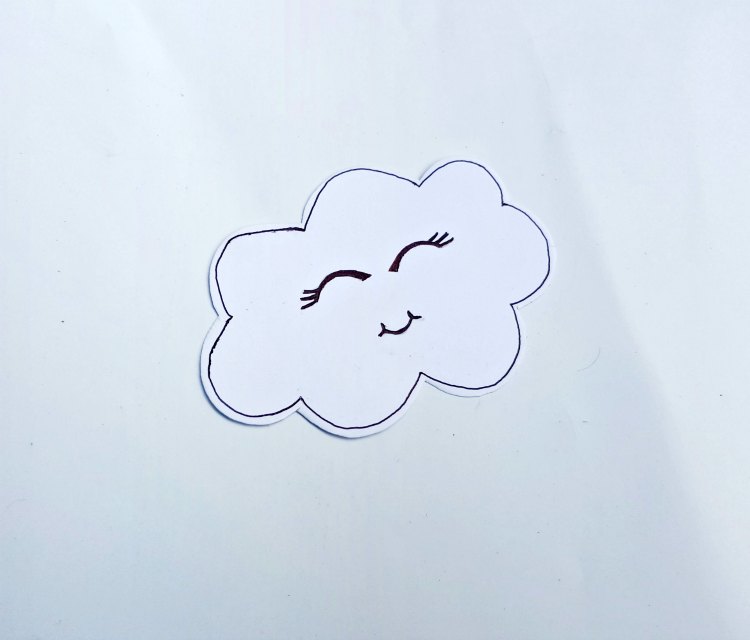
Step (2)
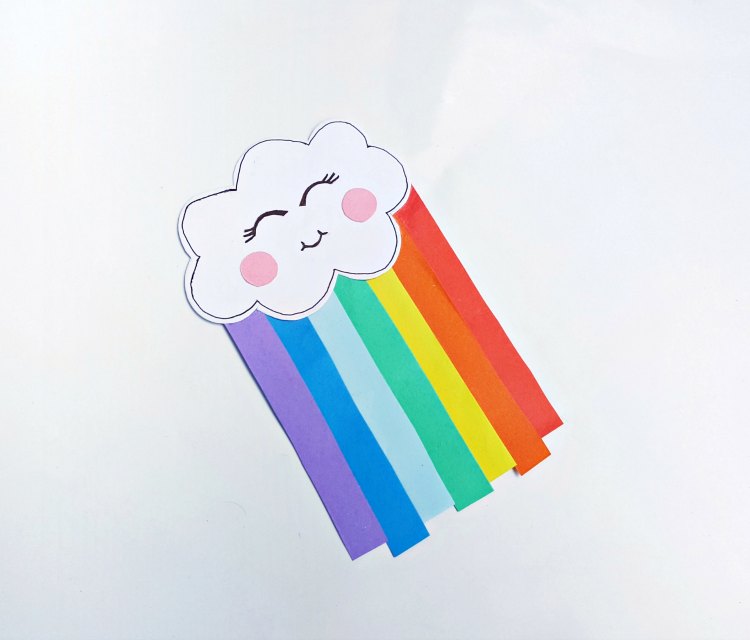
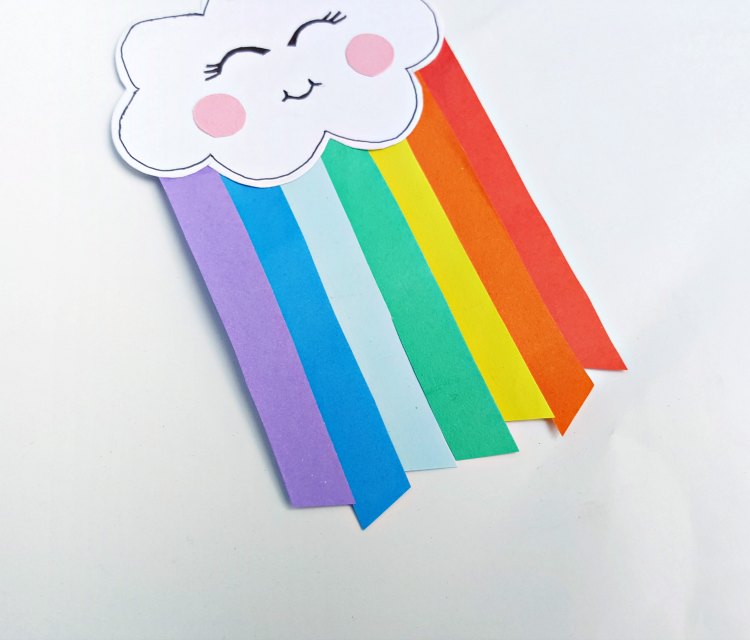
Take the cloud pattern and trace a thin border along the side using a black pen or marker(optional). Use the pen ormarkerto draw the face of the cloud.
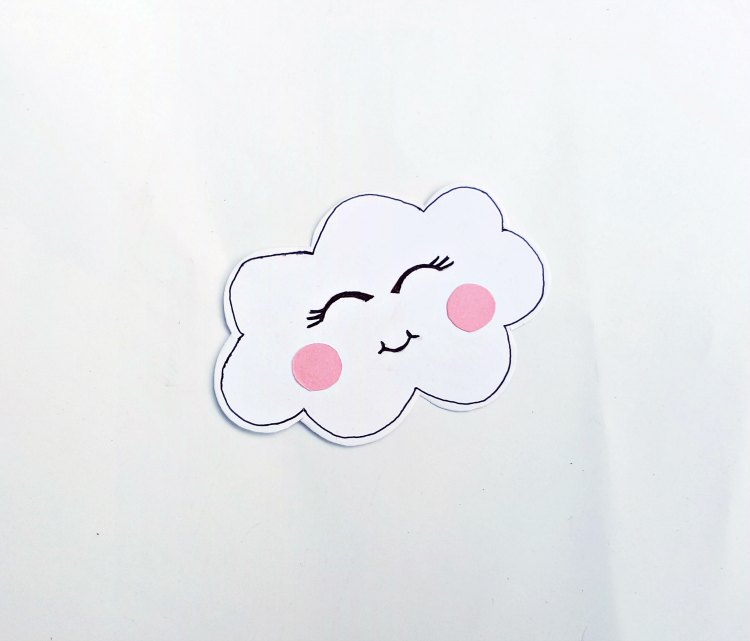
Step (3)
Take the 2 pink circles and glue them on both cheeks of the cloud.
Arranging the Rainbow (Color Lesson Integration)
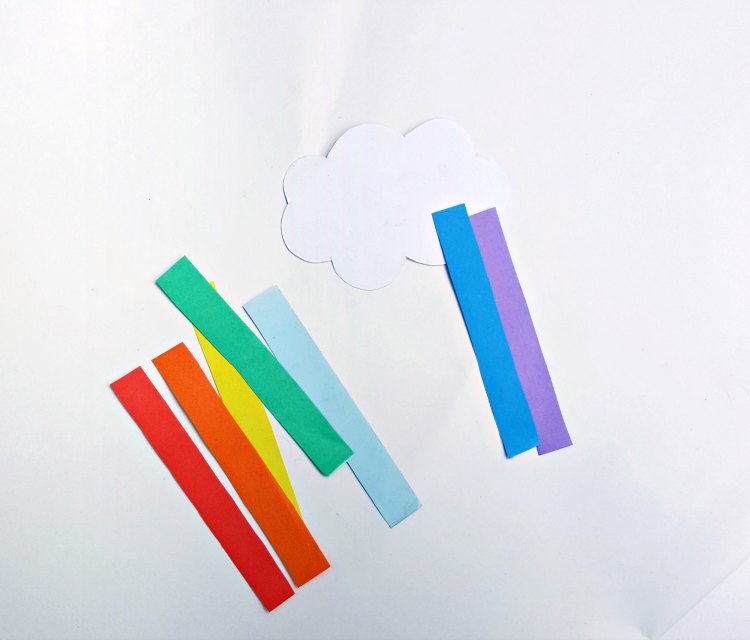
Step (4)
Flip the cloud to the other side and place it on a flat surface. Arrange the 7 rainbow colors (cut out craft papers) from the opposite direction (starting from red).
Final Assembly and Cloud Details
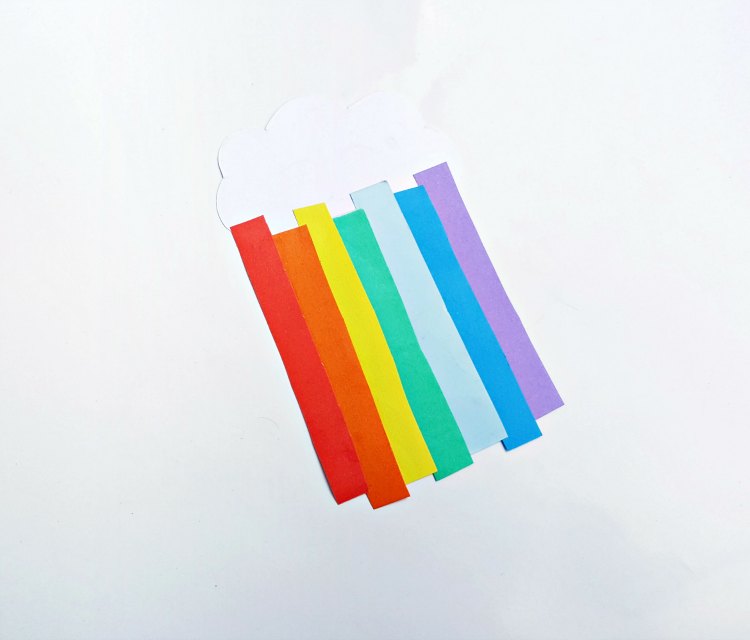
Step (5)
Start to glue the cut-out papers on the bottom end of the cloud’s backside
.
Step (6)
Keep in mind to glue the colors appropriately (purple, blue, sky blue, green, yellow, orange, and red).
Step (7)
Done gluing all the rainbow colors? Turn the cloud to the other side.
Step (8)
You may keep the ends of the rainbow strips as they are, or you can also cut diagonal ends as I did, which looks great!