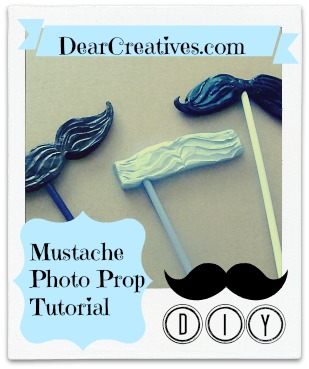
Clay Mustache Photo Props – DIY Clay Mustaches
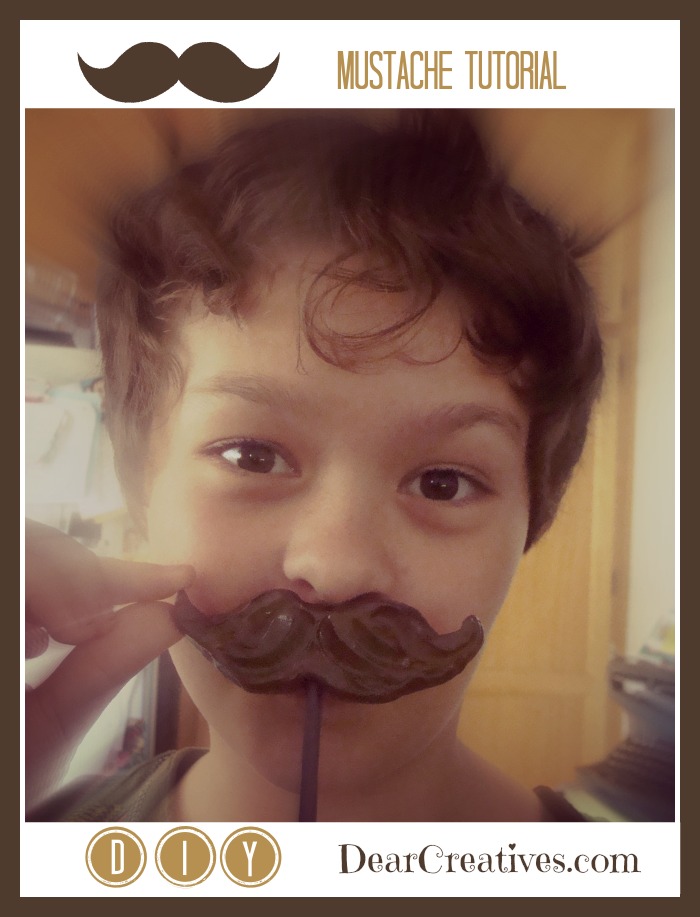
Clay Mustache Photo Props: Today we are sharing how to make clay mustaches. This is a fun clay project that is easy to make. With wedding season upon us, I thought I would share a tutorial and share how you can make your own. DIY clay mustaches: Use them for photo props! I have made photo props for several weddings and parties. You can create them easily too.
But, you don't need a party to create these fun DIY Mustache Photo Props. This would be a fun project to do with older kids! Then they have a fun photo session while you take pictures of them.
You can store them in your favorite mason jar or container for display if you like, pulling them out anytime you need a mustache photo prop. Later in this post I share how to set up a table for using them at a wedding reception and photos of the bride and groom using them. I hope this inspires you to get creative and make your own fun photo props!
Are looking for other ideas here's where to find all our summer craft ideas. And here are all our Wedding Ideas.
DIY Mustache Photo Props
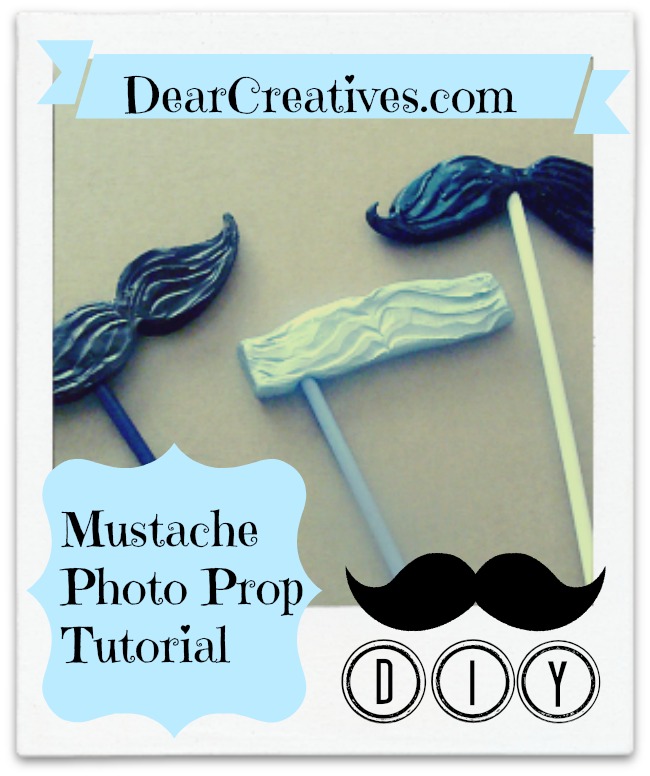
Easy mustache photo prop tutorial
How To Make Clay Mustaches
Click the image to enlarge
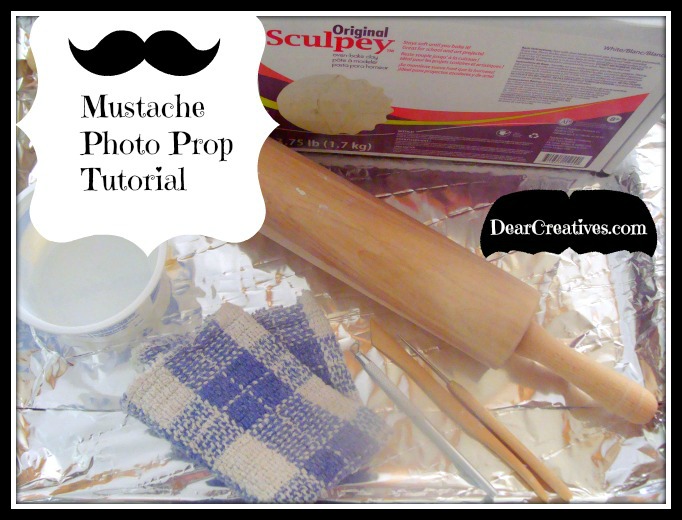
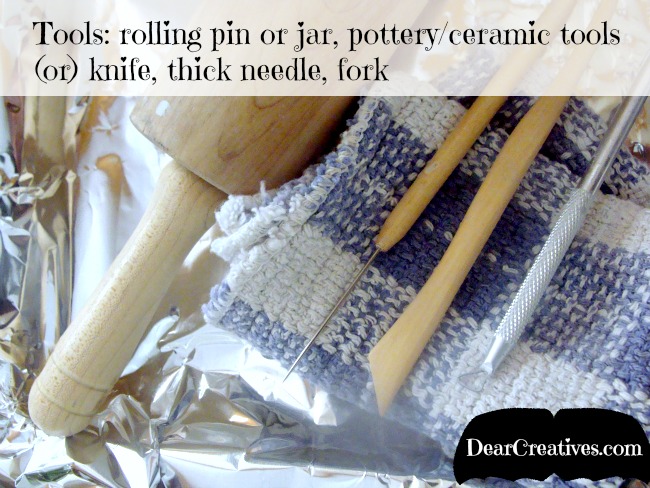
Tools you need can vary from things in your kitchen to the preferred pottery and sculpting tools. Believe it or not, if you are creating with clay or making lots of these clay mustaches you'll love to invest in these clay tools

Disclosure – post content may contain affiliate links or sponsored content by clicking on these links and making qualified purchases we earn a small commission, at no added cost to you.
Project Notes
- The links share are links I have used or own.
- Important: Please note that do not use your baker's rolling pin for this project! If you do not have a second one use a jar or wine bottle or something else.
- Do not use a glass rolling pin. Pick up a wooden rolling pin at a yard sale, or thrift shop, or pick up a cheap rolling pin (just to use for crafts).
- Use care when working around small children! Sculpty clay and certain clays aren't for young children (get them playdough to keep them busy). Plus, you will be using an oven, along with sharp tools.
- Older kids may enjoy this project but, supervision will be required.
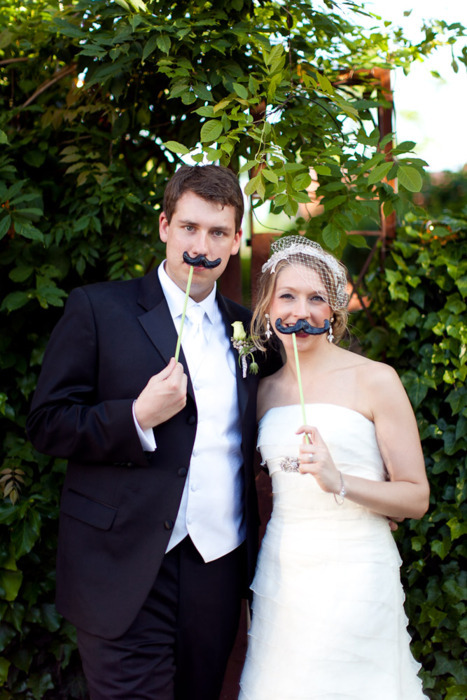
- See the wedding couple with the mustache photo props at the end of the post!
Supplies For This Clay Project
Supplies and Tools:
Clay for this project
- Sculpey Original Clay, 3-3/4-Pound, White
– oven-bake clay is recommended. It is easy to use & gives you great results.
Tools
- Trademark Tools 75-S008 Hawk 8-Piece Pottery and Clay Modelling Tool Sculpture Set
- Darice 6-Piece Wooden Clay Tool Set
- Or your kitchen items (see the image above for suggestions)
Other Supplies
- Loew Cornell Dowel Rods 12″-3/16″ 20/Pkg
- Krylon 6-Ounce Crystal Clear Acrylic Coating Aerosol Spray
- E-6000 Craft 3.7-Ounce Adhesive
- High-quality spray paint- colors black
, brown
, silver
for mustaches
- And other colors of spray paint for dowels to go with wedding colors or photoshoot-colored themes. (other colors optional)
- wash rag
- hand towel
- paper towels
- cookie sheet or sheet pan
- aluminum foil
(to protect the surface of your cookie sheet or sheet pan or it won't be food-safe after. I just use an old sheet pan for my crafts and not for food.
- container for water (to dip your fingers in when smoothing out clay)
- craft rolling pin
* not for food use! or glass jar as mentioned above
- If not using the above-mentioned tools you will need to improvise (note you will not use your items/utensils for eating once used)
- oven ( follow directions on the box for baking for the type of clay you are using)

Click the image to enlarge
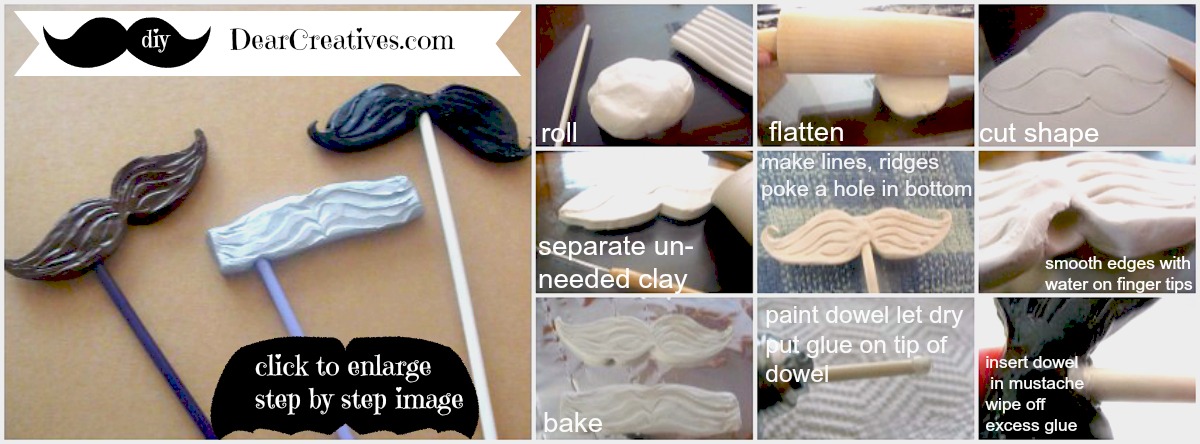
I placed the step-by-step mustache photo prop tutorial directly on this image, just click the image to enlarge it and follow along! Please note: Additional steps are in the Step by Step instructions below! When you bake your clay follow the directions on your box. If your oven runs hot check five minutes prior to the end time.
How To Make Clay Mustaches
Clay Mustaches Photo Props Instructions:
Step by Step Directions for Photo Prop Mustaches
- Take a separate piece of clay and roll it into a ball
- Flatten with a rolling pin ( jar or hands)
- Cut out your shape
- Separate your un-needed clay
- Make lines and ridges on your mustache (with your clay tools or a pencil)
- Carefully poke a hole in the bottom
- Smooth edges with damp fingertips
- Bake in the oven (per clay instructions)
- Let the cooked clay cool
- Paint dowels, then let them dry
- Spray Paint cooled mustaches ( this must be done outdoors or in a highly ventilated area)
- Spray Krylon Sealer onto the painted mustaches that are already completely dried (This step must be done outdoors or in a highly ventilated area)
- Put glue on the end of the dowel
- Insert dowel with glue into mustache hole and let dry completely prior to using
- Have fun, dress up, and take photos!
- Easy print and save directions below to have next to you for reference!
DIY Clay Mustaches
Clay Mustache Photo Props
Click the image to enlarge
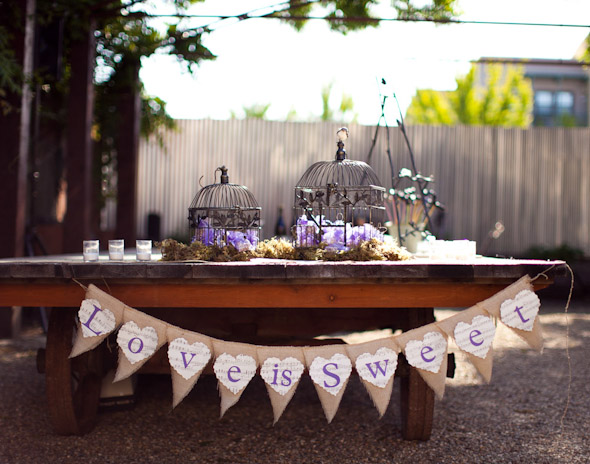
How to set up your photo prop table at a wedding, party, or event
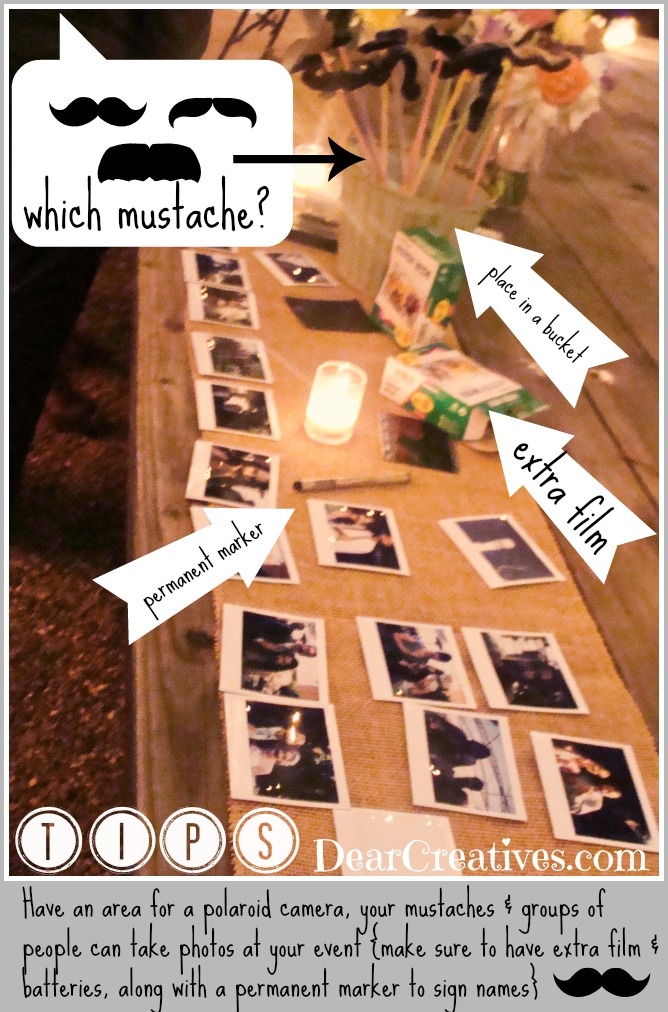
Here are a few tips for your event fun!
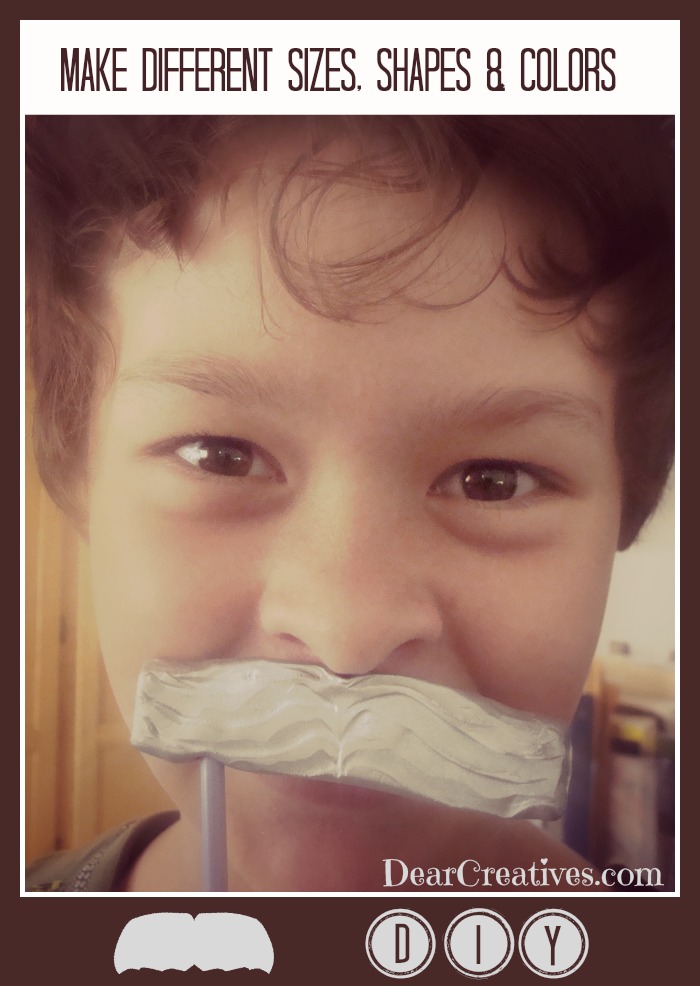
You can use many shapes, create lips or anything else that suits your occasion or photo prop needs! If you use this tutorial and make something be sure to tag us on Twitter and Instagram with @DearCreatives I'd love to see how you made your own!


Clay Mustache Photo Prop Tutorial – #DIY
Mustache Clay Photo Prop Tutorial - How to make clay mustaches. Fun clay project that is easy to make. Use the DIY mustaches for weddings, events or photoshoots. Visit DearCreatives.com for Step by Step Images
Ingredients
- Sculpey Original Clay 3-3/4-Pound, White - oven-bake clay is recommended. It is easy to use and gives you great results.
- Tools:
- Trademark Tools 75-S008 Hawk 8-Piece Pottery and Clay Modelling Tool Sculpture Set
- Darice 6-Piece Wooden Clay Tool Set
- Other Supplies:
- Loew Cornell Dowel Rods 12″-3/16″ 20/Pkg
- Krylon 6-Ounce Crystal Clear Acrylic Coating Aerosol Spray
- High-quality spray paint: colors black brown, silver for mustaches and other colors for dowels to go with wedding colors or photoshoot colors (other colors optional)
- wash rag
- hand towel
- paper towels
- cookie sheet
- tin foil
- container for water to dip your fingers in when smoothing out clay
- rolling pin * not for food use! or glass jar as mentioned above
- If not using above mentioned tools you will need to improvise note you will not use your items/utensils for eating once used
- oven follow directions on the box for baking for the type of clay you are using
Instructions
-
Step by Step Directions for Photo Prop Mustaches
-
Use a separate piece of clay and roll into a ball
-
Flatten with the rolling pin ( jar or hands)
-
Cut out your shape
-
Separate your un-needed clay
-
Make lines and ridges on your mustaches
-
Carefully poke a hole in the bottom (for your dowel to go into after being baked)
-
Smooth edges with damp fingertips
-
Bake in the oven (per clay instructions) and let the clay cool fully
-
Paint the dowels and let them dry
-
Spray Paint cooled mustaches (this must be done outdoors or in a highly ventilated area)
-
Spray Krylon Sealer onto Painted on mustaches that are already completely dried (This step must be done outdoors or in a highly ventilated area)
-
Put glue on end of the dowel
-
Insert dowel with glue into mustache hole and let dry completely prior to using
-
Have fun, dress up and take photos! Or set up a display at a wedding or an event as shown in the post.
Recipe Notes
For full photos and tips for making your own clay mustaches go here -
DIY Clay Mustache Photo Props
- Purchase extra clay and dowels for making more. The steps are the same and you will have plenty of spray paint from the original supply list.
- See this post with the bride and groom using the mustaches and the wedding banner we made for the wedding too.
Looking for other photo prop ideas?
- Purchase extra clay and dowels for making more. The steps are the same and you will have plenty of spray paint from the original supply list.
- See this post with the bride and groom using the mustaches and the wedding banner we made for the wedding too.
Wedding Couple Using Mustache Photo Props
- New here? Be sure to Subscribe
- Pin it for later
- Follow us on Pinterest
- Photo Props Pinterest
- YouTube – how to make clay mustaches
Looking for other photo prop ideas?
I hope you try making mustache photo props for any of your occasions! Need any photo props made but, don't have time? Just email me and we can chat.
What kind of photo props have you made for parties, weddings, or events? Have you ever tried making clay mustache photo props? Or will you make this clay project? Tag us on social media with you make yours. @DearCreatives on Twitter and Instagram

These are adorable and so much fun! Love them! Jenna @ Rain on a Tin Roof
Thanks Jenna for dropping by & your lovely comment.
These are adorable and would be a really fun party idea for the kiddos! I’m visiting today from Thursday’s Favorite Things. 🙂
Hi Rosey, Thanks for your visit! & nice to meet you. Hope to see you again soon!
Hi Theresa, these are a lot of fun and seem easy enough for a novice crafter like me to make! Thank You for linking it to this week’s Fluster Buster Party, wishing a lovely weekend, Lizy Party co-host
Hi Lizy, They really aren’t hard to make. & of course practice makes perfect. They are super fun to take photos with. I hope you try sometime. & always great to drop in when I can.
So cute!! I really should do these with my kids, they would love it!!
Thanks for the great idea and tutorial, pinning!
You should Mindi I made them for several weddings but we need to make some to keep! Sammie loves them. She looks so much younger in these photos they are about a year old at least! lol I am going to update post at some point with photos from my new camera. Thanks for your visit! xo
These are super cute! I am new from southern charm! I would love for you to check out my blog and hopefully follow me back. Nicole
Hi Nicole, Thanks for your invite of course I’ll drop by as soon as I can! Perfect, that way we can get to know each other better! Be sure to link up here weekly too! I’d love to see your crafts, decor, diy, recipes… posts. Parties are on Fri- Thurs. evening & then start new!
I love that you used clay! This will be a fun project for the kids to do this summer. Thanks for sharing on Fluster’s Creative Muster Party.
Robin
Fluster Buster
Hi Robin, It is a polymer clay http://en.wikipedia.org/wiki/Polymer_clay which dries hard yet is not prone to cracking & easily breaking. I hope you get a chance to.
Thanks for linking up to Whimsy Wednesday! Your project has been featured this week on my blog!
http://www.ohmy-creative.com/holiday-crafts/fathers-day/what-to-make-dad-for-fathers-day-13-ideas/
Also, you can add your project {or any project} to my website. I feature them on my main slider on the home page…follow this link to submit your project!
http://www.ohmy-creative.com/submit-a-project/
Be sure to stop by and grab a button…
Hi Susan, Thanks so much for the feature, invite & news! I appreciate it!
Thanks so much for sharing with last weeks Adorned From Above Blog Hop 54. We look forward to seeing what you have to share with us this week. The party opens at 8:00PM Mountain time.
Debi and Charly @ Adorned From Above
http://www.adornedfromabove.com
Thanks Debbie, Not sure if I can make it by this week. It’s graduation week in our area, but I’ll try! Thanks for popping in.