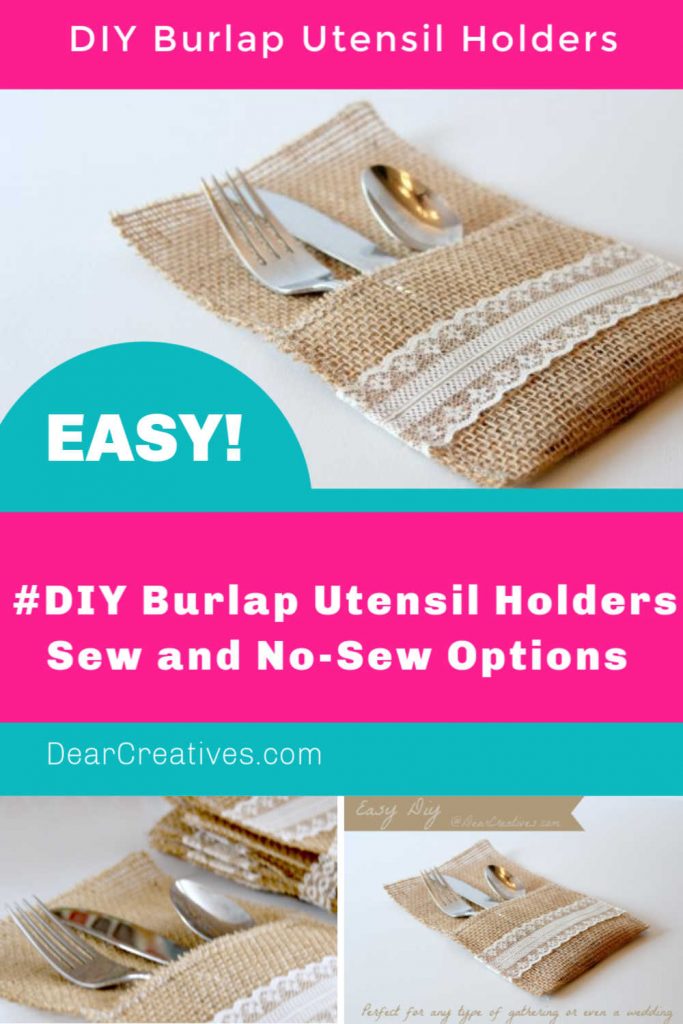
DIY Burlap Utensil Holders – Sew and No-Sew Options
Are you ready to DIY Burlap Utensil Holders? Today I am sharing a tutorial with you on how to make your own Burlap Lace Utensil Holders. This is an easy DIY crafting project that's quick! This project is perfect to make for any time you are looking for a rustic dining table setting or outdoor table setting or you can create these anytime for your table decor at home or for an event such as a rustic wedding or even a special dinner for two. Don't forget you can make these for Thanksgiving table decor setting, or fall table setting too…
Looking for something else to make? See all our sewing projects.
If you are new to sewing this project is perfect as it is super easy, all straight stitching and no pattern needed. Before you know it you will be making a batch of these burlap utensil holders for yourself or even as gifts. See below for the no-sew option.
Affiliate Links May Be Included In This Post.
Not a sewer? you can purchase fabric glue

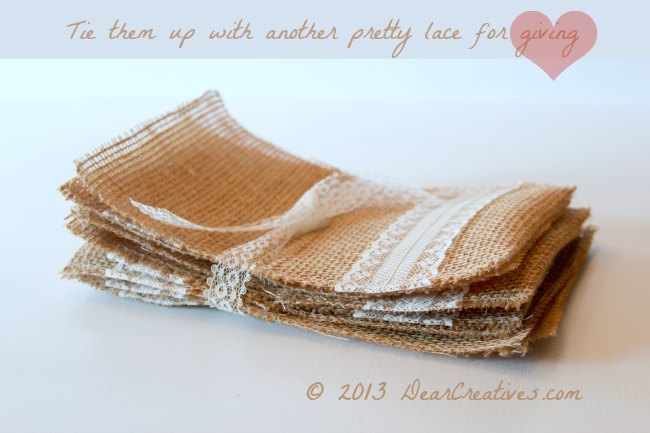
Burlap Lace Utensil Holders
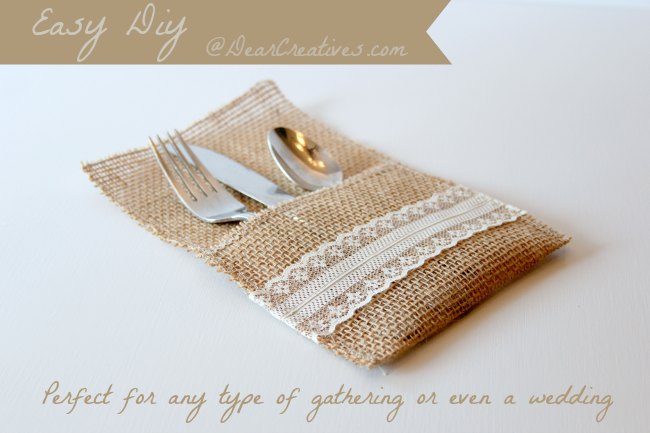
This type of utensil holder is perfect for any type of gathering, event, or wedding. Now onto the Burlap Utensil DIY!
DIY Burlap Utensil Holders
Supplies you will need for this DIY
These products are all similar to what I used and sourced from my affiliate Amazon. I do earn a small commission for qualifying purchases.
- burlap
(woven or any type will do) Cut to Total Size: 6 inches wide x 13 3/4″ for each one
- thread
(wheat or light color)
- scissors
- cardboard or poster board or sewing paper
to make a template (optional)
- ruler
- straight pins
- lace
(size about 1-1/2″ wide)
- For no-sew options omit thread and pick fabric glue
, hot glue gun with glue,
or iron-on tape
. Just make sure the glue is invisible if the weave of your burlap is thin.


The number of supplies you will need vary on how many utensil holders you make.
Instructions for how to make burlap utensil holders
1. The first thing is either to make and cut out a template or just measure and cut one using it as a template for the rest.
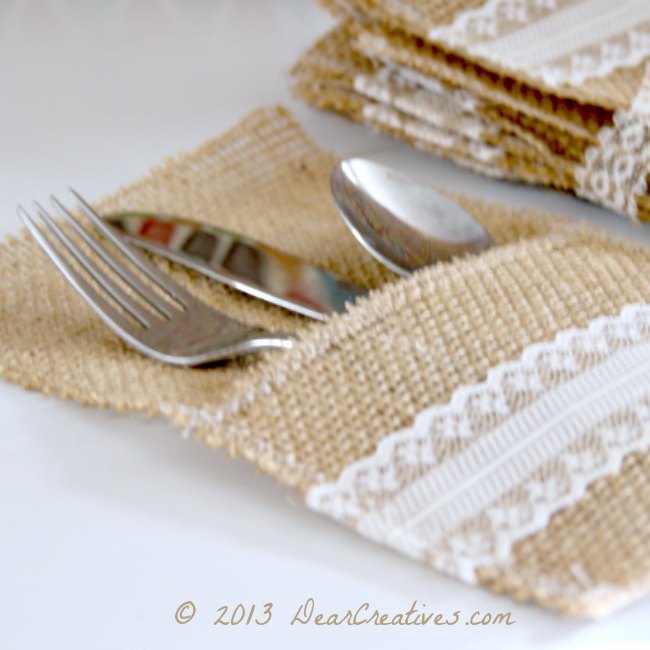
- The measurements I used left enough room to add a napkin to them. Total Size: 6 inches wide x 13 3/4″ for each one you want to make. I made 8 so I cut this size 8 times.
2. Next, cut your lace pieces about 6 1/2″ for each one. (OR) You can put the lace into place by folding the lace across then tucking it under the edge pin and cutting to size. To find placement just fold up your burlap fabric about 4-3/4″ (but, do not sew it yet) I placed mine exactly one inch from where the bottom was going to be which was a little over 1-1/2 inch from where #2 is in the photograph and opening of utensil holder pocket is.
As you see you fold up your 6 x 12- 3/4 ” fabric 4-1/2″ to create the pocket. All sewing prior to the third step is done without folding for the pocket as shown in the image below. (envision your total size burlap flat unfolded to do the first steps, hope that makes sense)
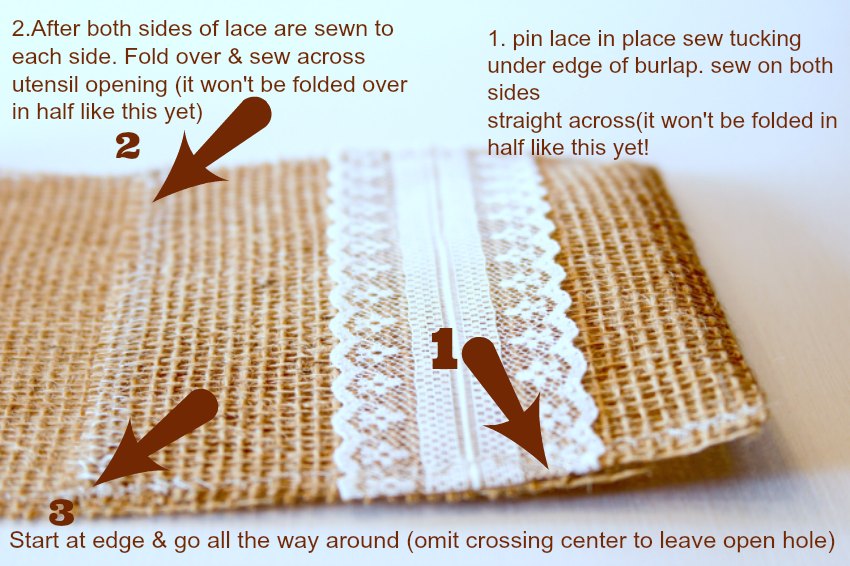
3. Once you do steps one and two you fold up the burlap. Then pin it at each side in place start at one corner and go the entire way around. It isn't necessary to sew across the bottom, sew along one side, across the top, and down the other side like it's a ( u ) shape. I did this so the burlap edges wouldn't unravel and to make the fold of the pocket.
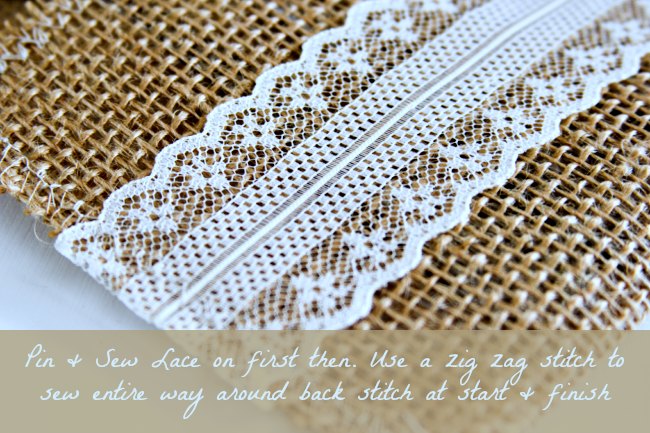
When you sew the lace onto burlap you sew across the side edges (on each side) where you will sew around a final time. If you have questions just ask and I'll try to answer them.
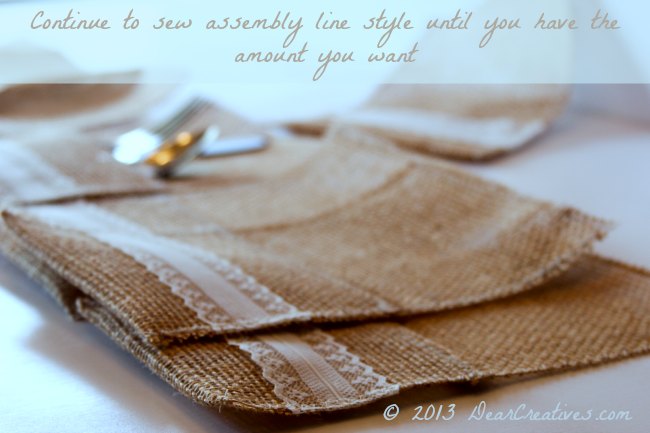
Now you can do this assembly style after you make one, after seeing how easy it is to sew up! Sometimes if you are newer to sewing it's easier with a video or more detailed photos, but I hope I explained it well enough for you to try.
Now you are all ready to have some rustic decor on your festive tabletops and tablescapes.
The lace I used was vintage I had from my grandma. I know just by changing the type of lace you use you can alter the look and feel of these. If you make a Burlap Lace Utensil Holder or set of them, I'd love to see them! You can email me or leave me the link in the comments, tag us on social media @dearcreatives, on Twitter and Instagram, or submit your project to us.
Next, you might even find yourself sewing up some pretty napkins out of fall fabric to add right into your holders too! Need more help here are a few more no-sew silverware holder ideas and resources for you. These DIY utensil holders were made for a summer party and table setting. When or what even will you make yours for?
- New here? Be sure to subscribe!
Helpful Video Tutorials DIY No-Sew Silverware Holders
- This tutorial for silverware holders uses iron-on tape
. This is another option that is perfect to use instead of sewing, glue, or hot glue.
- Handmade Wedding: Burlap Cutlery Holders has a few more ideas to go with a rustic-themed event or wedding.
Looking for more ideas to make?
Related Content
Wedding Ideas
- Burlap Wedding Banner DIY
- Love Is Sweet Wedding Banner
- How To Make A Boutonniere
- DIY Mustache Props – Tutorial (Fun wedding or party idea)
- DIY Upcycled Utensil Holder (To Match Your Theme/Party or Event)
New here? Be sure to subscribe!
- Be sure to add our RSS feed to your favorite reader and subscribe and never a post.
- Follow us on Pinterest
- Wedding Inspiration Pinterest
- Pin it for Later
Not making this project now? Pin it for later: DIY Burlap Utensil Holders
Looking for more fall crafts or content?
- You might want to make some Velvet Pumpkins to go with these! Visit this pumpkin decor DIY post to see this easy how-to, and grab a tutorial to give it a try!
- Fall Craft Ideas
- See all our Craft Ideas
Helpful posts that are related
- colorful easy burlap utensil holder DIY
- Thankful Burlap Utensil holder Etsy
- Tutorial for Cutting Burlap (so it won't unravel)
- 10 Burlap Wedding Ideas
This post has been updated to include more helpful content, resources, and information.
They are really pretty, what a beautiful way to present cutlery
Hi Mel, Thanks for taking the time to comment. I am glad you like them.
These are beautiful! I”ve been thinking about making some like this! What a great idea 🙂 Going to pin it right now!
Hi Cara, Thanks so much for pinning. You should there super easy. If you run into any problems or questions just ask!But, I don’t think you will.
So beautiful and elegant, Theresa!
Hi Amy, Thanks so much for your visit & lovely comment. I hope you saw my party & took time to share something while you were here.
Oh what a neat idea, I am not sure that my sewing machine and I speak the same language yet, but I did get some no sew stuff the other day at walmart. This would even be nice to make a couple for an in house date night with the hubby to make the setting feel a little more detailed and special…can’t wait to try to make it !
Hi MJ, Yes perfect for a lovely romantic dinner! Hope you make some! Glue will work fine as long as it’s for fabric, dries clear. Optionally you can try clear glue w/ glue gun.
Oh my gorgeousness! I just want a set of these to use in my house for when I feel like fancy pantsing it! We’ll be featuring these beauties over at Someday Crafts tomorrow 🙂
Hi Miranda, Thanks for sharing & your visit + lovely comment.
These are just too cute! They would be perfect for thanksgiving!
Thanks Stephanie!
The lace on there is so sweet! What a great idea to get part of the Thanksgiving table done early….
🙂
hugs x, Crystelle
Crystelle Boutique
Hi Crystelle, Yes trying to get a jump on things as I am traveling this year & co hosting at a daughter’s house out of town. Our whole family is gathering there. Hope your holiday is great! Glad you like them.
Thank you for sharing at our TGIF Link Party at A Peek Into My Paradise! Your post is featured at this weeks party I can’t wait to see what you share this week! I am currently accepting posts for themed bloggers showcase/roundups and would love for you to participate! Go here for the details and to join in on the fun! http://apeekintomyparadise.com/bloggers-showcase-submissions Cathy @ http://apeekintomyparadise.com
Hi Cathy, Thanks so much for the feature. I hope I can drop by again soon with a project or recipe. Hard to get to all these fun parties everywhere. Especially when things get busy but, I’ll try!
I ABSOLUTELY LOVE THEM! I’VE MADE SOME FOR GIFTS AND MY FRIENDS CAN’T GET ENOUGH OF THEM. GREAT TUTORIAL !
HERE IS A L INK TO MY SITE http://maresmarvellouscreations.wordpress.com/miscellaneous/silverware-holders/. I
Hi Mare, Thanks for sharing the ones you made with me. I enjoyed dropping by to see yours. Glad you had the chance to try the tutorial and are enjoying them!