This post contains links to affiliate websites, such as Amazon, and other affiliates. We receive an affiliate commission for any qualifying purchases made by you using these links. This is at no additional cost to you. We appreciate your support!
Welcome, fellow gardeners! If you're looking for a clean, efficient way to organize your collection of seeds, this is the perfect project. This post shares our Free Seed Packet Template—available in three distinct designs—and a simple DIY tutorial perfect for preserving your garden harvests.
With gardening season in full swing, these packets are incredibly versatile. You can use this project as a sweet Mother’s Day gift idea by adding flower seeds to the packet, or as a fun activity for kids to celebrate Mom by planting flowers with her in the garden.
These seed packets are also essential for practical gardening. They are perfect for collecting and organizing seeds you've saved from your own plants, or for storing any extra seeds you have leftover after planting season. It’s an easy papercraft solution for any gardener, any time they need a reliable DIY seed packet.
Grab the free printable below and start making your custom seed packets today!
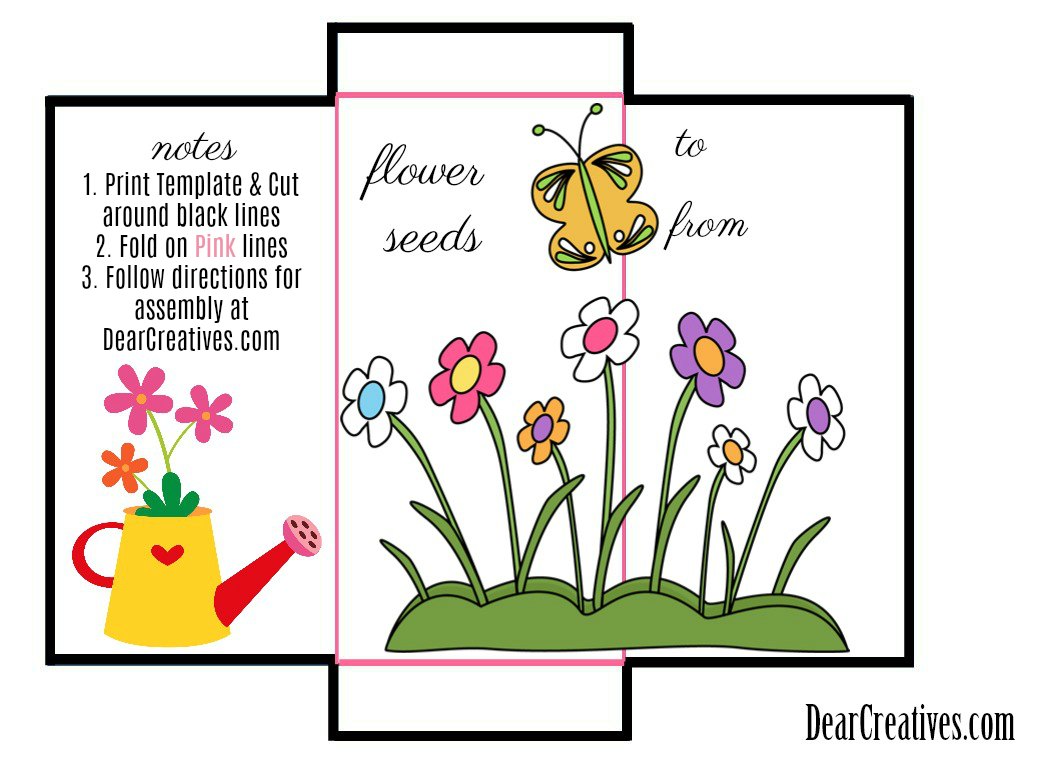
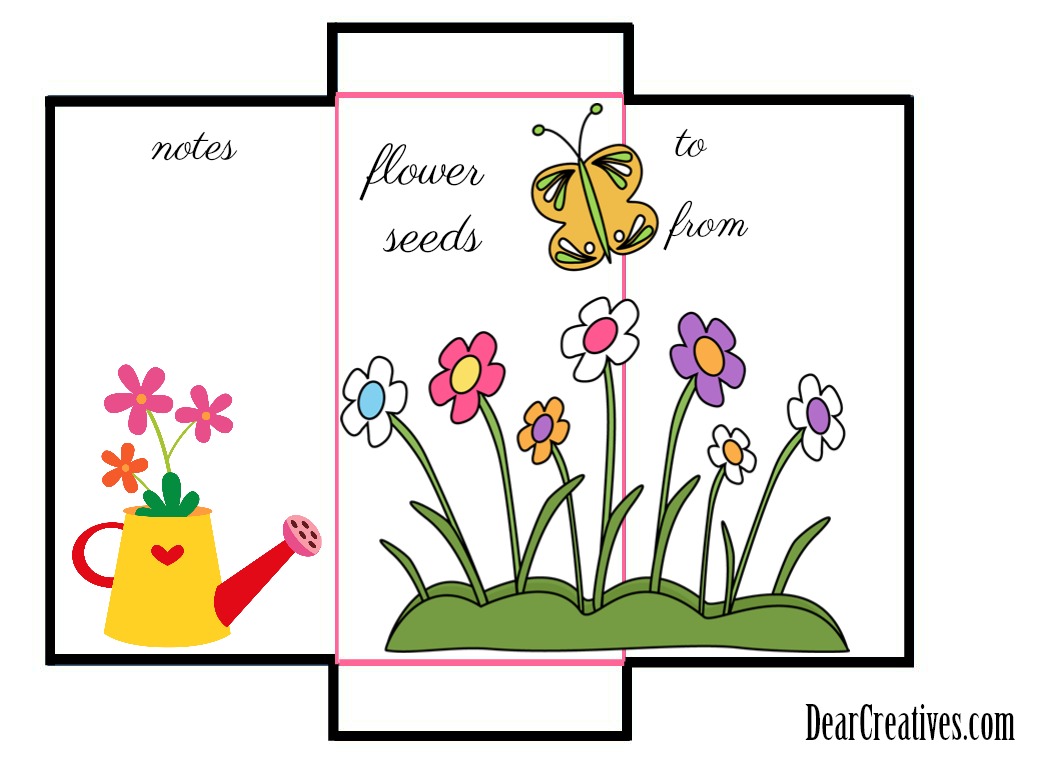
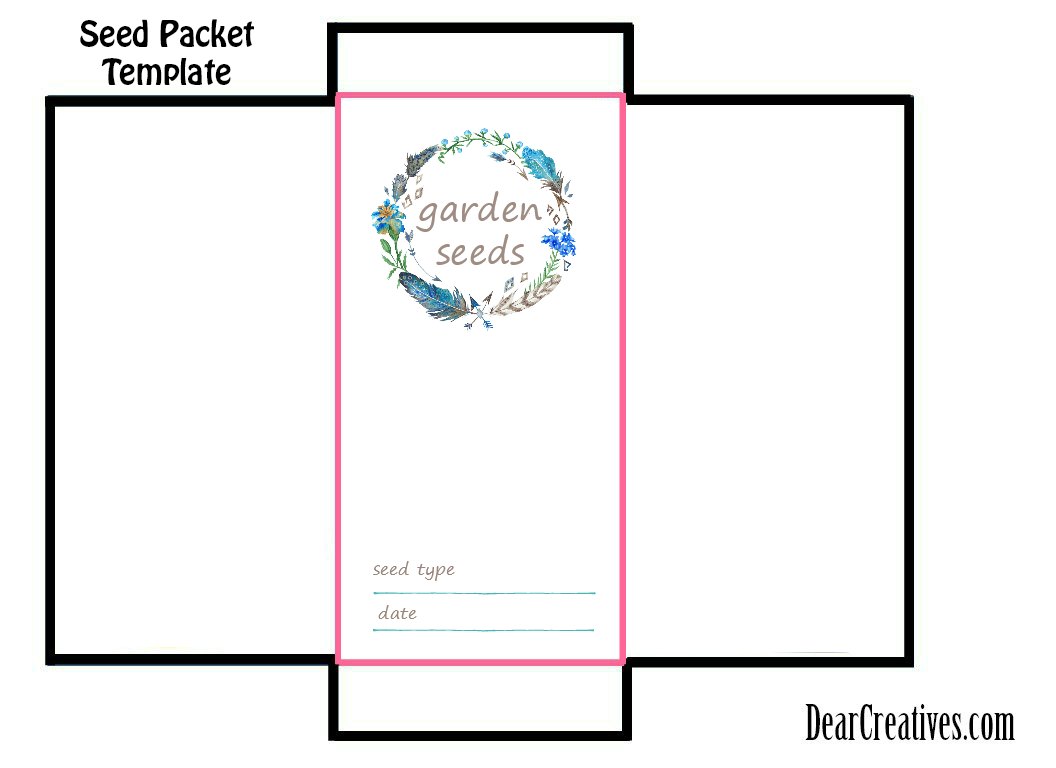
Seed Packet Template
Garden DIY
This seed saver DIY is easy to make. Another gardening gift you can make is thisHerb Garden Kit DIY,which also comes with a free Mother's Day printable and a garden printable.
How to make a seed-saver envelope
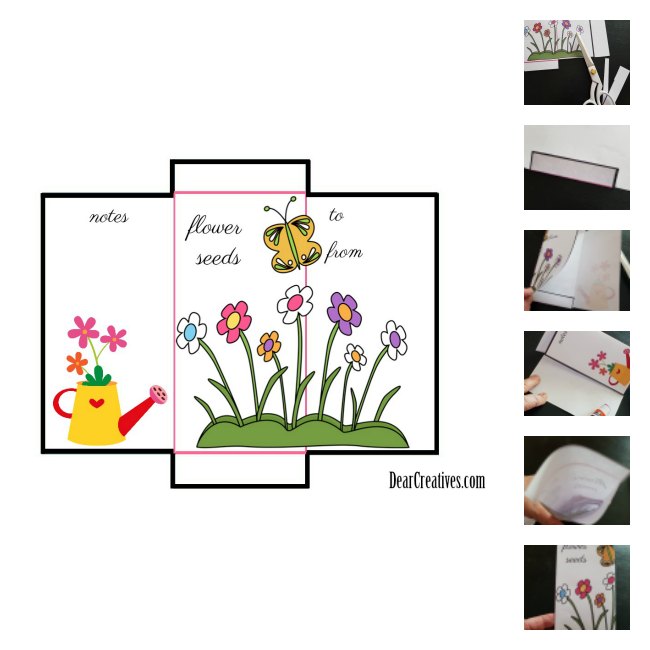
You will find 3 templates to pick from in the post. A flower seed-saver template, a garden-seed saver template, and a blank template for your seeds with no design. These are for personal use only.
Steps for making a seed-saving envelope
Start by downloading the seed packet template and following the instructions to cut it out and glue it together.
Grab any of the free seed packet templates (below)
Fold the bottom flap up and glue the top of the bottom folded flap
For the next step, NOTE: Which design do you want to be your top? It will be folded down, and glued last! Back Side Options for one envelope are (to – from) or (garden notes). Only one side will be shown
Glue stickone side down to the bottom, and press the one side only to the backside of the front envelope (this piece will not be shown on the back of the envelope)
Fold the next back of the envelope top-down, and glue around the 4 sides *LEAVE TOP FLAP OPEN
For clarity, there is a video that has the same gluing method, but the envelopes are cut by hand with a no-print option
Print the Seed Envelope Template and follow the steps to make a seed envelope!
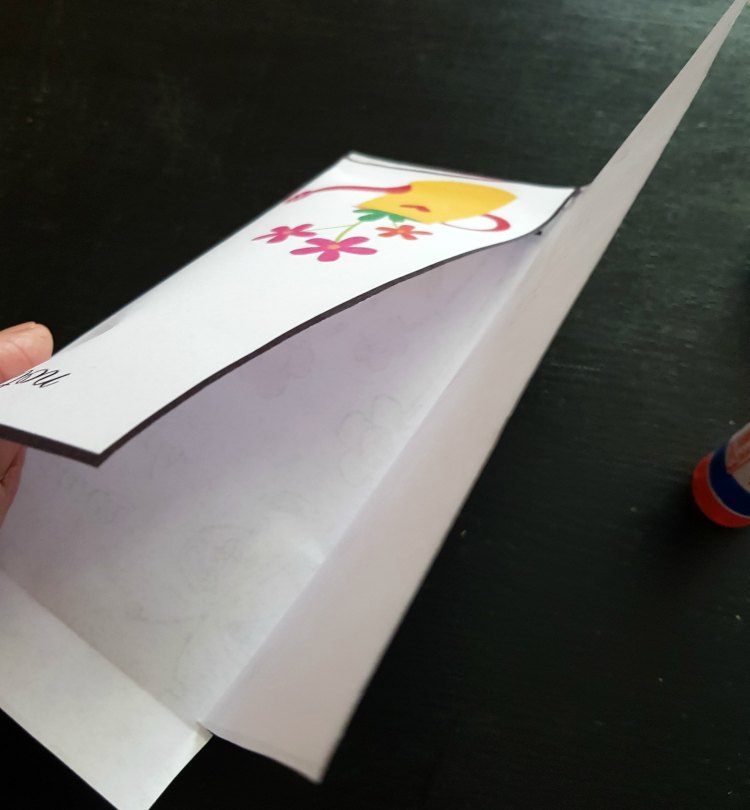
The only steps that may be tricky the first time are steps 6-9. Here are a few larger images to clarify the steps.
Close-up Steps of Gluing The Seed-Saver Envelope
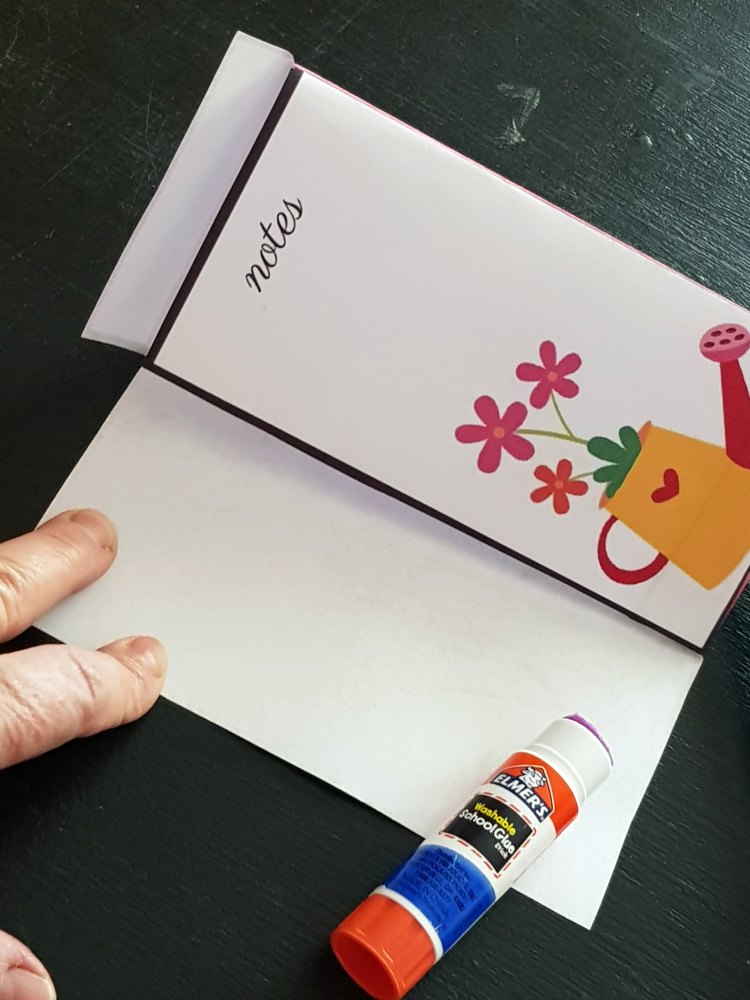
Step 6: Fold the bottom flap up and glue the top of the folded bottom flap
Step 7: Pick backside design (if needed)
Step 8: Glue stick one side down to the bottom, and press the one side only to the backside of the front envelope (this piece will not be shown on the back of the envelope)
Step 8
Fold the backs – top side down, and glue around the 4 sides *LEAVE TOP FLAP OPEN
Fold the top flap down after adding seeds, and seal only if you want to.
Step By Step-by-step images of how to assemble an envelope
Use regular glue sticks orre-positional glue sticks. I hope to make a few more designs when I have the chance. However, I thought this might be a fun and easy kids' craft that kids can make for mom, grandma, or auntie.
Here's another way to make seed packet envelopes, and the video tutorial shows you how to glue your cut-out envelope. Sometimes it's easier to see it being done than read about it. I hope you enjoy making a few for yourself or as a gift.