This post contains links to affiliate websites, such as Amazon, and other affiliates. We receive an affiliate commission for any qualifying purchases made by you using these links. This is at no additional cost to you. We appreciate your support!
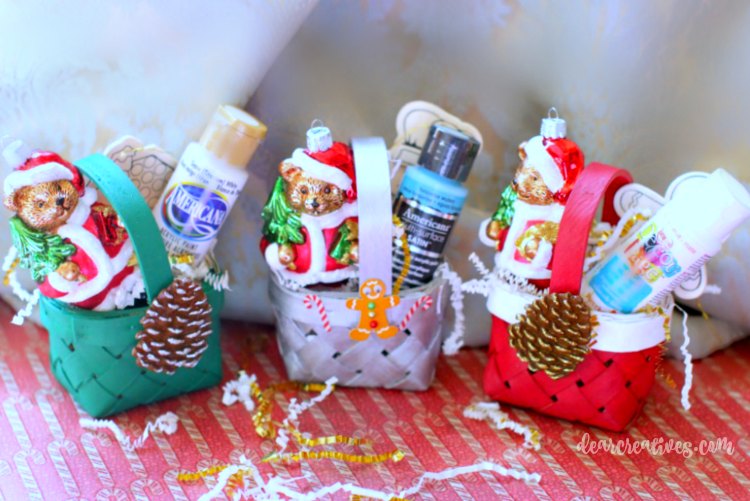
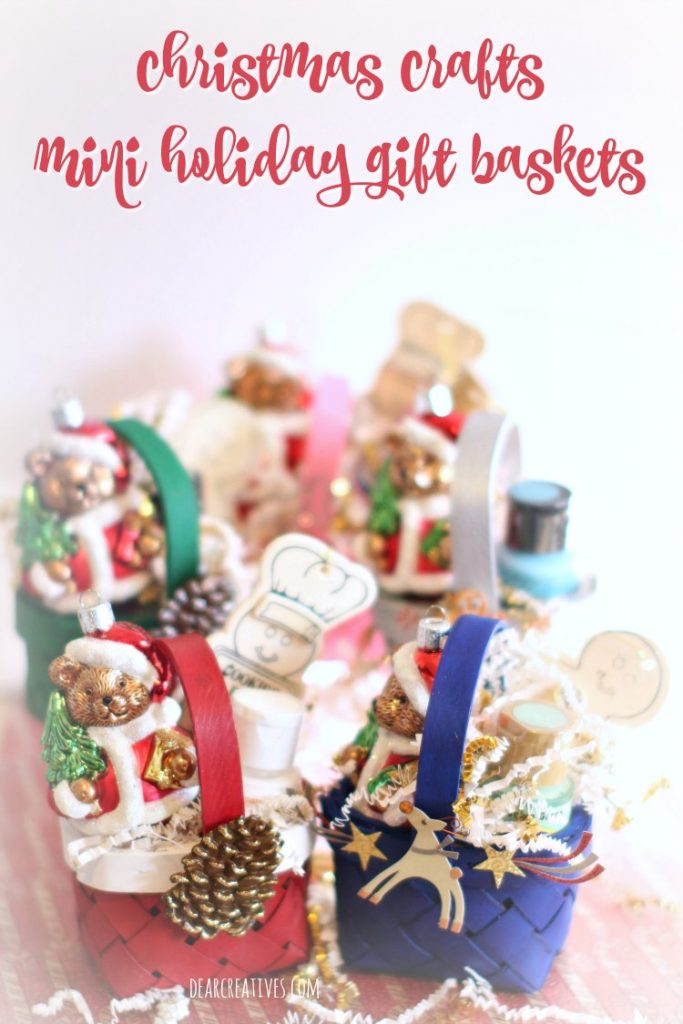
Are you looking for an easy, affordable, and incredibly versatile project for the holiday season? These Mini Christmas Gift Baskets are the answer! This simple craft involves painting and decorating tiny baskets that you can then fill with small gifts, candies, or craft supplies.
This post is packed with ideas for using these personalized baskets, whether you need a fun afternoon craft for kids or a thoughtful handmade gift idea for a co-worker or neighbor. We’ll show you how to customize the baskets for all ages, from simple paint designs for little ones to more detailed decorations for crafty teens and adults.
These mini baskets make the best DIY teacher gifts and are perfectly sized to be used as unique stocking stuffers! Grab your paint and glitter—it's time to start creating the cutest little handmade gifts for the holidays.
All the supplies for this project are easy to pick up from your local craft stores or Amazon. The mini baskets typically come in packages of six. For the fillers, items like shatterproof ornaments are often found in packages of three, making this a very cost-effective craft to scale up!
To get started, you'll first decide on your paint colors to customize the mini basket, then embellish them with accessories. Once finished, you simply insert your little gift. For my baskets, I added acrylic paints, mini paintable wood ornaments, and non-breakable ornaments.
You can customize these mini-gift baskets in many ways. And they make fun, budget-friendly Christmas gifts! Add any little toys, candies, jewelry, or trinkets. The best part is that you can probably grab a lot of things on sale for the season right now. Let's get started.
Step-by-Step Instructions for Painting and Decorating
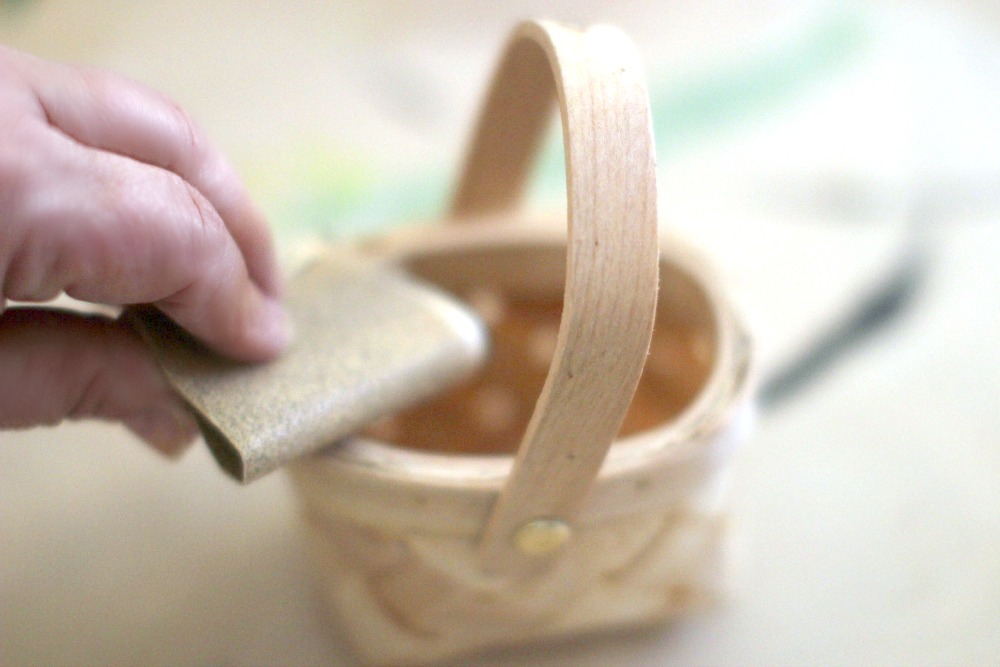
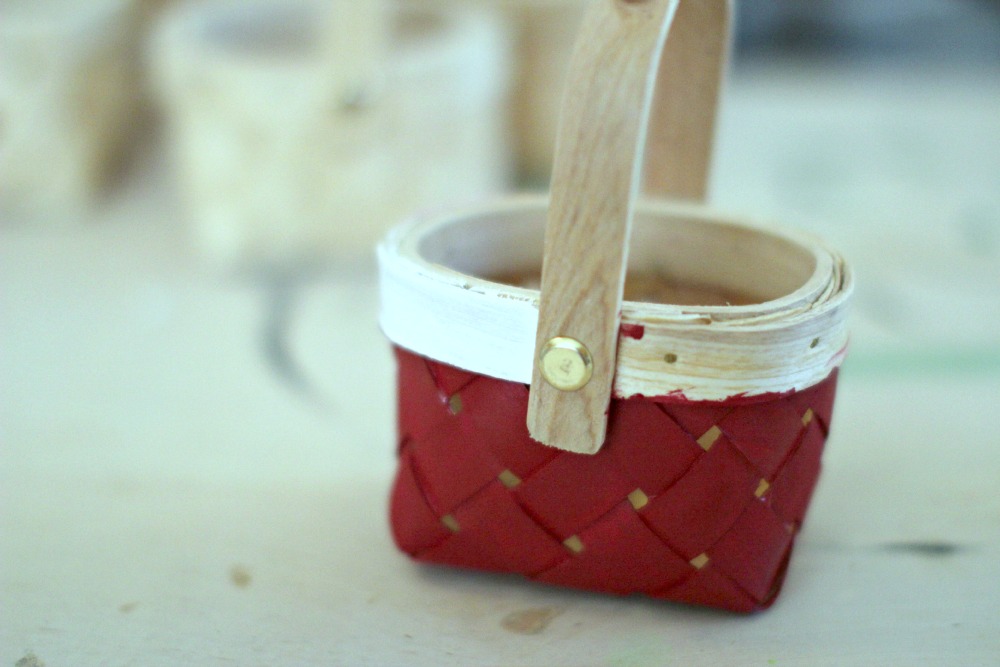
Prep for painting the baskets: Sand the mini baskets
Clean off any sanding dust!
First, sand off any rough edges with sandpaper. Then, dust off to ensure your surface is clean and smooth.
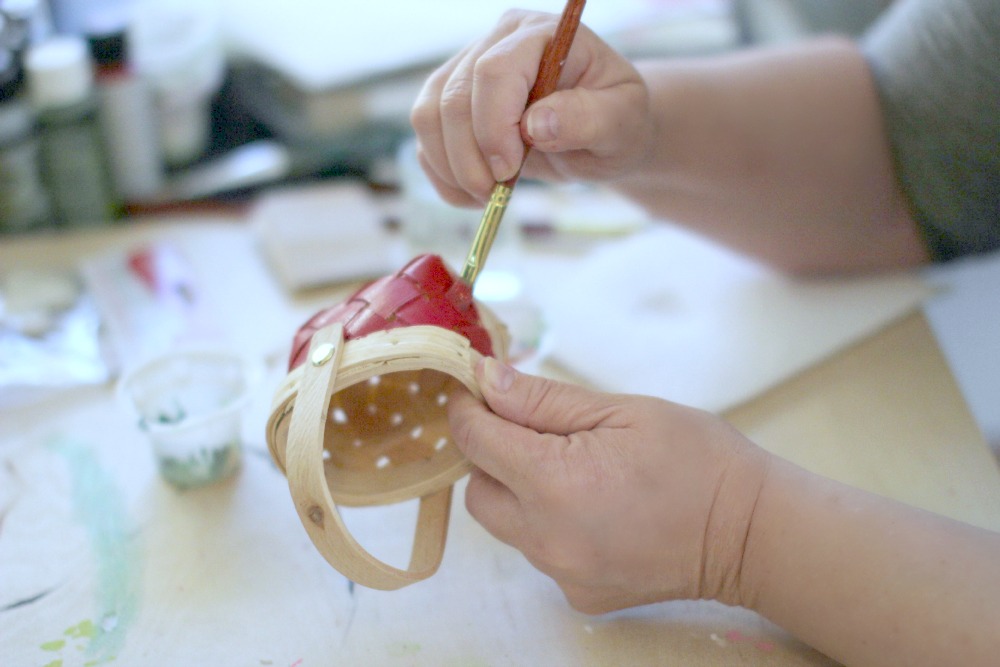
Begin painting the basket ornaments
Craft Project Notes: Let the paint dry between coats.
Next, paint your baskets. No need to pre-coat with anything. Give it one coat, don't overload the brush; this is key if you don't want the paint to seep inside the holes of the basket. I didn't paint the insides, but you can if you want.
Paint all sides of the basket and the bottom
Turn upside down and paint under the handle.
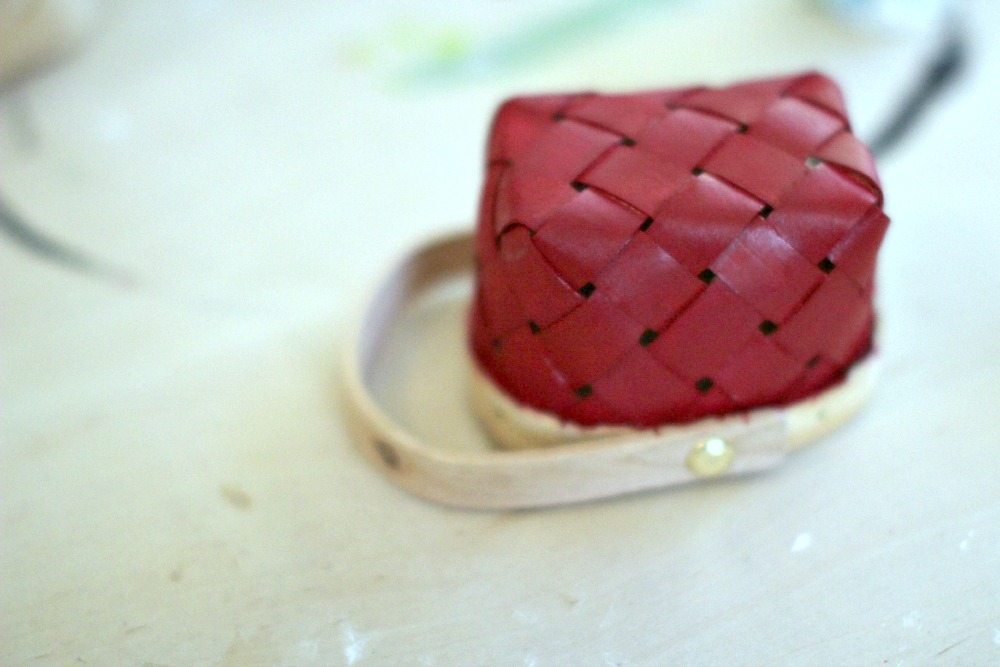
Paint the trim on the basket
Next, paint the trim white if you'd like. Additionally, you can also paint it one color and add Twinkles, glitter paint, which will make it sparkle.
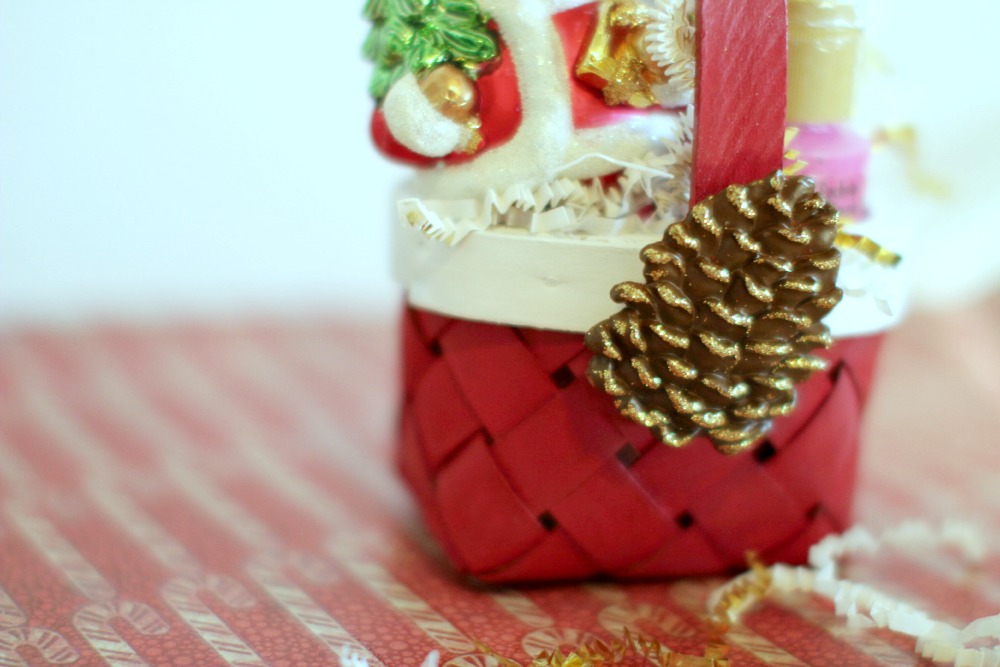
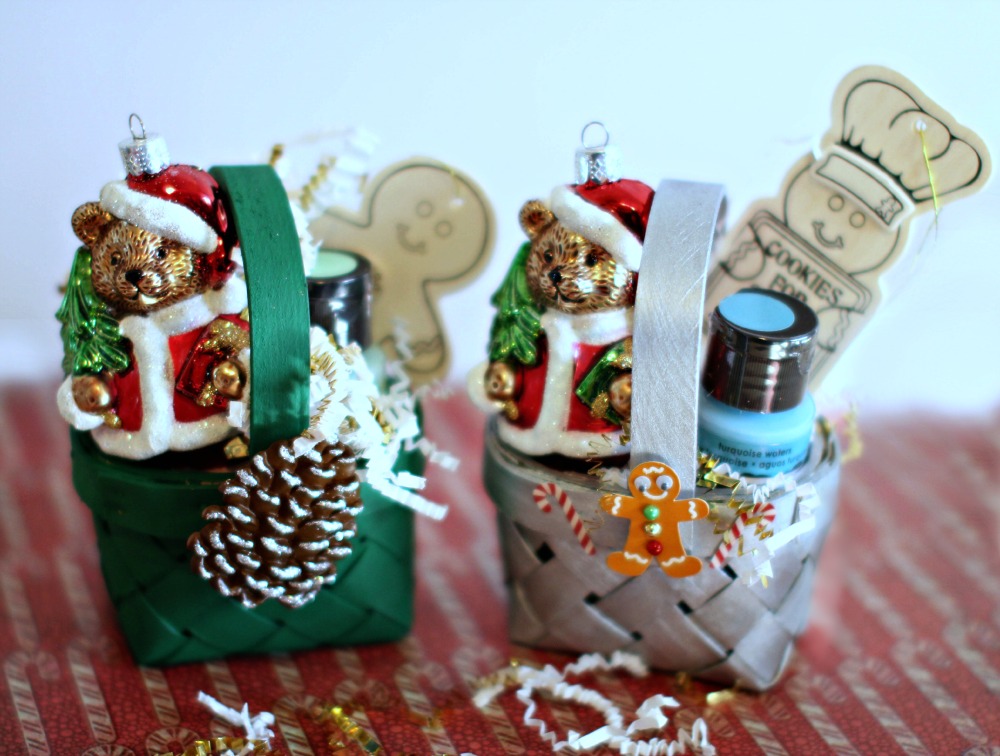
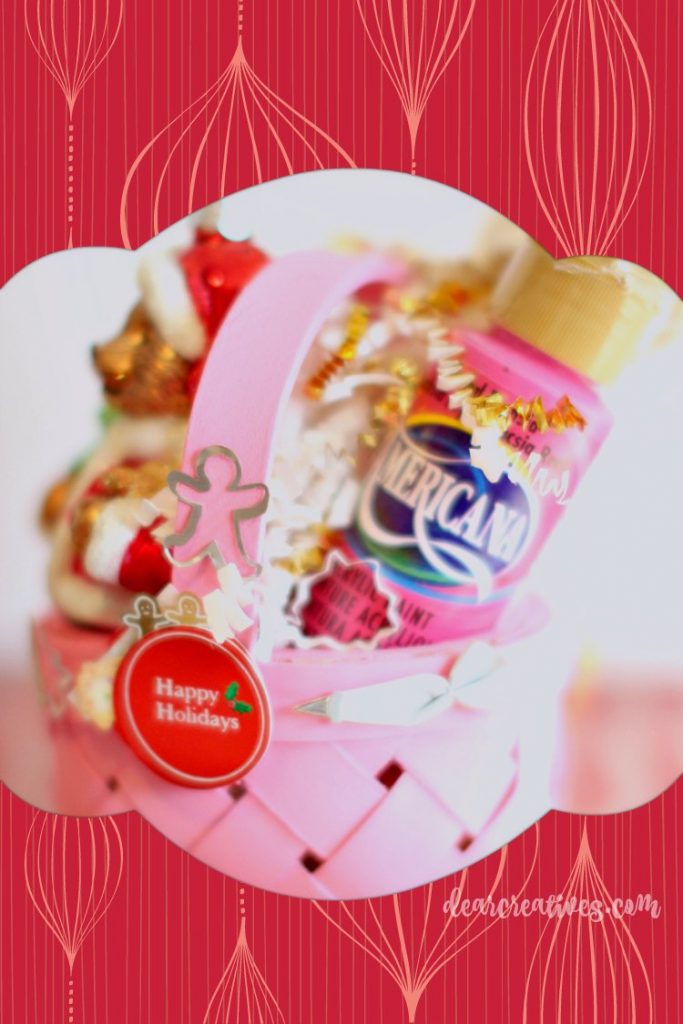
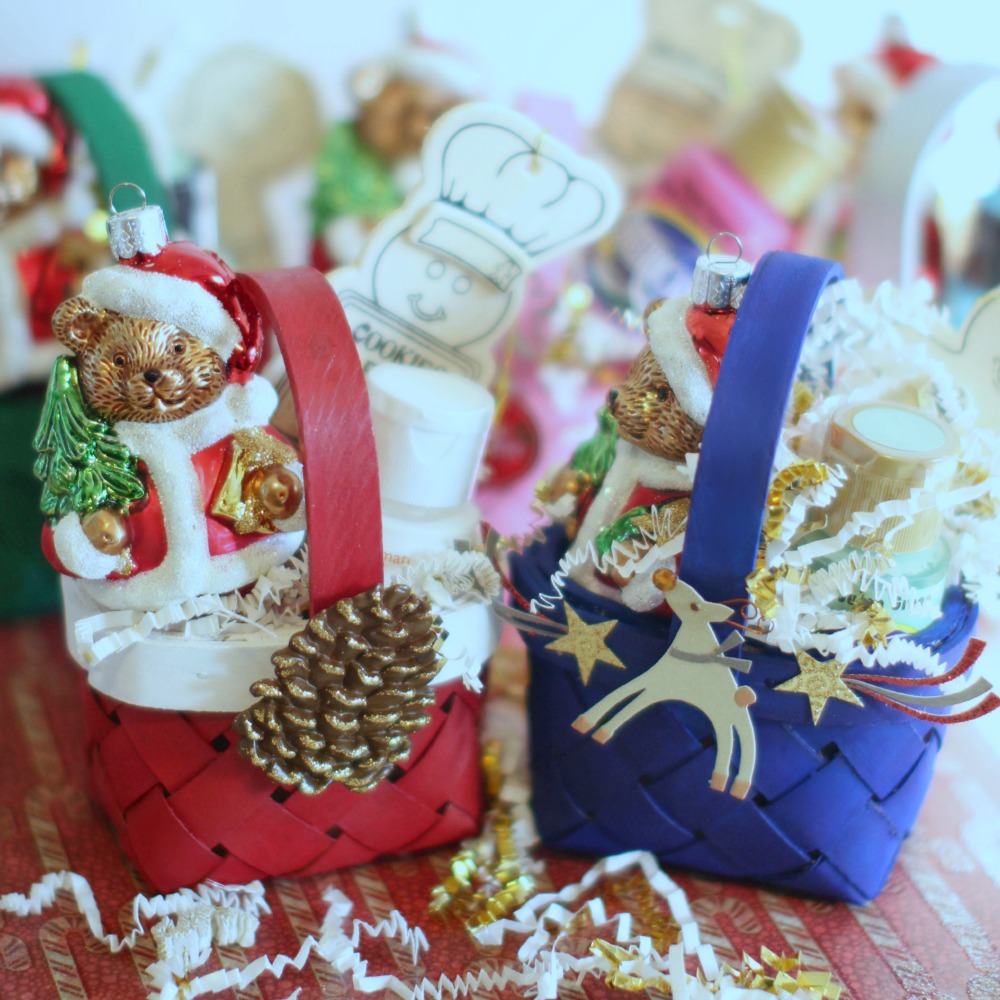
Personalize the mini basket gift by embellishing and adding small gifts to it
Personalize them by adding a scrapbook holiday pinecone or other holiday embellishments. The embellishments have a sticky back and adhere well. If you are making them for smaller kids, such as toddlers, you might want to hot glue them on or leave this step off, depending on their ages.
My granddaughter is learning to love baking. Her favorite color is pink. I personalized this basket for her. With mini holiday stickers.
Add ribbons, holiday fillings, and make them festive as you want.
Put your favorite paint colors and mini wooden ornament kits into the baskets.
You can make this a Christmas craft for kids, too. I know the kids will love painting their own wood ornaments and hanging them up on the tree next year.
I hope you enjoy making your holidays festive and fun!
Happy holiday crafting! And making and gifting handmade gifts.
Portions of this post may have been published previously on Decoart's blog
What types of Christmas crafts have you been making?
Green