This post contains links to affiliate websites, such as Amazon, and other affiliates. We receive an affiliate commission for any qualifying purchases made by you using these links. This is at no additional cost to you. We appreciate your support!
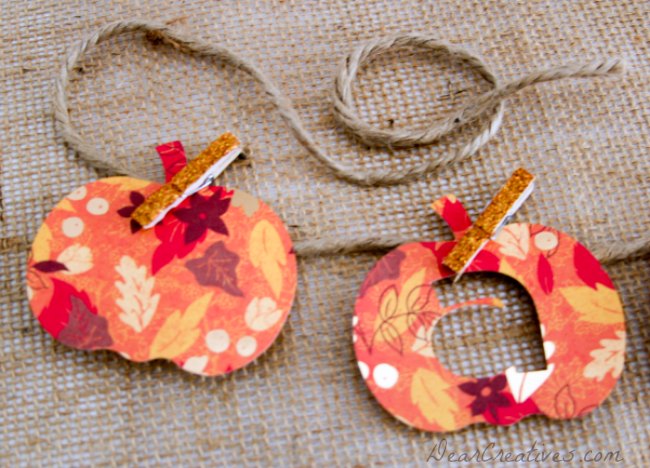
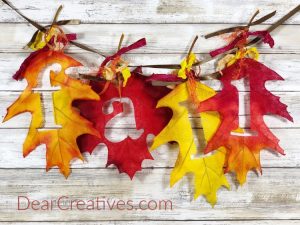
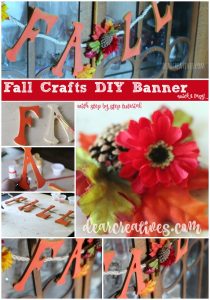
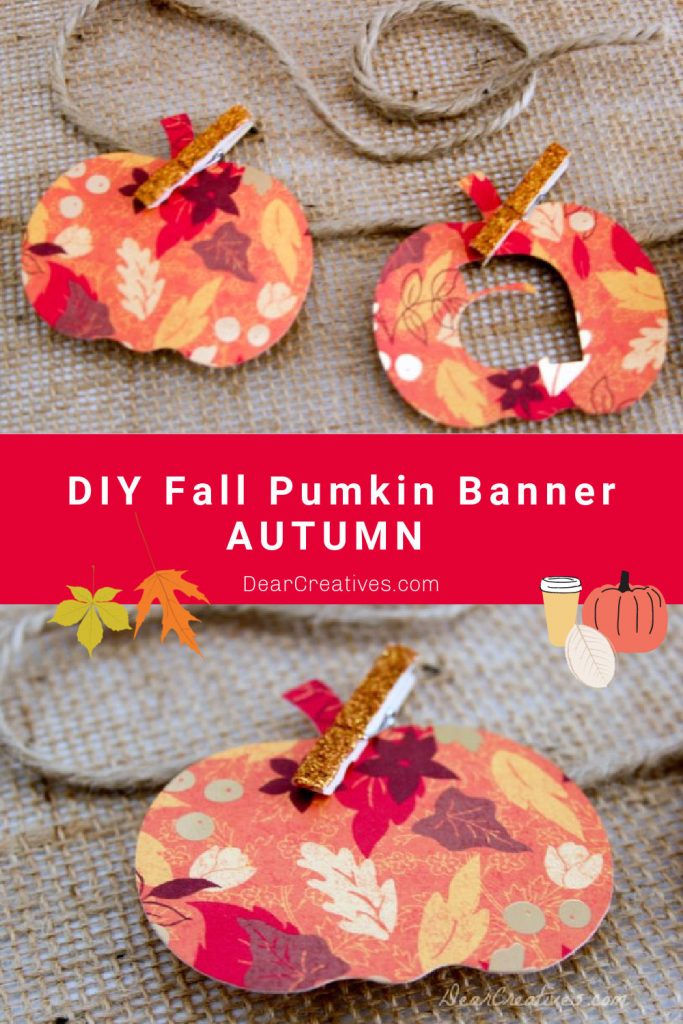
Are you looking for a quick way to dress up your mantel? This DIY Cricut Fall Banner is the perfect weekend project! Using cardstock and a few simple supplies, you can create a beautiful paper pumpkin garland that says ‘Autumn.' Whether you use your Cricut machine or cut it by hand, this project adds the perfect festive touch to your home decor.
New to making projects like this or considering getting a digital cutting machine? Start here: Cricut Crafts. For more ideas, check out my full list of20+ Fall Cricut Projects! And for our latest crafts, find all our Cricut Craft Ideas here.
Don't worry if you don't have a digital cutting machine; find craft projects to cut by hand at the end of this post. Or even cut this one by hand (without the inside cuts). Are you ready to make a pumpkin banner? Making banners and garland is so easy!
Fall Pumpkin Banner
I managed to create another banner this past week while Sammie was in school. Seriously, projects like this come together quickly. So whether it's the weekend, naptime, or the kids are in school, making Paper crafting is something easy to do. And a great hobby! It's fun putting together the pretty papers with earthy twines or pretty ribbons. Finding the right combinations that just seem to fall into place.
How to Make a Fall Banner with Cricut (Step-by-Step)
Design Your Pumpkin Shapes: Open Cricuts Design Spaceto find a pumpkin shape or use the ‘Autumn' letters. If you aren't using a machine, you can hand-draw your pumpkin outline or use a program like Illustrator.
Layout and Sizing: Decide if you want internal cuts or just the pumpkin outline. In Design Space, fit as many shapes as possible onto one sheet of cardstock, allowing for proper spacing.
Measure Your Hanging Space: Decide where you will hang the finished banner. Measure the length of your ribbon or twine, allowing for plenty of extra on the ends.
PRO-TIP: Leave one end of the twine on the spool or roll while you work! This allows you to adjust the length as you lay out your project.
Cut the Materials: Follow the prompts in Design Space to cut your cardstock. If cutting by hand, draw your outlines on the back of the paper and use detail scissors.
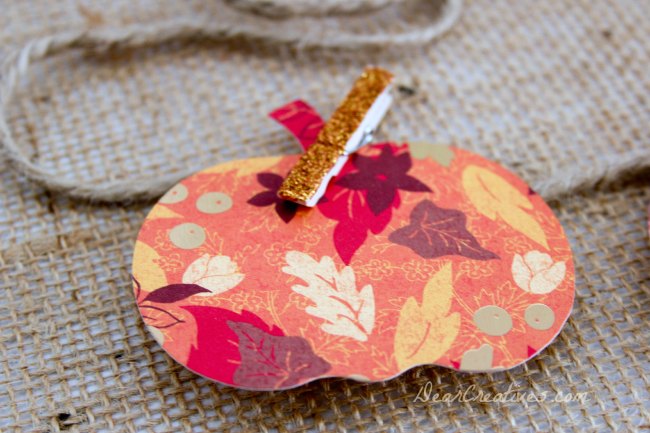
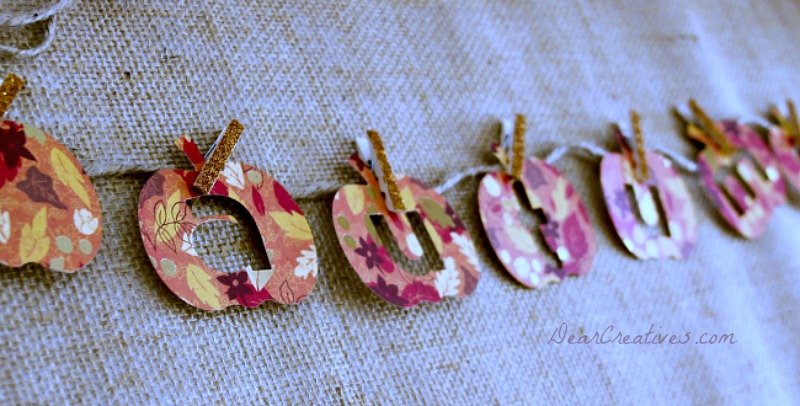
Assemble the Garland: Use mini clothespins to attach the paper pumpkins and letters onto the twine.
Final Adjustments: Once the spacing looks perfect, cut the twine from the spool. Your banner is ready to hang!
Project Notes:
You can design your projects for free in Design Space even if you don't have a Cricut yet!
Or you can purchase a print-and-cut design to use.
65lb to 80lb textured cardstock works best for durability and a high-end look.
How do I hang a banner without a mantel?
You can use Command hooks on a wall, draped over a mirror, or across an entryway.
What is Cricut Crafts?
I am inspired by creative paper crafters out there! Some work by hand, paper cutting, which is a true art, and then, like this project today, which is done with a digital cutting machine, like my Cricut. Using a Cricut to cut is so easy, then assemble the banner or make other craft projects with the Cricut. If you are looking for fresh inspiration, I share my favorite Cricut Craft Ideas here!
I did create the design files (with cuts) using Cricut's Design Space, which is explained below. Cricut has come out with so many new machines, including the Joy machine and Joy Extra, which are perfect for making banners and cards!
7. What is Cricut Design Space?
The Cricut Design Spaceis a free online access studio that you use when you sign up for Cricut to design and to use your digital cutting machine. I love the updated features and how you can size and layout your designs before cutting. Fewer mistakes happen this way.
It's easy to connect your machine to the online studio, and once that's done, you are set. Occasionally, there will be an update, and prompts will keep you up to date. Now with Cricut's Design Space, you don't even need a cartridge for the machines! Plus, if you need to, you can purchase individual images or use the Cricut Access subscription for even more design possibilities.
Cricut has come out with so many new machines including the Joy machine which is perfect for making banners and cards!
Where To Purchase Design Files and SVG files for Cricut projects?
This is my favorite glitter for crafting! Perfect for mini clothespins. As explained in the previous paper-crafting posts. I am falling in love with designing fall banners. I hope you enjoy seeing them as much as I enjoy making them.
Somehow, I managed to find a little time to create this banner. Ya! (I wish I had gotten a better image of the full banner; our living room is dark. And I didn't even try to take the photo in there. Maybe someday I update this image. This image was originally taken way back before I took online photography classes.
or Autumn Splendor by DCWV are great for fall projects.


Beautiful Fall banner. I love the fall paper used.
Hi Judy, Thanks for dropping by! Me too it was in a 12 x 12 paperpack & only a few of each one. Hope to see you again soon.
This is so cute!!
Thanks Mindi, I have been too busy to do big projects. But, I have a few things up my sleeve waiting for the right time to get through them.
Oh Theresa – the banner is just beautiful 🙂
I like the pattern and the colors – great job!!
Thanks Winnie for your complement & visit today!
Glad to see you at All Things Pretty. I love this and I love my Cricut
Hi Leslie, Thanks for dropping by. Always glad to stop by when I can. Nice to know you love yours too!
What a fun idea! love the paper you used! I would love to have you come and share this at my link party! http://www.madetobeamomma.com/2013/10/homemade-70.html
Thanks Katie, I will try & drop by sometime soon, thanks for the invite.
Such a cute autumn banner! Die cut machine totally is a live saver! 😀
Hi Helen, I agree & they are great for when you want to do simple seasonal projects or larger cut projects.