The Perfect Beginner Project: Easy Snowman Ornament Pattern Review + 3 Pro Tips
Are you looking for the perfect beginner ornament pattern? Or tiered tray decor? Recently, I purchased the cutest Frosty the Snowman Ornament Pattern. This adorable Etsy snowman pattern is exactly what you need. Here's my honest review.
This is perfect if you are looking for quick and easy homemade gifts to make and give. Or to make decorations for your Christmas tree or to decorate your tiered tray shelves for winter!
I picked up the snowman ornament pattern (craft sewing pattern) on Etsy. And with leftover fabrics and fabrics I purchased at Walmart, I am making more. I thought I would share how my easy sewing craft project turned out and give you the sewing pattern review.
Are you looking for something else easy to craft or make? Try this DIY Potpourri With Free Printable Label. Or this Printable Christmas Potpourri Recipe. Or try our hand-sewing Felt Santa Ornament Pattern.
DIY Snowman Ornament Pattern

If snowmen aren't your thing, or you don't sew on the sewing machine. I also purchased patterns for felt cat ornaments and felt mushroom ornaments, both are made by hand-stitching. I can't wait to get those made and share them. As for the snowman ornament, I was only going to make a few, and then my little grandson saw them and said, Is that for me? Well, how could I say no?
How to use these snowman mini pillow decorations when they are finished?
Use them as an ornament on the Christmas tree, in bowls as bowl fillers, on tiered trays, or even on a shelf. Give them as handmade gifts during the holidays or winter. Note: if gifting to kids, omit the safety pin when adding the tag. My grandson put his on his bed as a decoration.
Who is this pattern for?
Anyone with basic sewing skills and basic sewing machine skills.
Was the Pattern Easy To Follow?
It is easy to follow. Although there are a few things I either missed in the directions (or were not stated), or decided were better to do differently. Let me elaborate on this.
The Tricky Step
- HELPFUL TIP: It is easier to embroider the face before adding it to the mini quilt square pillow. This is a big one!
- For Stuffing The Pillow: I did try to sew the pillow and leave an opening on the side (to stuff and close). But the pattern method is better as you don't have the side seams show on the pillow.
HELPFUL TIP: Take care to cut the hole without going through the back layers, which is mentioned in the pattern. And make sure to place the cut where the little snowman's face will cover it, (stuff the pillow and stitch the seam up), as you will sew the seam up! - Stitching the face on: Tip: I used 3 strands of embroidery floss, but you can use one or two, and then the stitches won't show as much (and still do the job).
- They are so easy to make, each one a little differently! Customize them to your liking! Add rosy colored cheeks, or not. Make cute little velvet or ribbon bows, attach mini bells… Easy!!
Instruction Quality
It comes with an Instant download, a PDF pattern with pattern and instructions. You will need a printer and printer paper. Downloading on a desktop from the purchased Etsy file is easy!
- The instructions are clear. The print quality for the pattern is excellent. The pattern does come with written instructions, diagrams, and images to help with the steps (Use my tips to make it even easier).
What skills do you need to make this snowman pattern?
- Sewing machine skills: Basic sewing knowledge for sewing straight seams and turning corners.
- Basic hand sewing skills.
- Basic embroidery stitches. (cross stitch and blanket stitch or other for sewing the snowman face to the pillow).
- YouTube has a ton of tutorials for any of these steps mentioned above!
Get The Snowman Ornament Pattern

Designer Snowman Faces on Mini Pillows: View Shop CyndyFaheyDesigns
Supplies, materials, and tools for making the snowman pattern
There is a complete list in the pattern description for supplies, too! These are the ones I used. Be sure to check your craft and sewing stash for what you have on hand.
- The Snowman Ornament Pattern and Paper Cutting Scissors, Ruler: (For making a square piece pattern for the quilt pillow squares and back).
There is a circle template and a template with the face. - Sewing machine and basic sewing supplies: Bobbin, Thread, a Needle (to stitch up stuffing hole by hand), Sewing Scissors, Straight Pins, Small Snaps like these or these: ( 80-10-1 OR .35” or 9mm tiny for making the eyes), Fusible interfacing light-weight (light), and an Iron for pressing seams (in your 4 patch). Fiberfill for stuffing (low-loft).
- Cotton material (like this) or like this: 2 different fabrics (you will cut to size) -3” squares x 4 pieces. And Cotton or flannel 1- 6″ square for the back.
- White Wool Felt for the face and Orange Wool Felt for the nose.
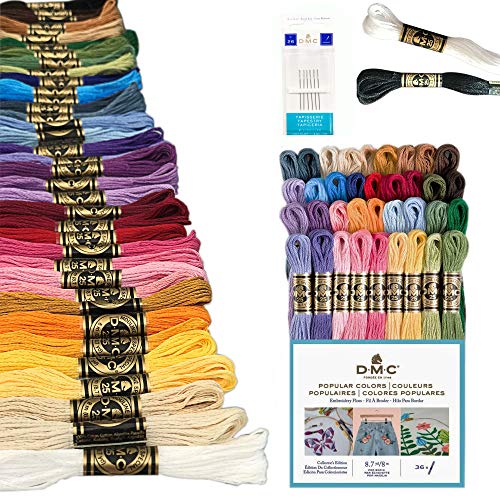
My favorite Etsy shop to buy wool felt and felt supplies is BenziDesigns. - Embroidery Thread (white and black) and a Sewing Needle (for embroidery thread). My favorite is the DMC Embroidery Thread, which comes in a color set, which is perfect for crafting. And multiple sewing and craft projects.
- Fabric Glue or Tacky Glue (for securing eyes and nose).
- Optional: Powder blush for adding a rosy glow to the cheeks.
- Embellishments: 1/8″ribbons (satin ribbons) (velvet ribbons), mini jingle bells…
- For the Tags: Paper Punch, like mine, and a hole punch (or a Cropadial, which is what I have for paper-crafts), or premade circle tags. And a black felt marker. Twine or ribbon and cute little safety pins for attaching the tag to the mini pillow.
Designers' Recommendations: additional tools
The designer also recommended: Rotary cutter (I did not use, I used sewing scissors), quilt ruler (probably helpful, but I did not use), ¼” quilting foot (I did not use), and a cutting mat (which is a must if using a rotary cutter).

Images Copyright ©2025 DearCreatives.com
Adapting and Customizations
- Scaling/Sizing: Is it easy to resize the finished item (e.g., “This ornament could easily be scaled up by 50% for a larger decoration”).
Or visit her shop for additional patterns. - Add ribbons, jingle bells, or other decorations.
- For the Frosty tags, I used my own (punch and hole punch). She purchased hers and shares the size to buy. You can even personalize the tags on the snowman with names if gifting. Pre-cut tags in this shape with holes and a string would work too.

Time Estimate
Print and cut the pattern in 20 minutes or less. 30 minutes to sew and press. Finishing the project (embroidery of the face and attaching it) takes approximately 30 minutes to 1 hour (depending on skill set).
Difficulty Rating
1/5 EASY (with basic sewing skills and knowledge of basic sewing machine skills.
Estimated Cost
Under $10 if using scrap fabrics, felt, or even less if you have the supplies on hand.
Finished Product
- Finished Size: 4″ by 4″
- Care: “Spot clean only”.
I can't wait to update this post with more that I make. Will you give this pattern a try? You can find many other adorable patterns in her shop, too. For small and large seasonal decorations for many holidays and seasons!
Happy Crafting!
Are you ready to get started? Find the Pattern Here: Frosty Snowman Pattern
Pin it for later, if you aren't making it now!

- New here? Be sure to Subscribe.
- Pin it for Later
- Follow us on Pinterest
- Shop our favorites on Amazon