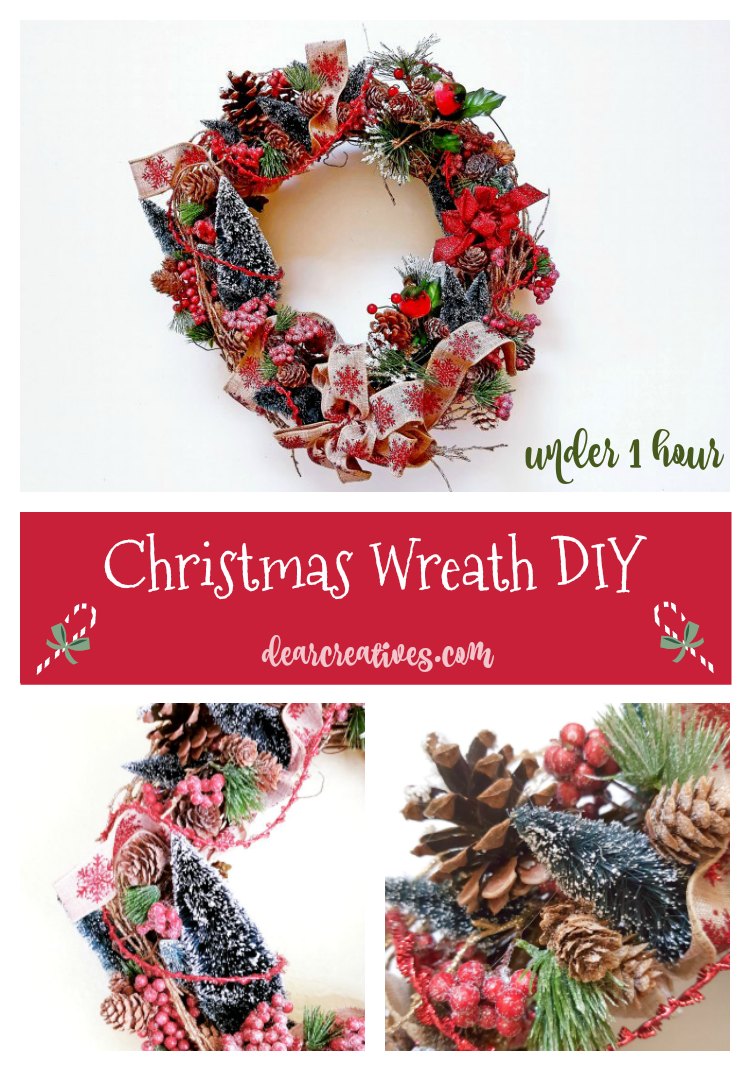
Easy Grapevine Christmas Wreath DIY
Today, we are sharing one of our favorite grapevine wreath ideas to show you how to make a beautiful, festive Christmas Wreath for your home. Getting into the spirit of the holidays often starts with DIY projects, and this quick craft is the perfect way to add charm to your seasonal décor!
Nothing is more fun than adding a little sparkle to your holidays, decorating with unique pieces like this wreath, and having time left over for baking holiday treats. Grab your coffee or eggnog, and let's get crafting.
Are you looking for something else? See all our grapevine wreath ideas
We love that this project starts with a grapevine wreath as a base, which makes it incredibly simple and fast. While I once made a Christmas wreath from scratch using fresh tree cuttings (which takes hours!), this Easy Grapevine Christmas Wreath is done in an hour or less because the base is premade. Let's make this simple wreath craft!
Make your own festive holiday wreath
Supplies Checklist: Decorating Your Grapevine Wreath
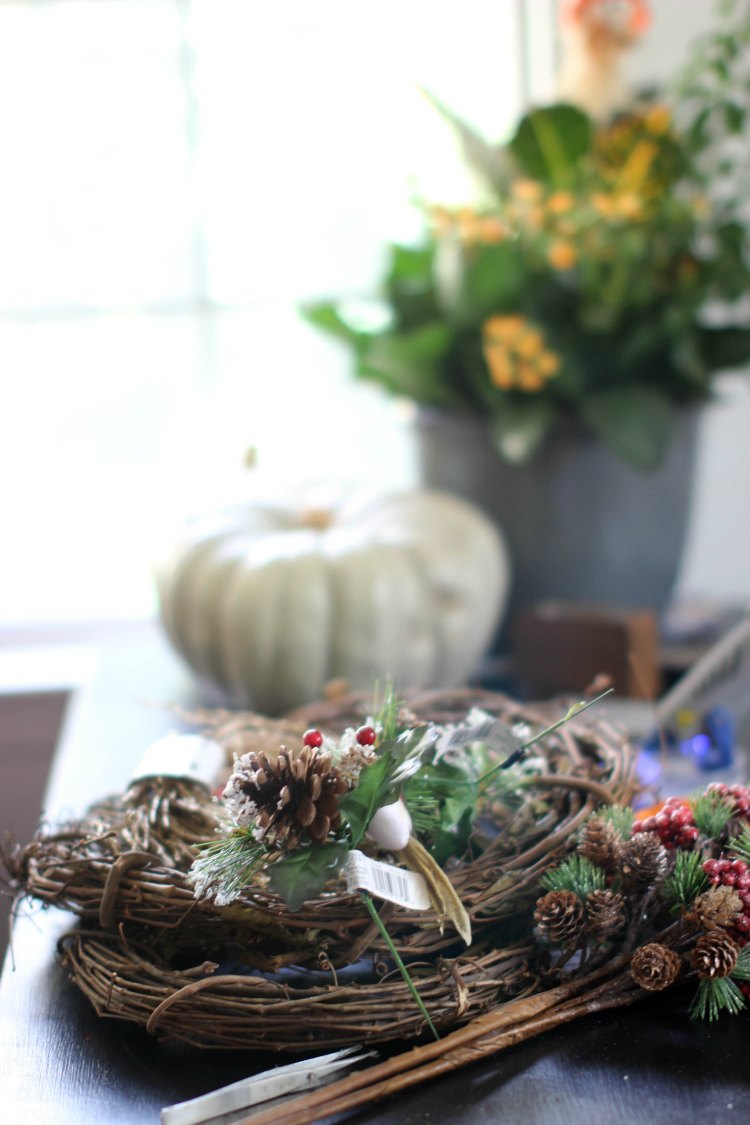
Grapevine Wreath
- Pick your grapevine wreath sizes: 12-14 inches. 18 inches or a larger size.
- (They come in 10, 12, 18-inch sizes, and bigger.)
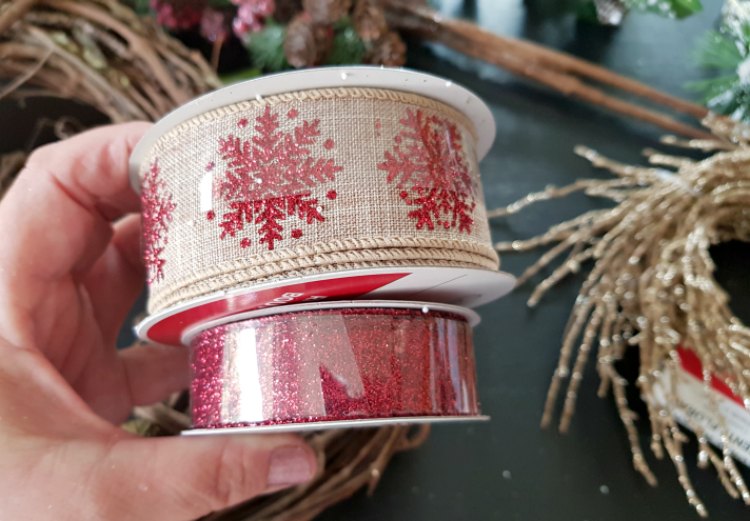
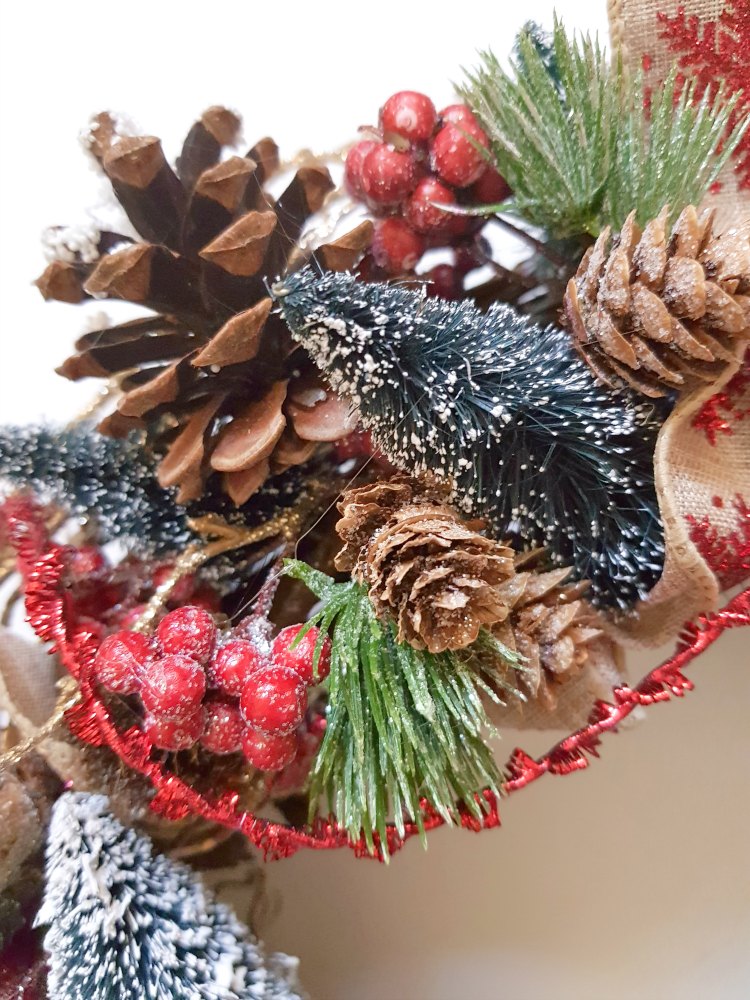
Embellishments, floral picks, and wired Christmas ribbons
- Snowflake wired ribbon or assorted wired organza holiday ribbons
- glittery mica twig garland, or pip garland in gold with stars, or natural twig garland
- gold star garland
- berry sprays
- nature floral pics
- faux mini Christmas trees (pull off stands)
- Similar to the one I used: metallic red holiday cord
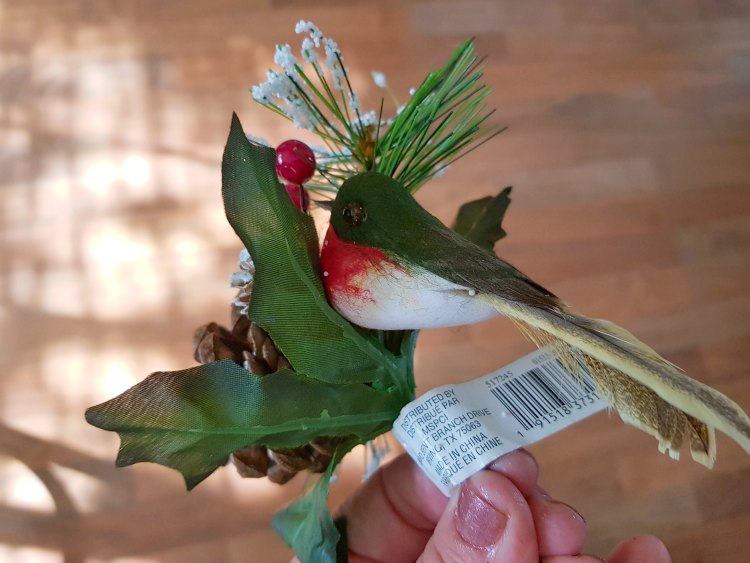
| faux red birds | chickadee clip on birds | shatterproof ornaments kit |
Tools for making your wreath
- hot glue gun and glue sticks
- wire cutters
- floral wire (or paddle wire)
- pliers
- scissors
- tweezers
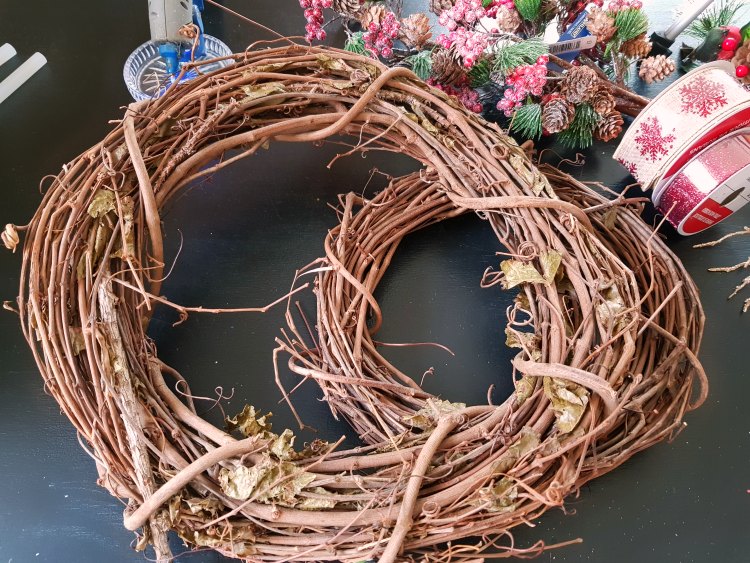
If you are just getting started, a small floral kit has pliers, a floral wire cutter, and a few other items that you need. Let's get started. I used a 12-inch wreath.
Step-by-Step Instructions: Simple Grapevine Wreath DIY
Pro Tips for Embellishment Placement
- Balance and Grouping: Begin placing your floral picks, pine sprays with red berries, and any mini Christmas trees or embellishments, focusing on visual balance. Remember that groupings of odd numbers (three, five, etc.) create the most visual interest on a wreath.
- Secure: Once you are happy with the arrangement and balance, secure each item firmly in place using your hot glue gun.
- Final Polish: After the glue has completely dried, use your fingers to gently pull off any lingering glue strands—they often look like tiny spider webs! Step back to review your wreath, filling in any empty spaces with extra fillers, pine cones, or ribbon sprays until it is as full and festive as you like.
Prep the Base, Make a Loop for Hanging,
Pick the size of your grapevine wreath. Or use this tutorial on an artificial Christmas wreath, but omit greenery.
- Lay your wreath out and determine which side will be your top and which is the bottom.
- Make a wired loop on the back for hanging. It's best to do this before starting your wreath. It makes it easy to hang it on a hook. Or you can use a wreath door hanger for hanging your wreath.
- Strip off loose dried leaves.
Attach Embellishments
- Next, take the gold garland and attach it to your grapevine wreath. Tuck under any ends, adjust, and be sure you like the way it looks before gluing it in place. I like using long tweezers to press down the embellishments into place.
Making a ribbon bow, placing the Ribbon on the Wreath, and Finishing the Bow Edges
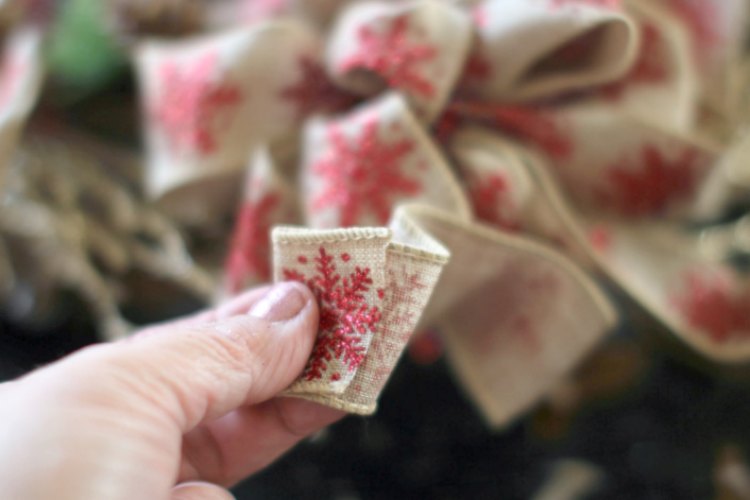
- Mark where you will put your wired ribbon (visually or with a temporary ribbon bow).
- Make the bow, and attach it in place with hot glue when you are sure of the placement. Shown in the video tutorial.
- Trim the ends of the ribbon straight, diagonal, or with a dovetail cut. Or fold them under and glue them.
- Be sure to glue under edges (or use fabric glue) to finish your ribbon ends. Gluing the edges of the ribbon prevents fraying. Use hot glue with tweezers for this, or the fabric glue.
- Lastly, you can wrap a coiled or shiny stretchy ribbon around the entire wreath to make it even more festive. You can find them in red, gold, and other colors.
When you are ready, and the wreath is finished, hang it on your wall or door with a door hanger.

Video Tutorial for Simple Grapevine Wreath
Other Helpful Resources
Here's a great video tutorial for how to make wired bows with wired ribbons. Or you can purchase a premade bow, or get a bow maker to help you make them.
Happy Christmas Crafting! And wreath-making!
- New here? Be sure to Subscribe.
- Pin it for Later
- Follow us on Pinterest
- Shop our favorites on Amazon


Oh you made this look so easy. It’s lovely with all of the neat little details.
Thanks Stacie! It’s really not that hard. just a lot of adding, gluing, and balancing. Hope you get to make your own wreath.