Fun, and Easy No Sew Unicorn Pouch DIY with FREE Template
The magic of unicorns meets the simplicity of felt in this fun No Sew Unicorn Pouch DIY! This project is perfect for kids, tweens, and teens who love creating cute accessories without touching a needle and thread.
Whether you're looking for a quick craft session or a handmade gift idea, this simple felt pouch is the answer. To make the process even easier, we've included a Free Template (pattern) download below. Grab your felt and glue gun, and let's get started on creating a beautiful, functional pouch for school supplies, makeup, or small toys!
Are you looking for something else to craft with felt? See our other felt craft projects. Or are you looking for something seasonal to craft? Find more crafts to make: spring craft ideas, or summer craft ideas you can do with or for the kids.
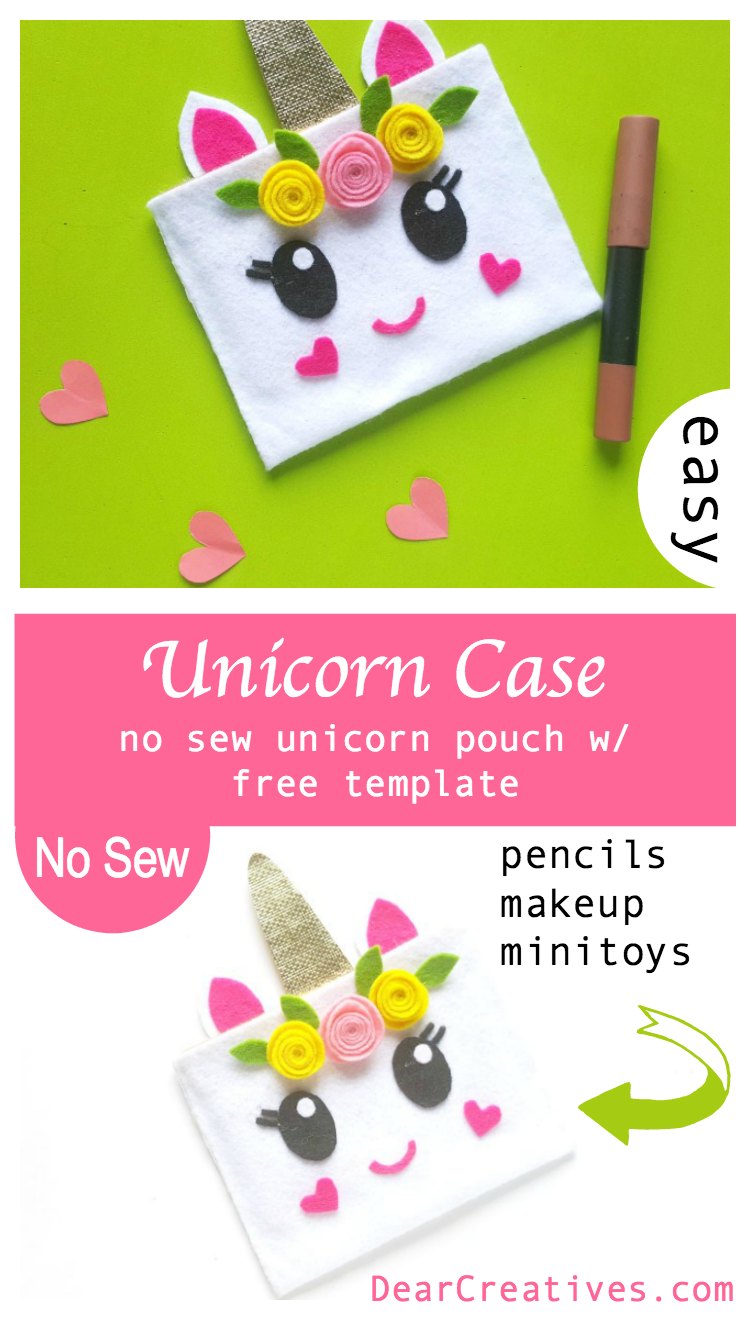
Using the free template to make this unicorn craft is easy, and this project is great for all ages. This is a fun craft project that kids or teens will enjoy making. My granddaughters are crazy for unicorns. Do you know someone who loves unicorns, too? And would love to make or have a unicorn case. Let's get started on this no-sew felt pouch.
To make the process even easier, we've included a Free Template (pattern) download below. Grab your felt and glue gun, and let's get started!
Unicorn Pouch (No Sew Project)
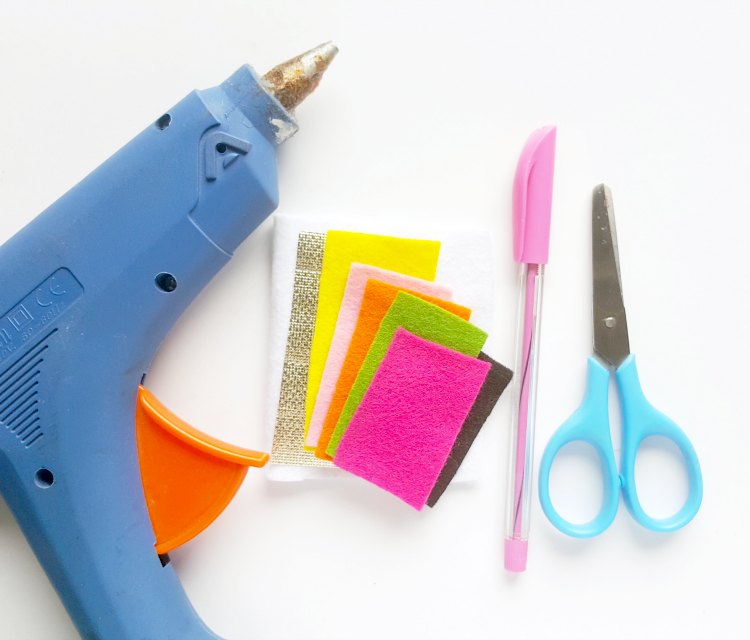
Materials List for Your Unicorn Pouch
Felt and Other Supplies
- Felt fabrics (assorted) use colors of your choice
- Golden colored fabric

Tools and Equipment
- Scissors
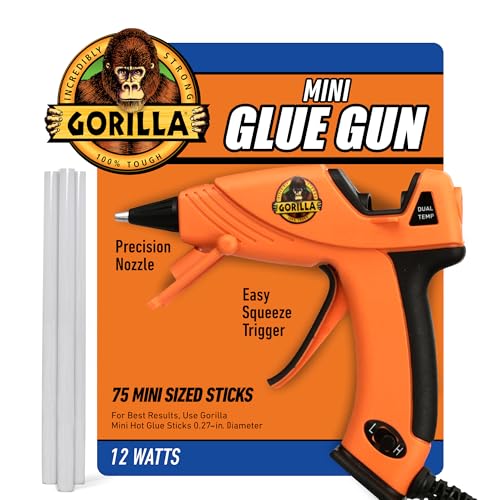
- Hot glue gun, or if kids are making this felt pouch, help them, and use felt glue (nontoxic) instead of the glue gun.
- Reusable Hook Loop Fasteners (velcro)
- Pencil – to trace the template


Get the craft template below, after the instructions.


Step-by-Step No Sew Unicorn Pouch Instructions
Prep and Cut the Felt Pieces
Step (1)
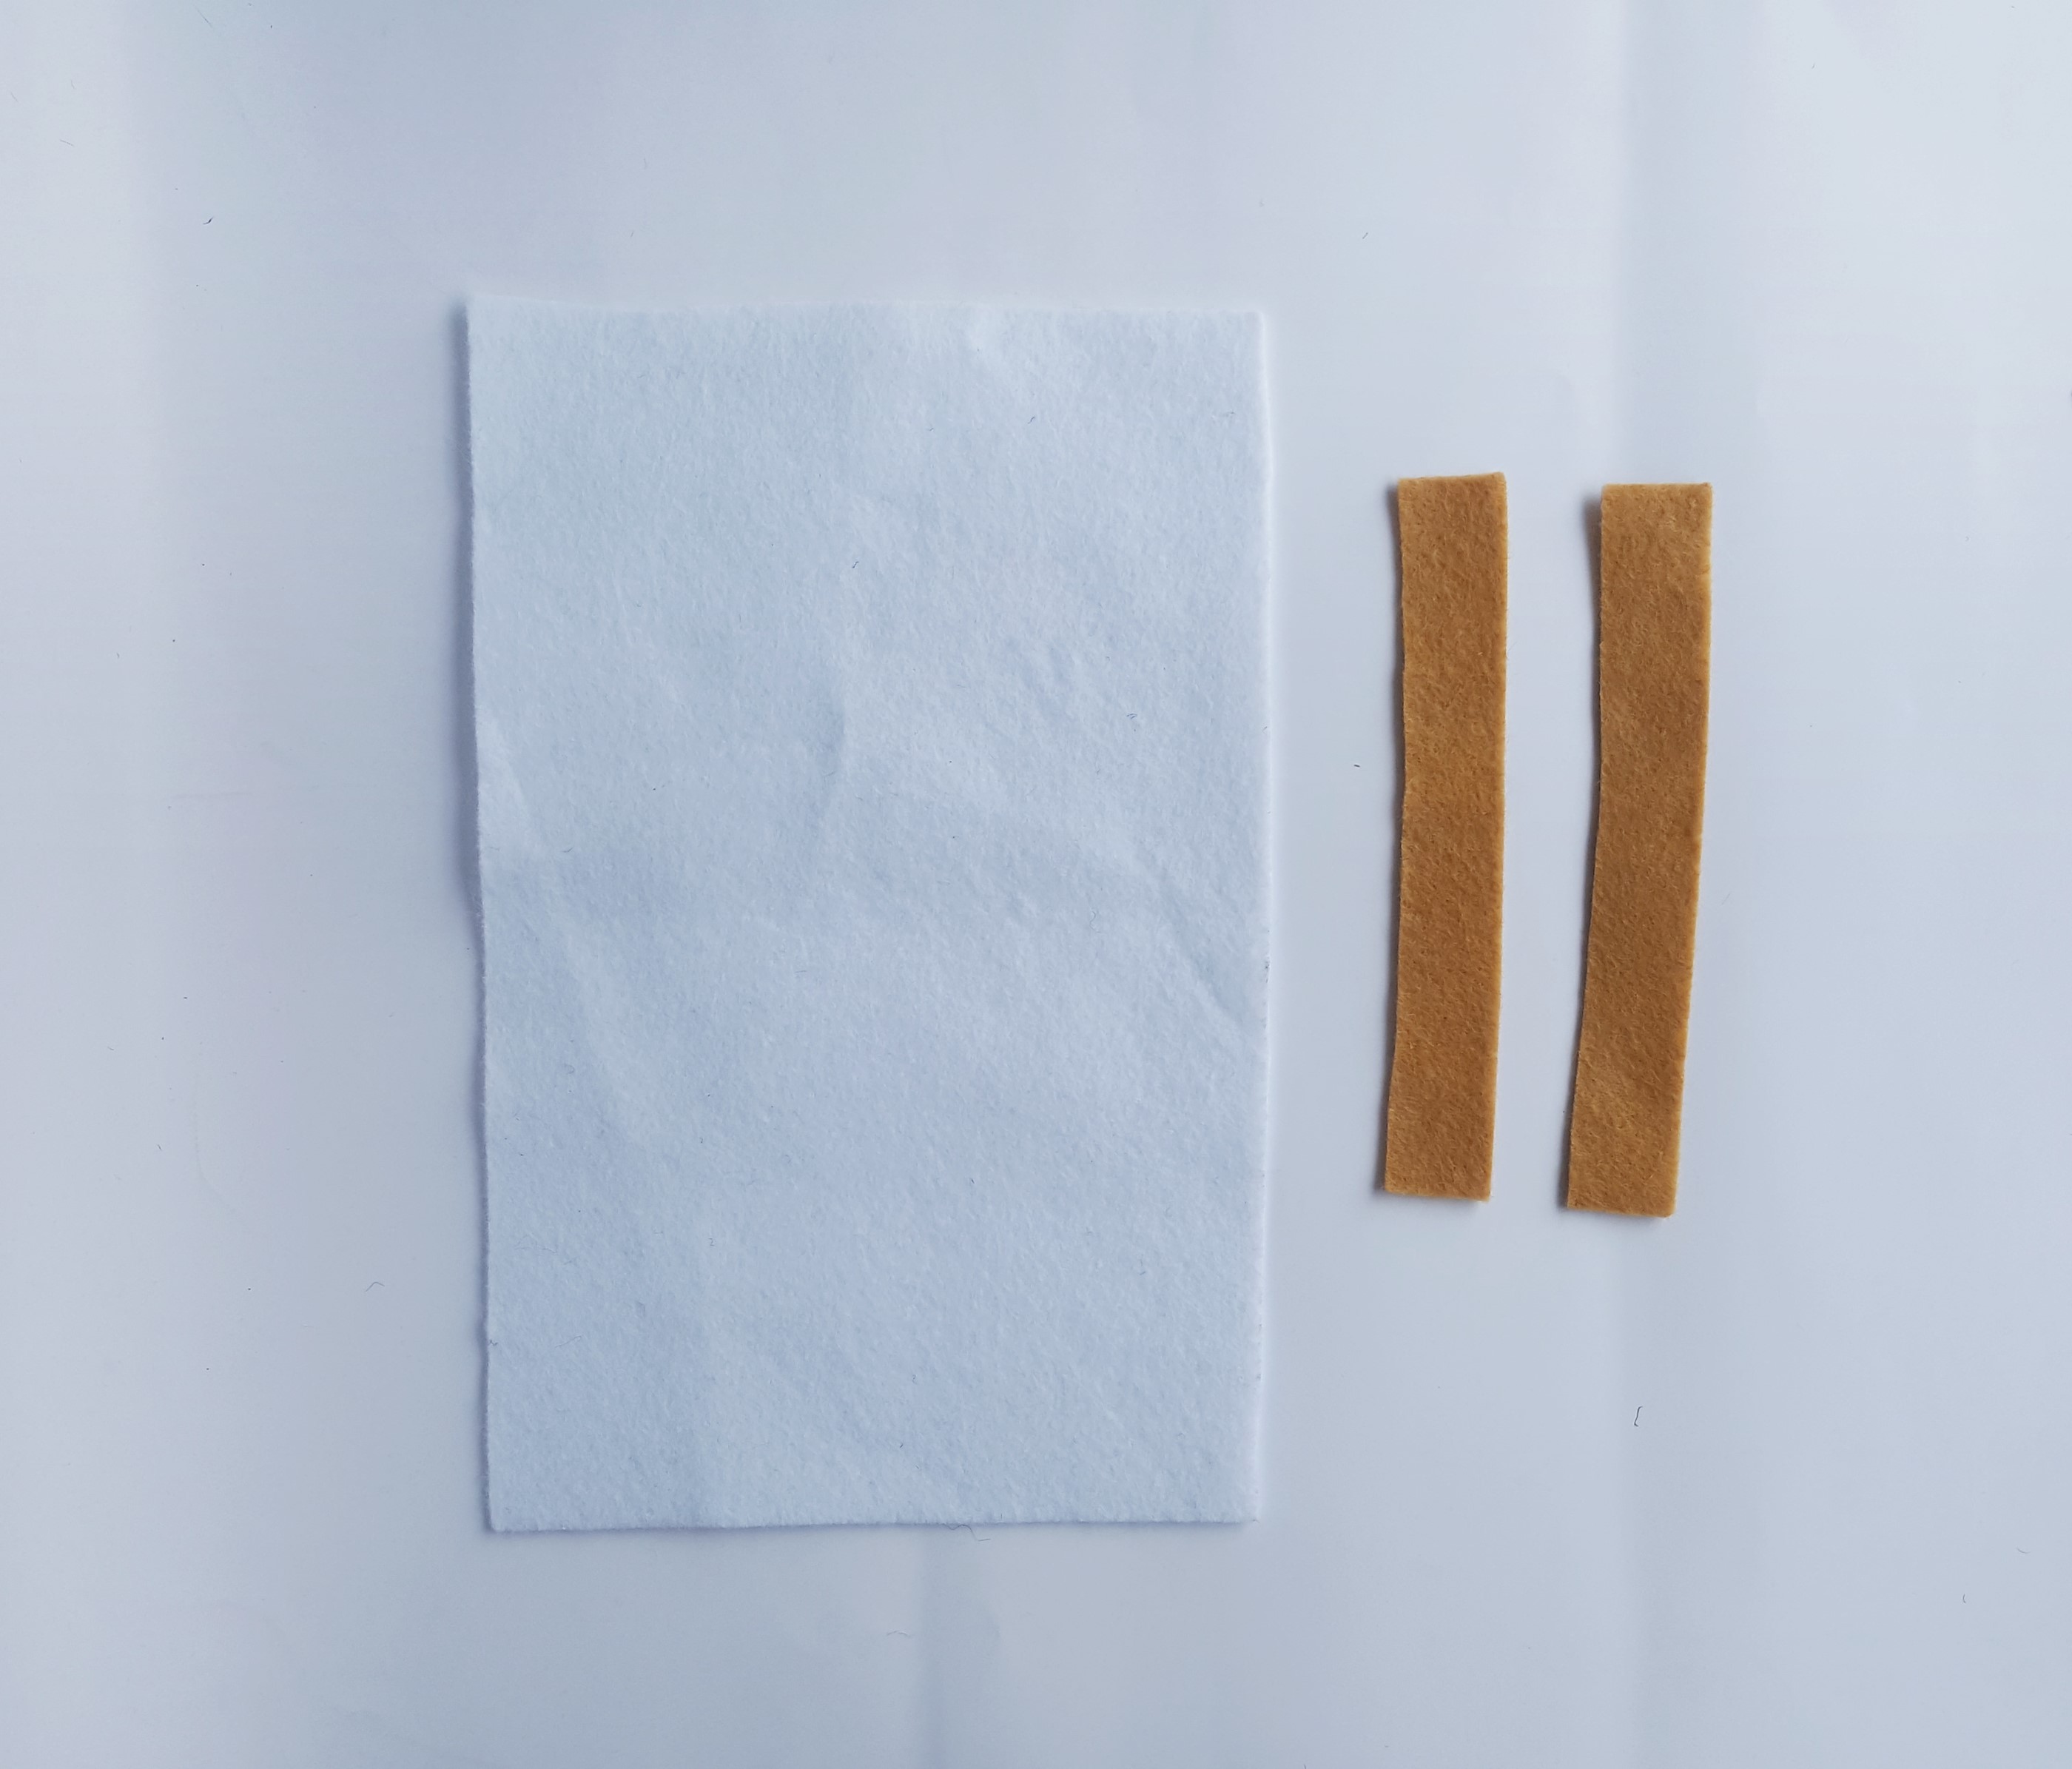
Cut the main felt fabric for the pouch according to your required size (mine was 6 inches x 10 inches). Cut 2 felt fabric strips of 1 cm width and the length the same as the width of the felt cut out for the pouch.
Step (2)
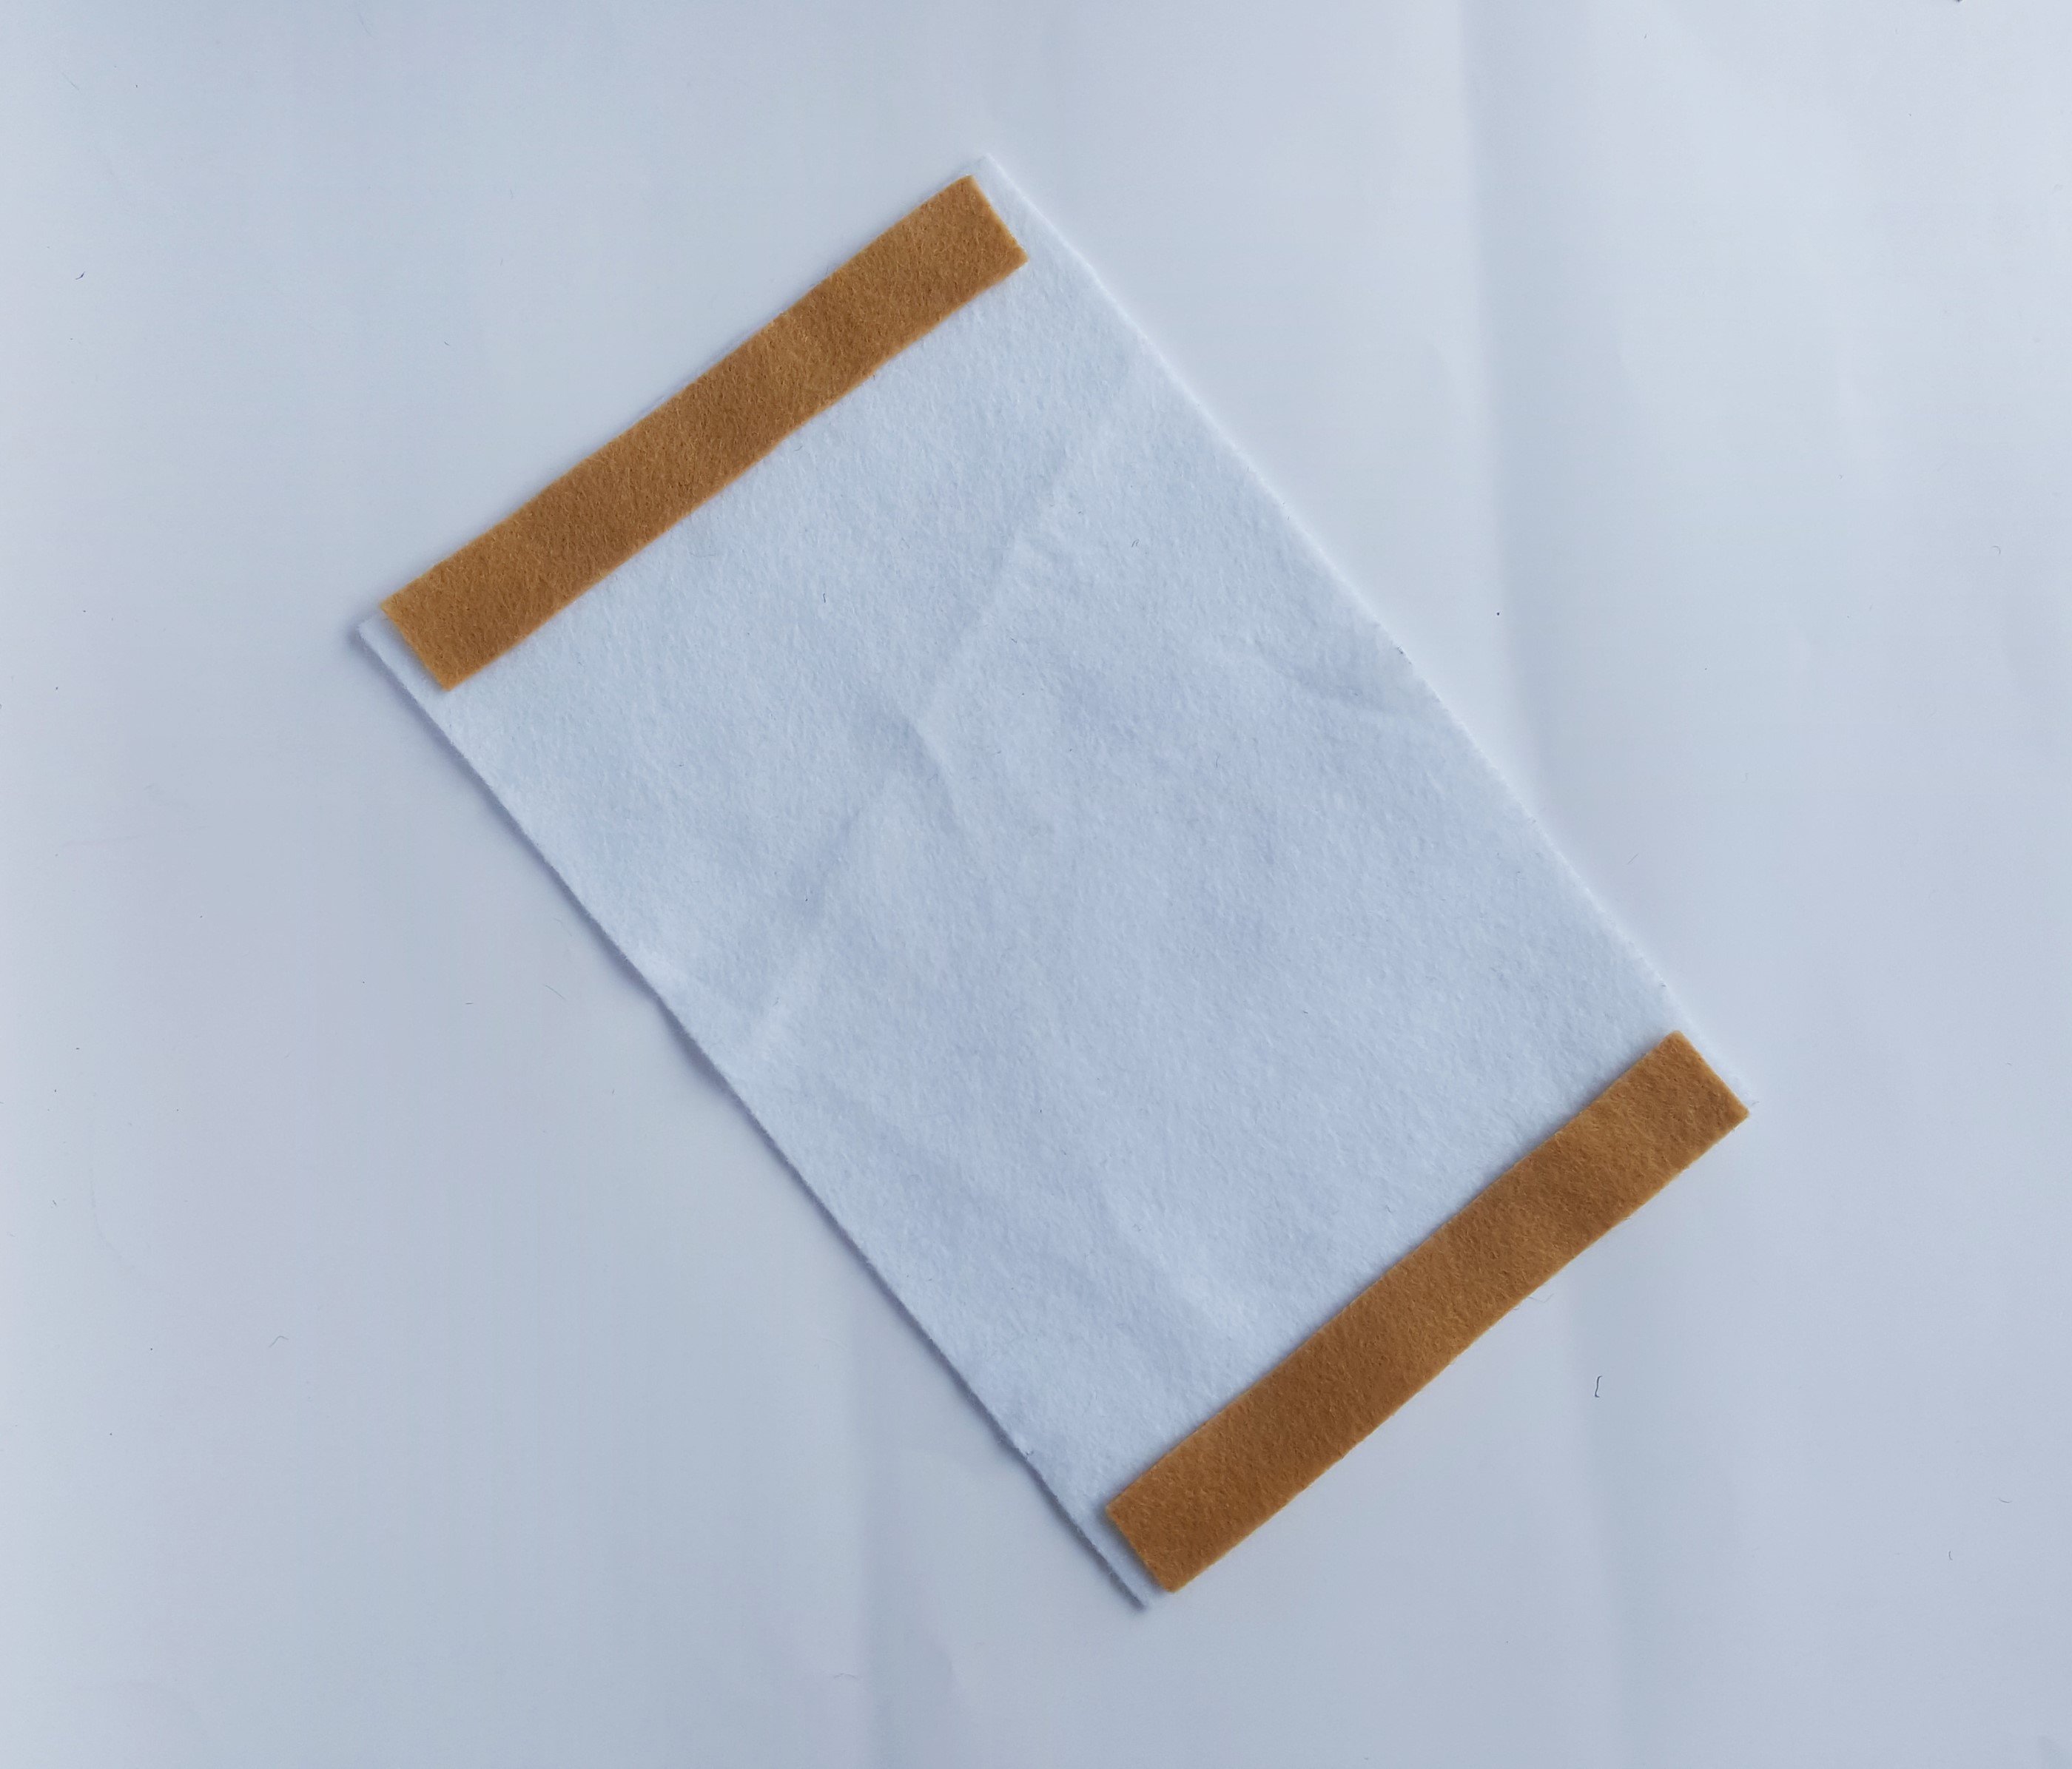
Prepare the hot glue gun and attach the 2 felt strips along the 2 width ends of the main felt piece. For any one strip, glue the 2 sides only, keep a loop in the middle.
Step (3)
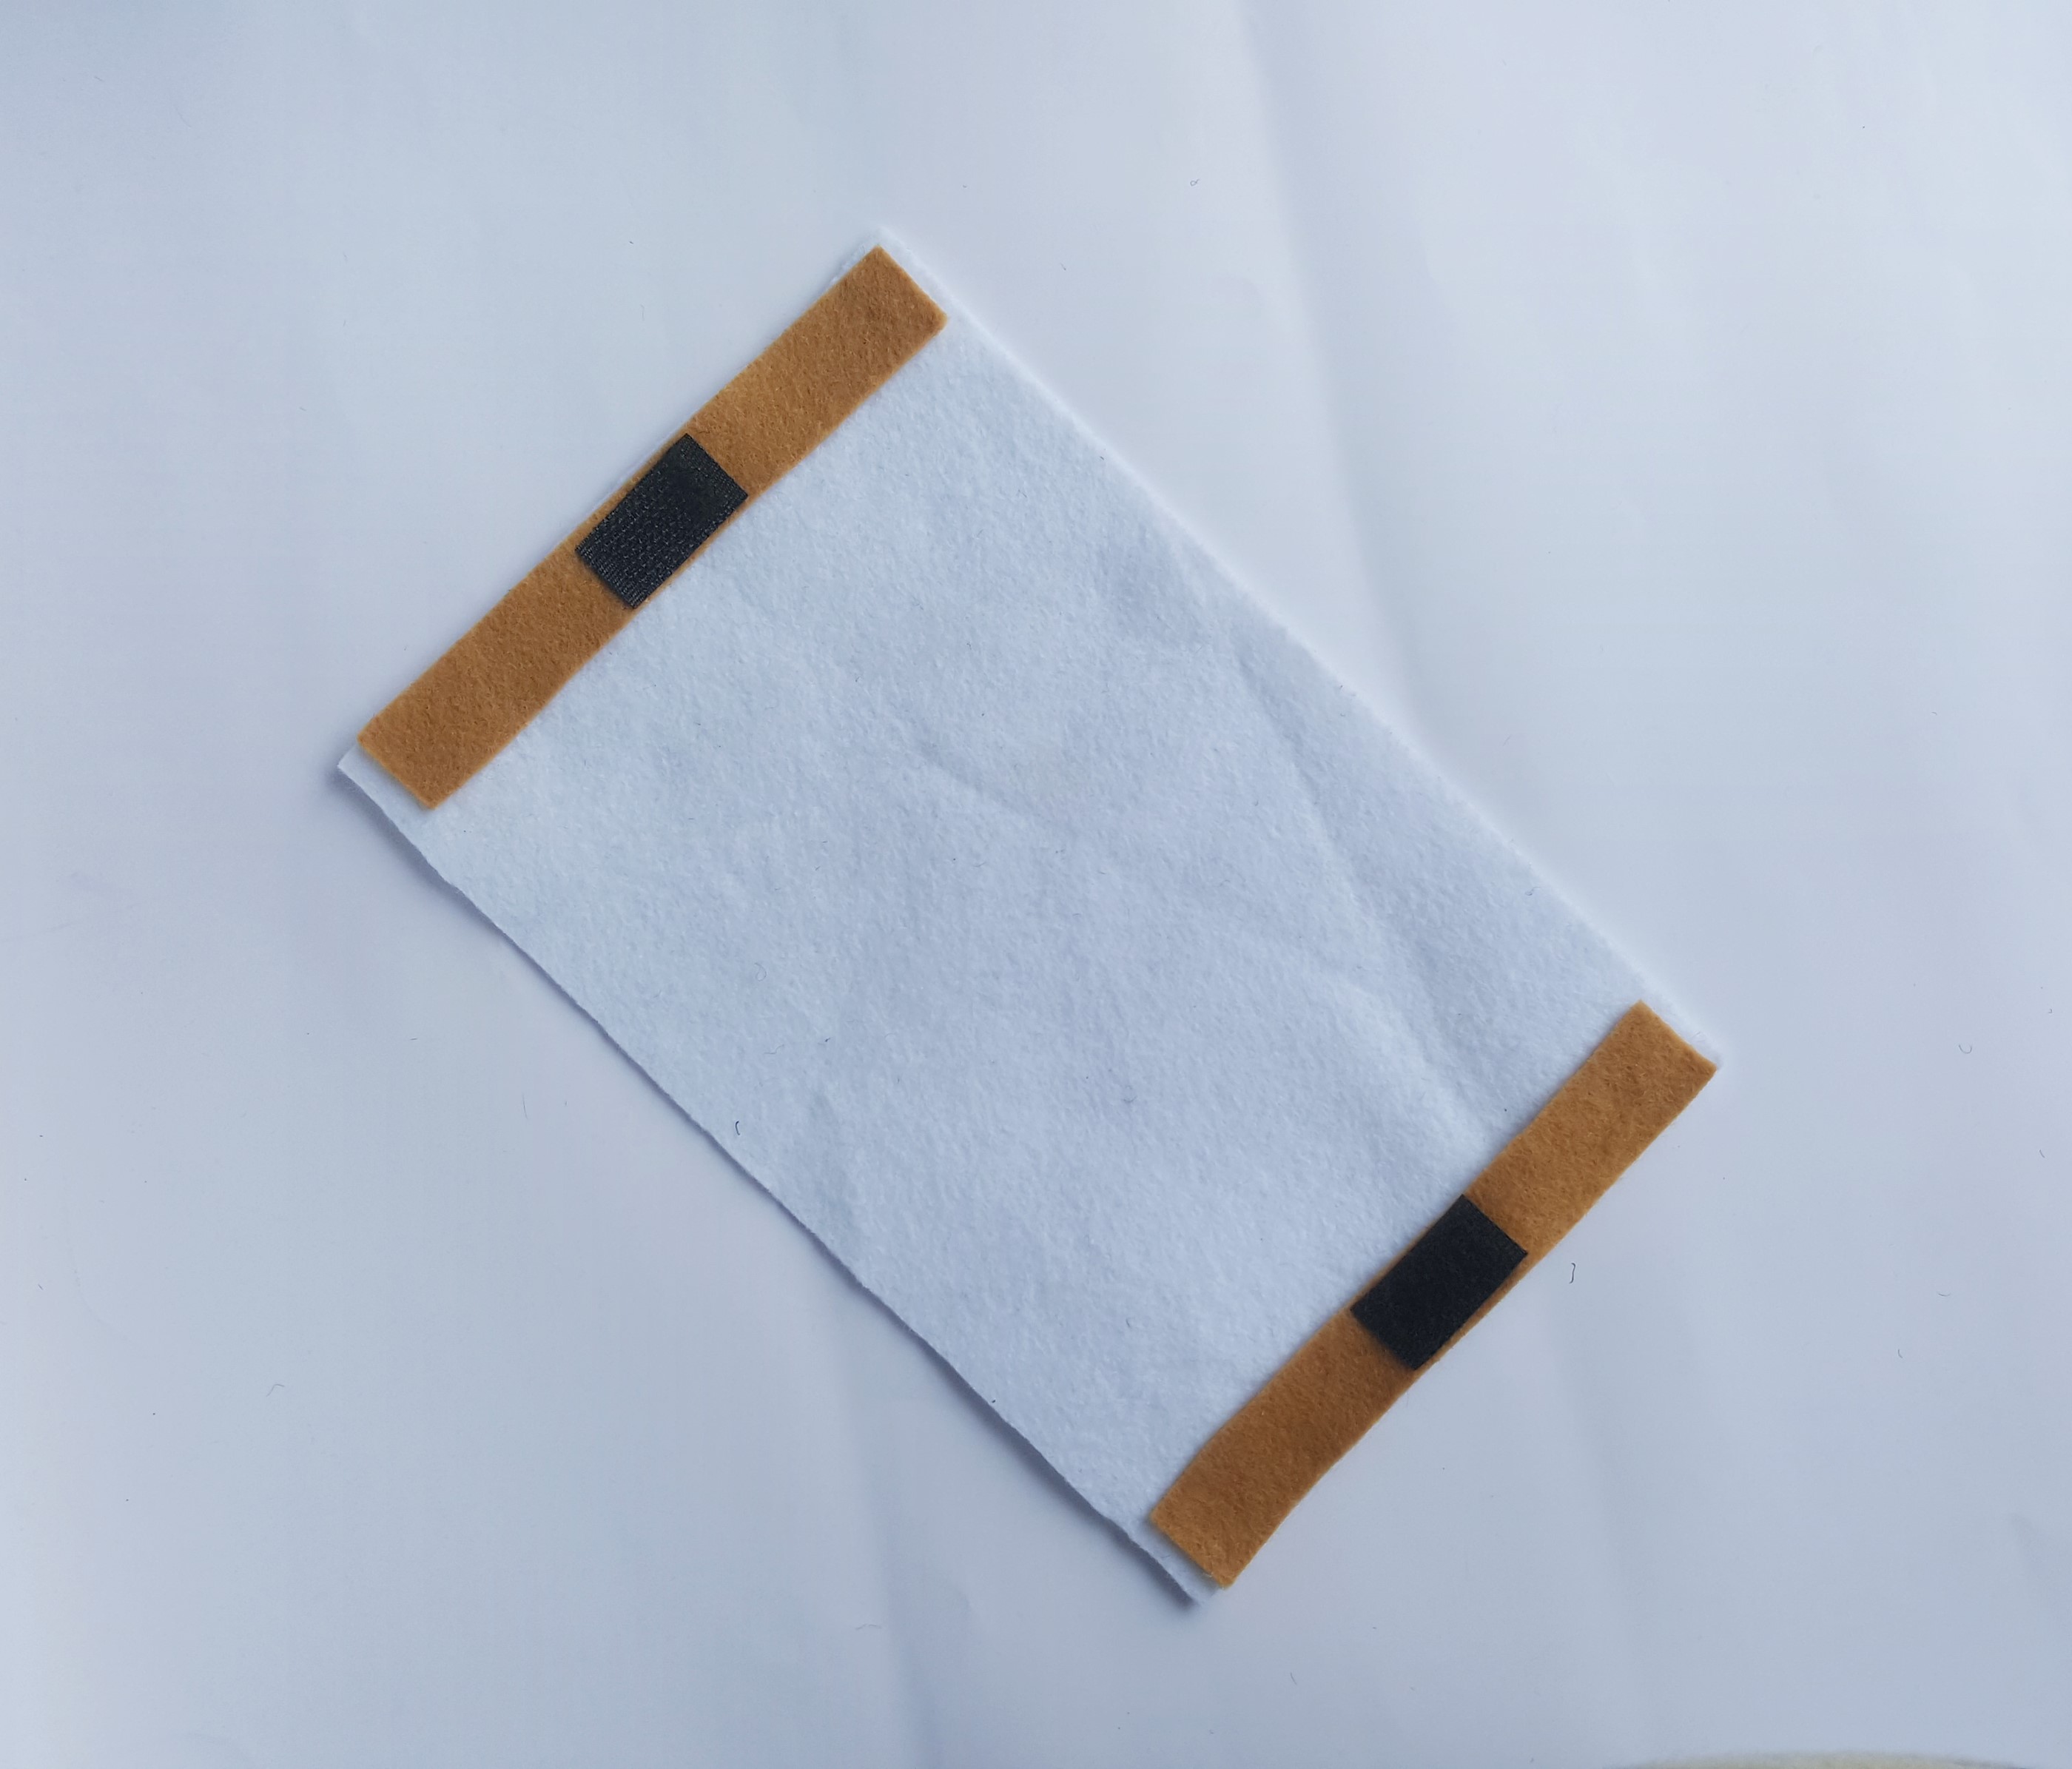
Glue hook-and-loop fasteners in the middle of the 2 attached felt strips on both ends.
Assemble the Unicorn Head and Horn

Step (4)
The download is at the bottom of the instructions.
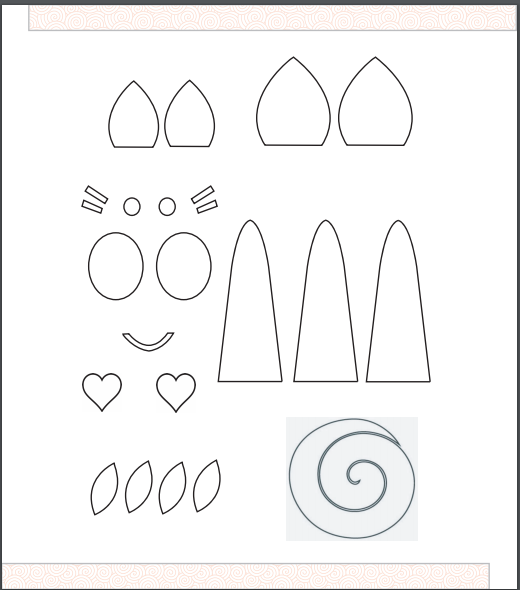
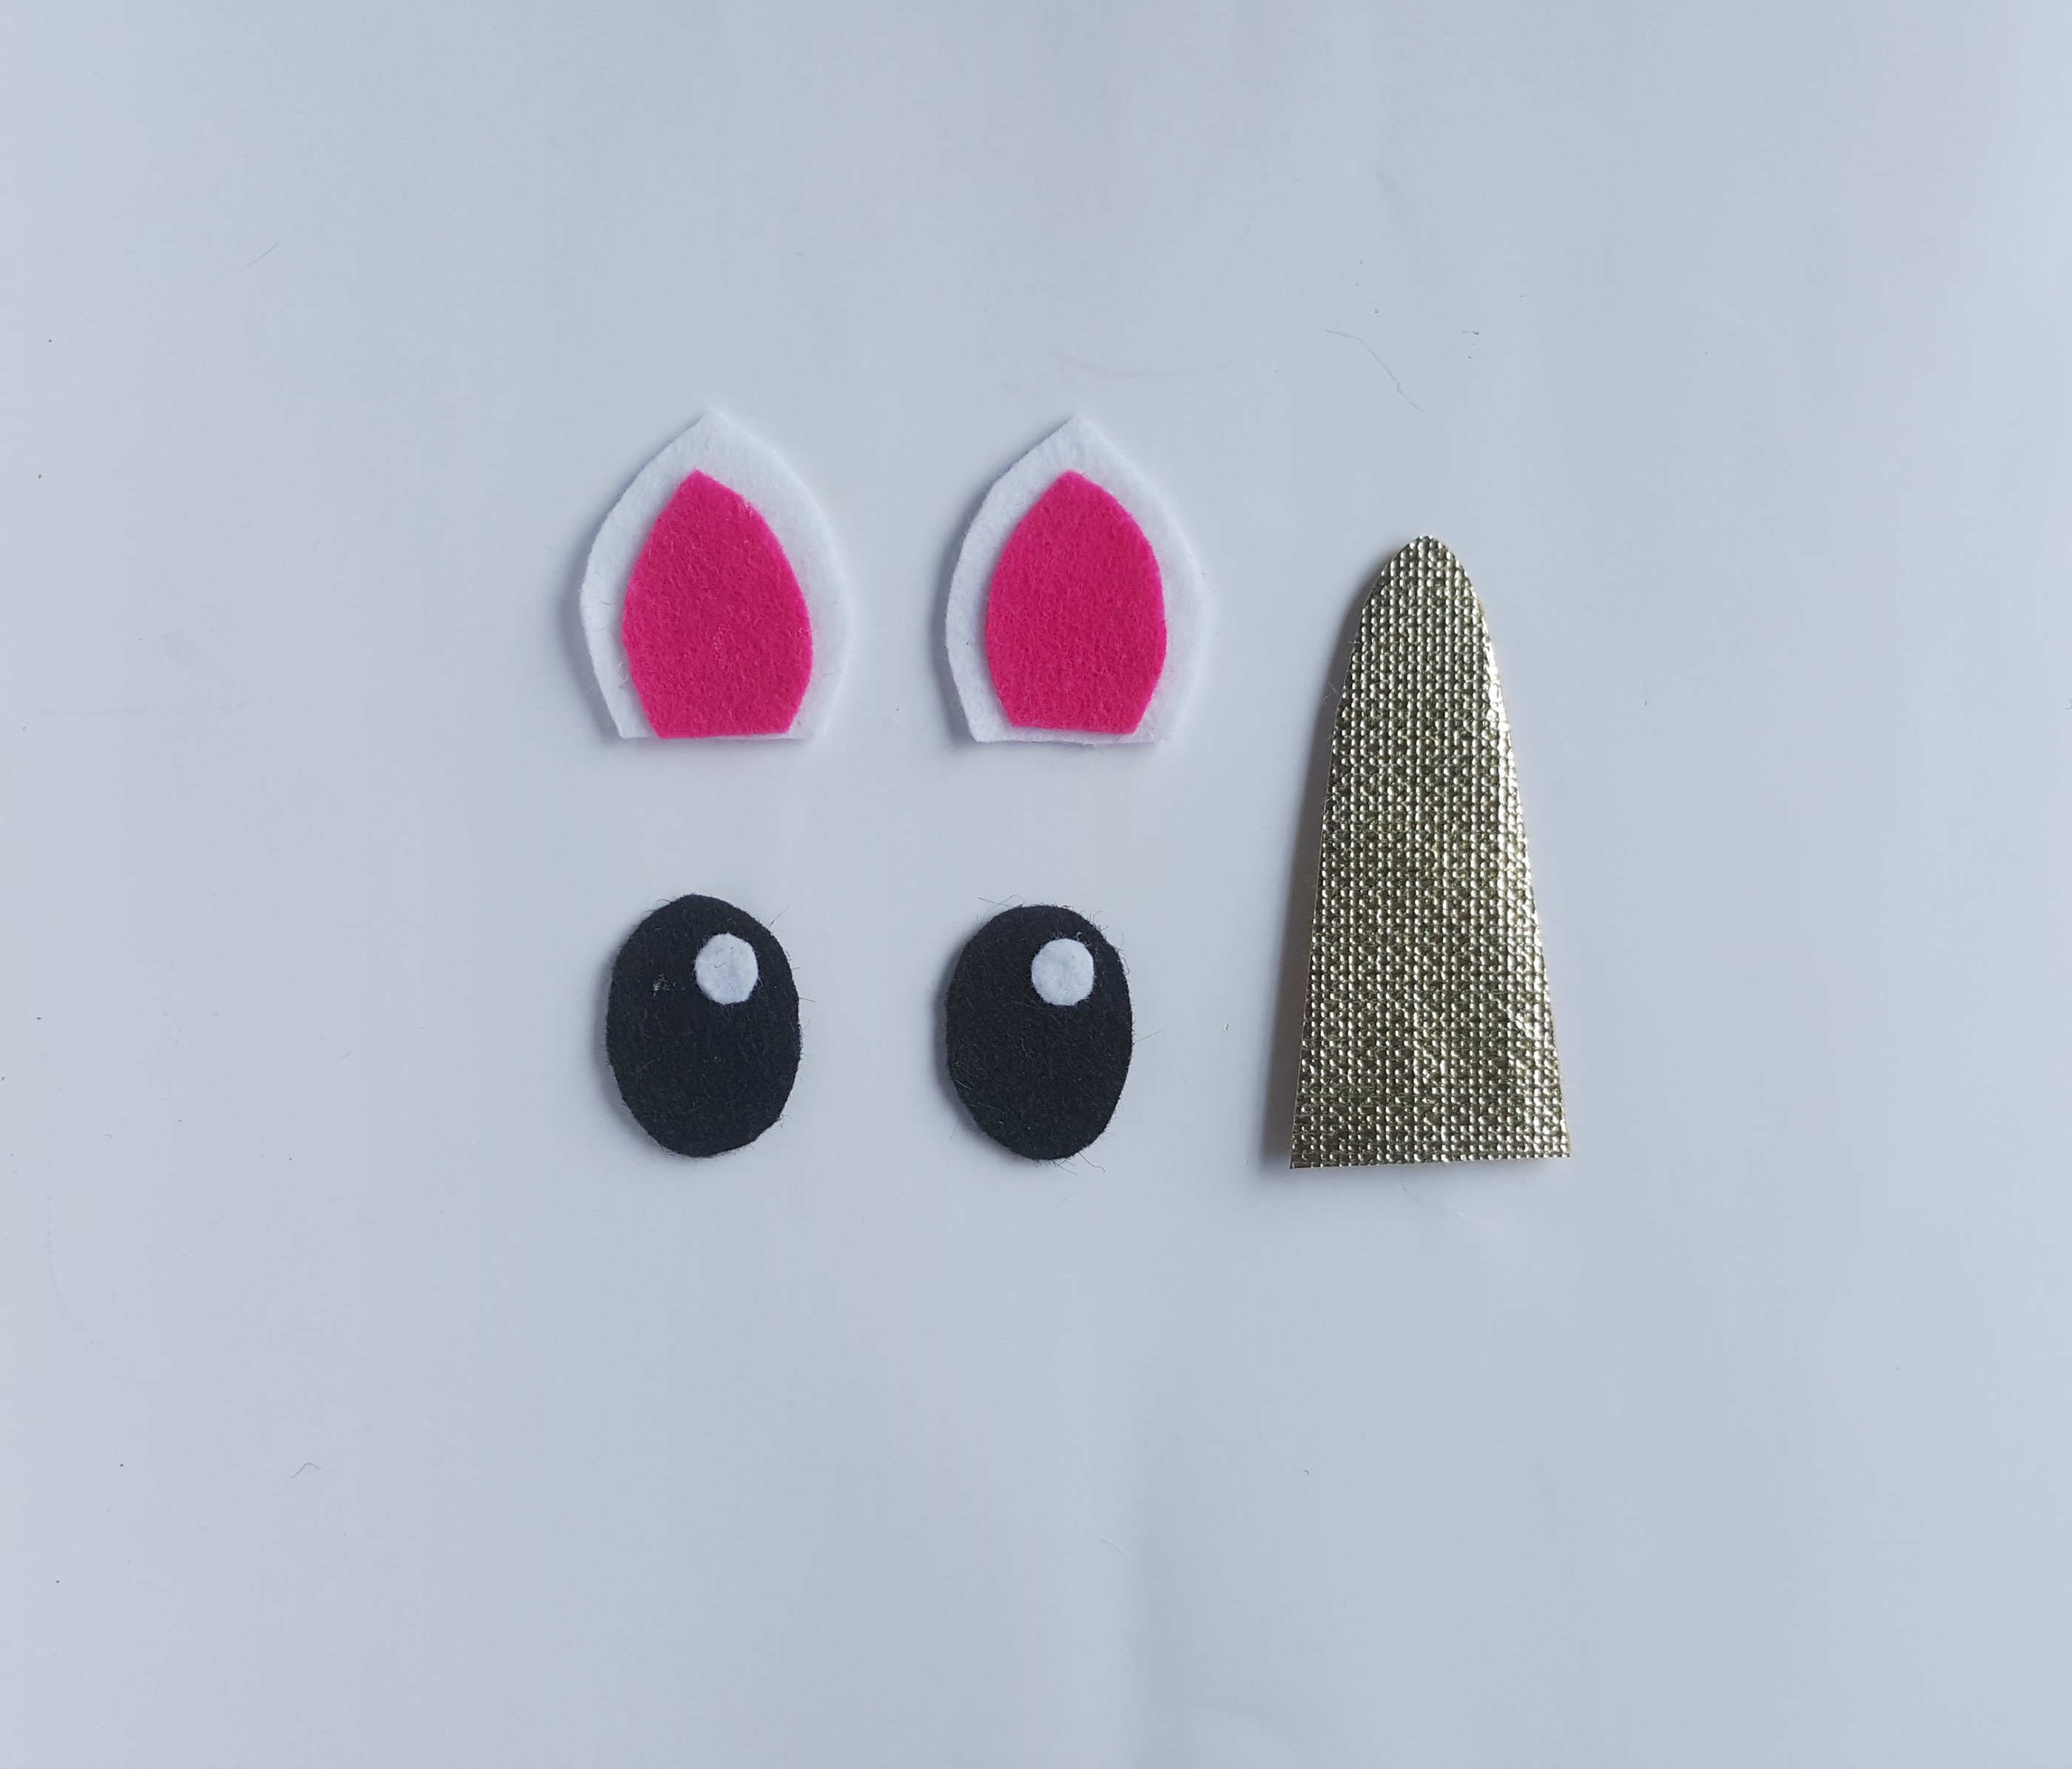
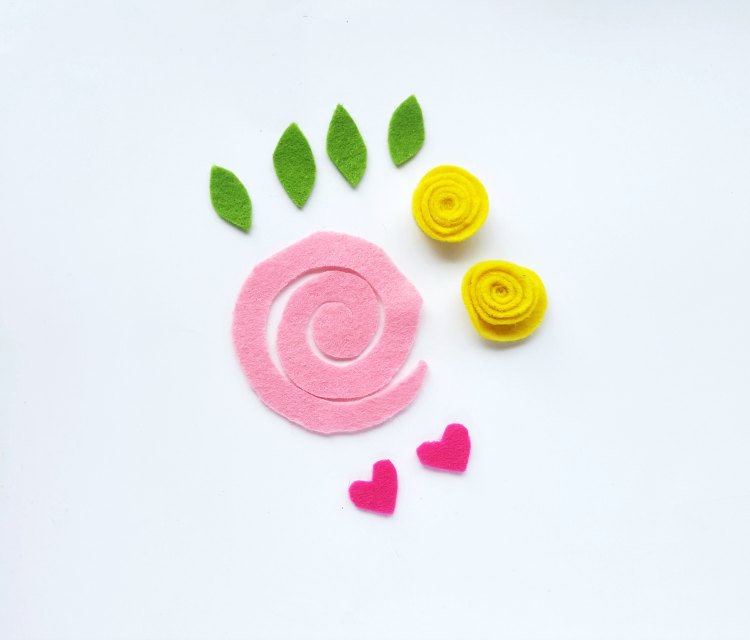
Then, prepare the pattern pieces from the free unicorn template by printing and cutting them out. Trace the patterns on the selected felt fabrics and cut them out nicely. The template includes –inner ear parts, outer ear parts, eyes, lips, blush/ freckle, horn, flower spiral, and leaf. For the horn part, you’ll need 3 materials for the 3 horn patterns- felt, cardstock, and golden fabric.
Step (5)
Next, glue the inner parts to the outer ear parts. Glue the cardstock horn pattern on the felt horn pattern, and then glue the golden horn pattern on the cardstock horn pattern. After, glue the 2 small white circles on the 2 large black circles (these are the eyes).
Glue the Pouch Edges and Decorate
Step (6)
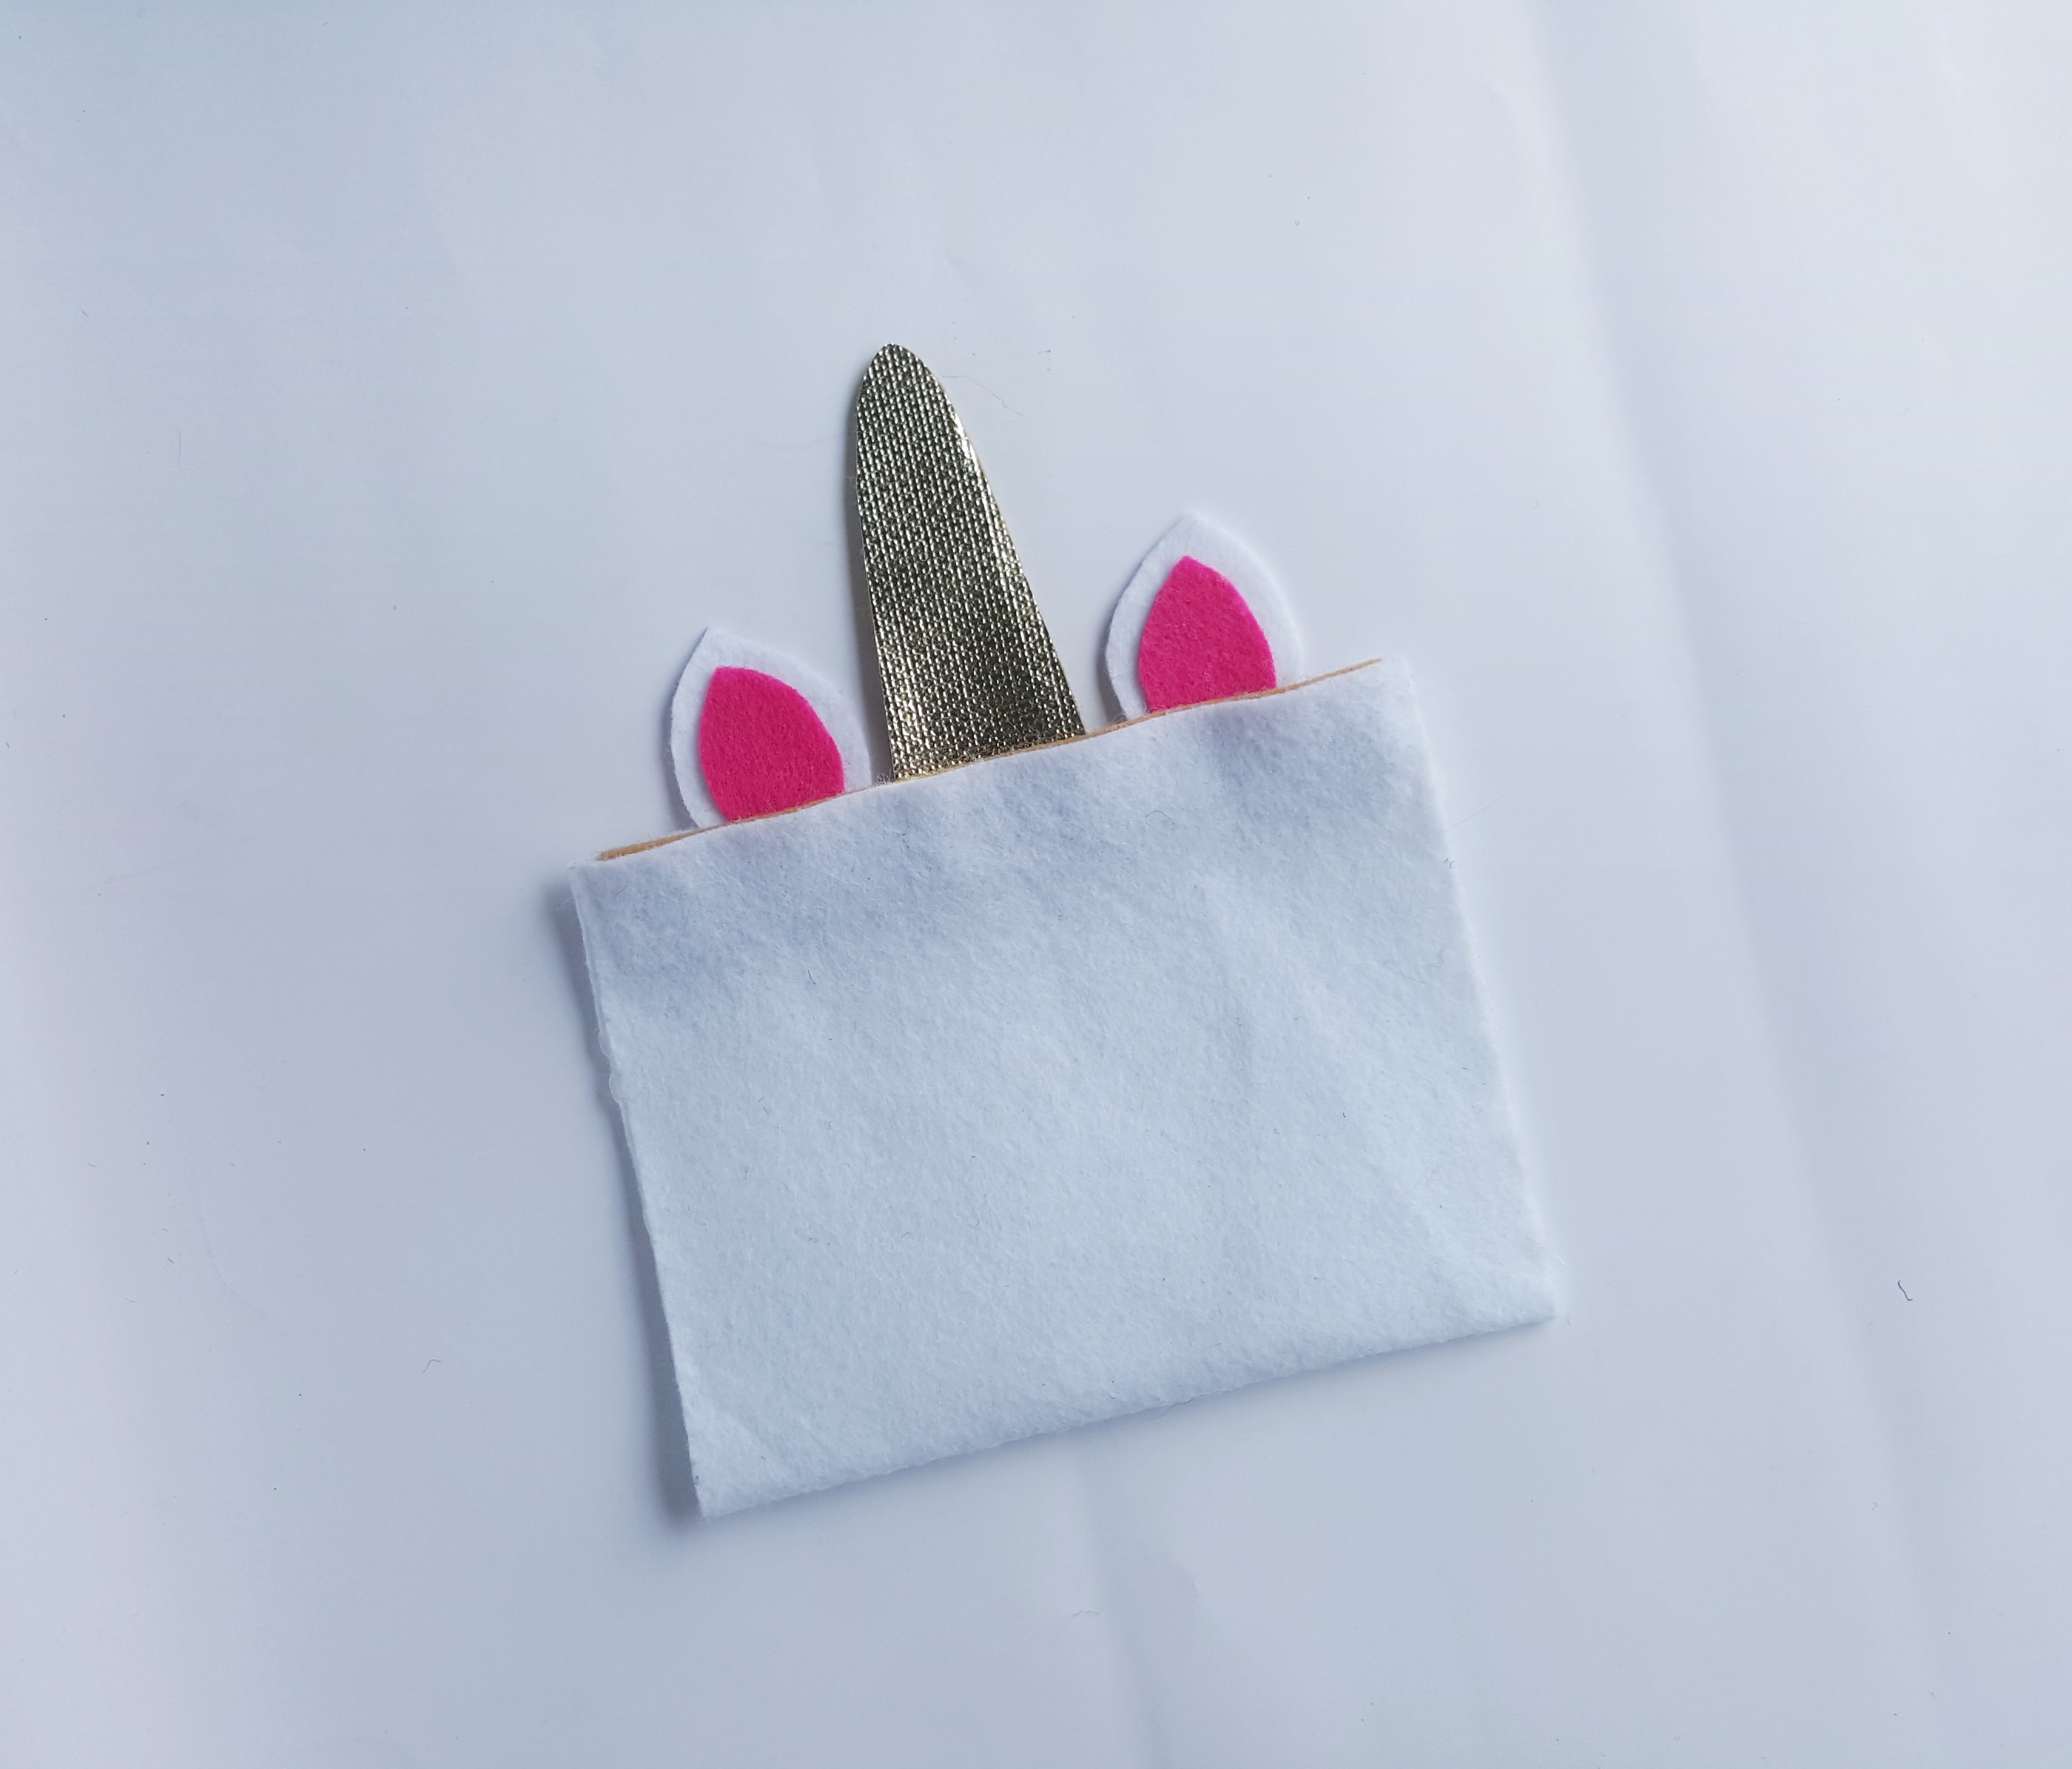
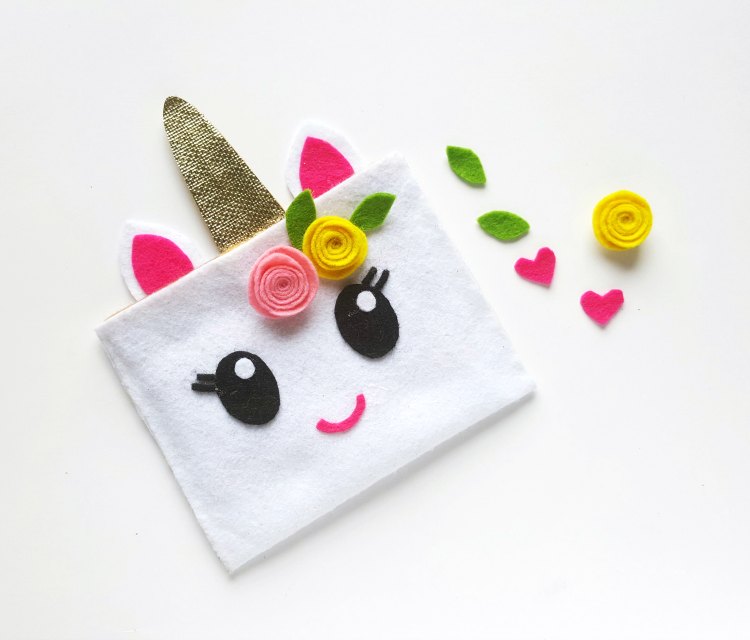
Fold the main felt piece in half lengthwise and glue the 2 open sides (not the top) using the hot glue gun. Remember that one of the side strips is glued on 2 sides only? That side of the pouch with the looped strip will be the back side of the pouch. Now glue the ears and the horn to the main piece, pushing at least 1 cm of their bottom ends inside the looped strips. Use the hot glue gun to attach the ears and the horn, and also don’t forget to close the loop by gluing the entire strips with the main fabric.
Step (7)
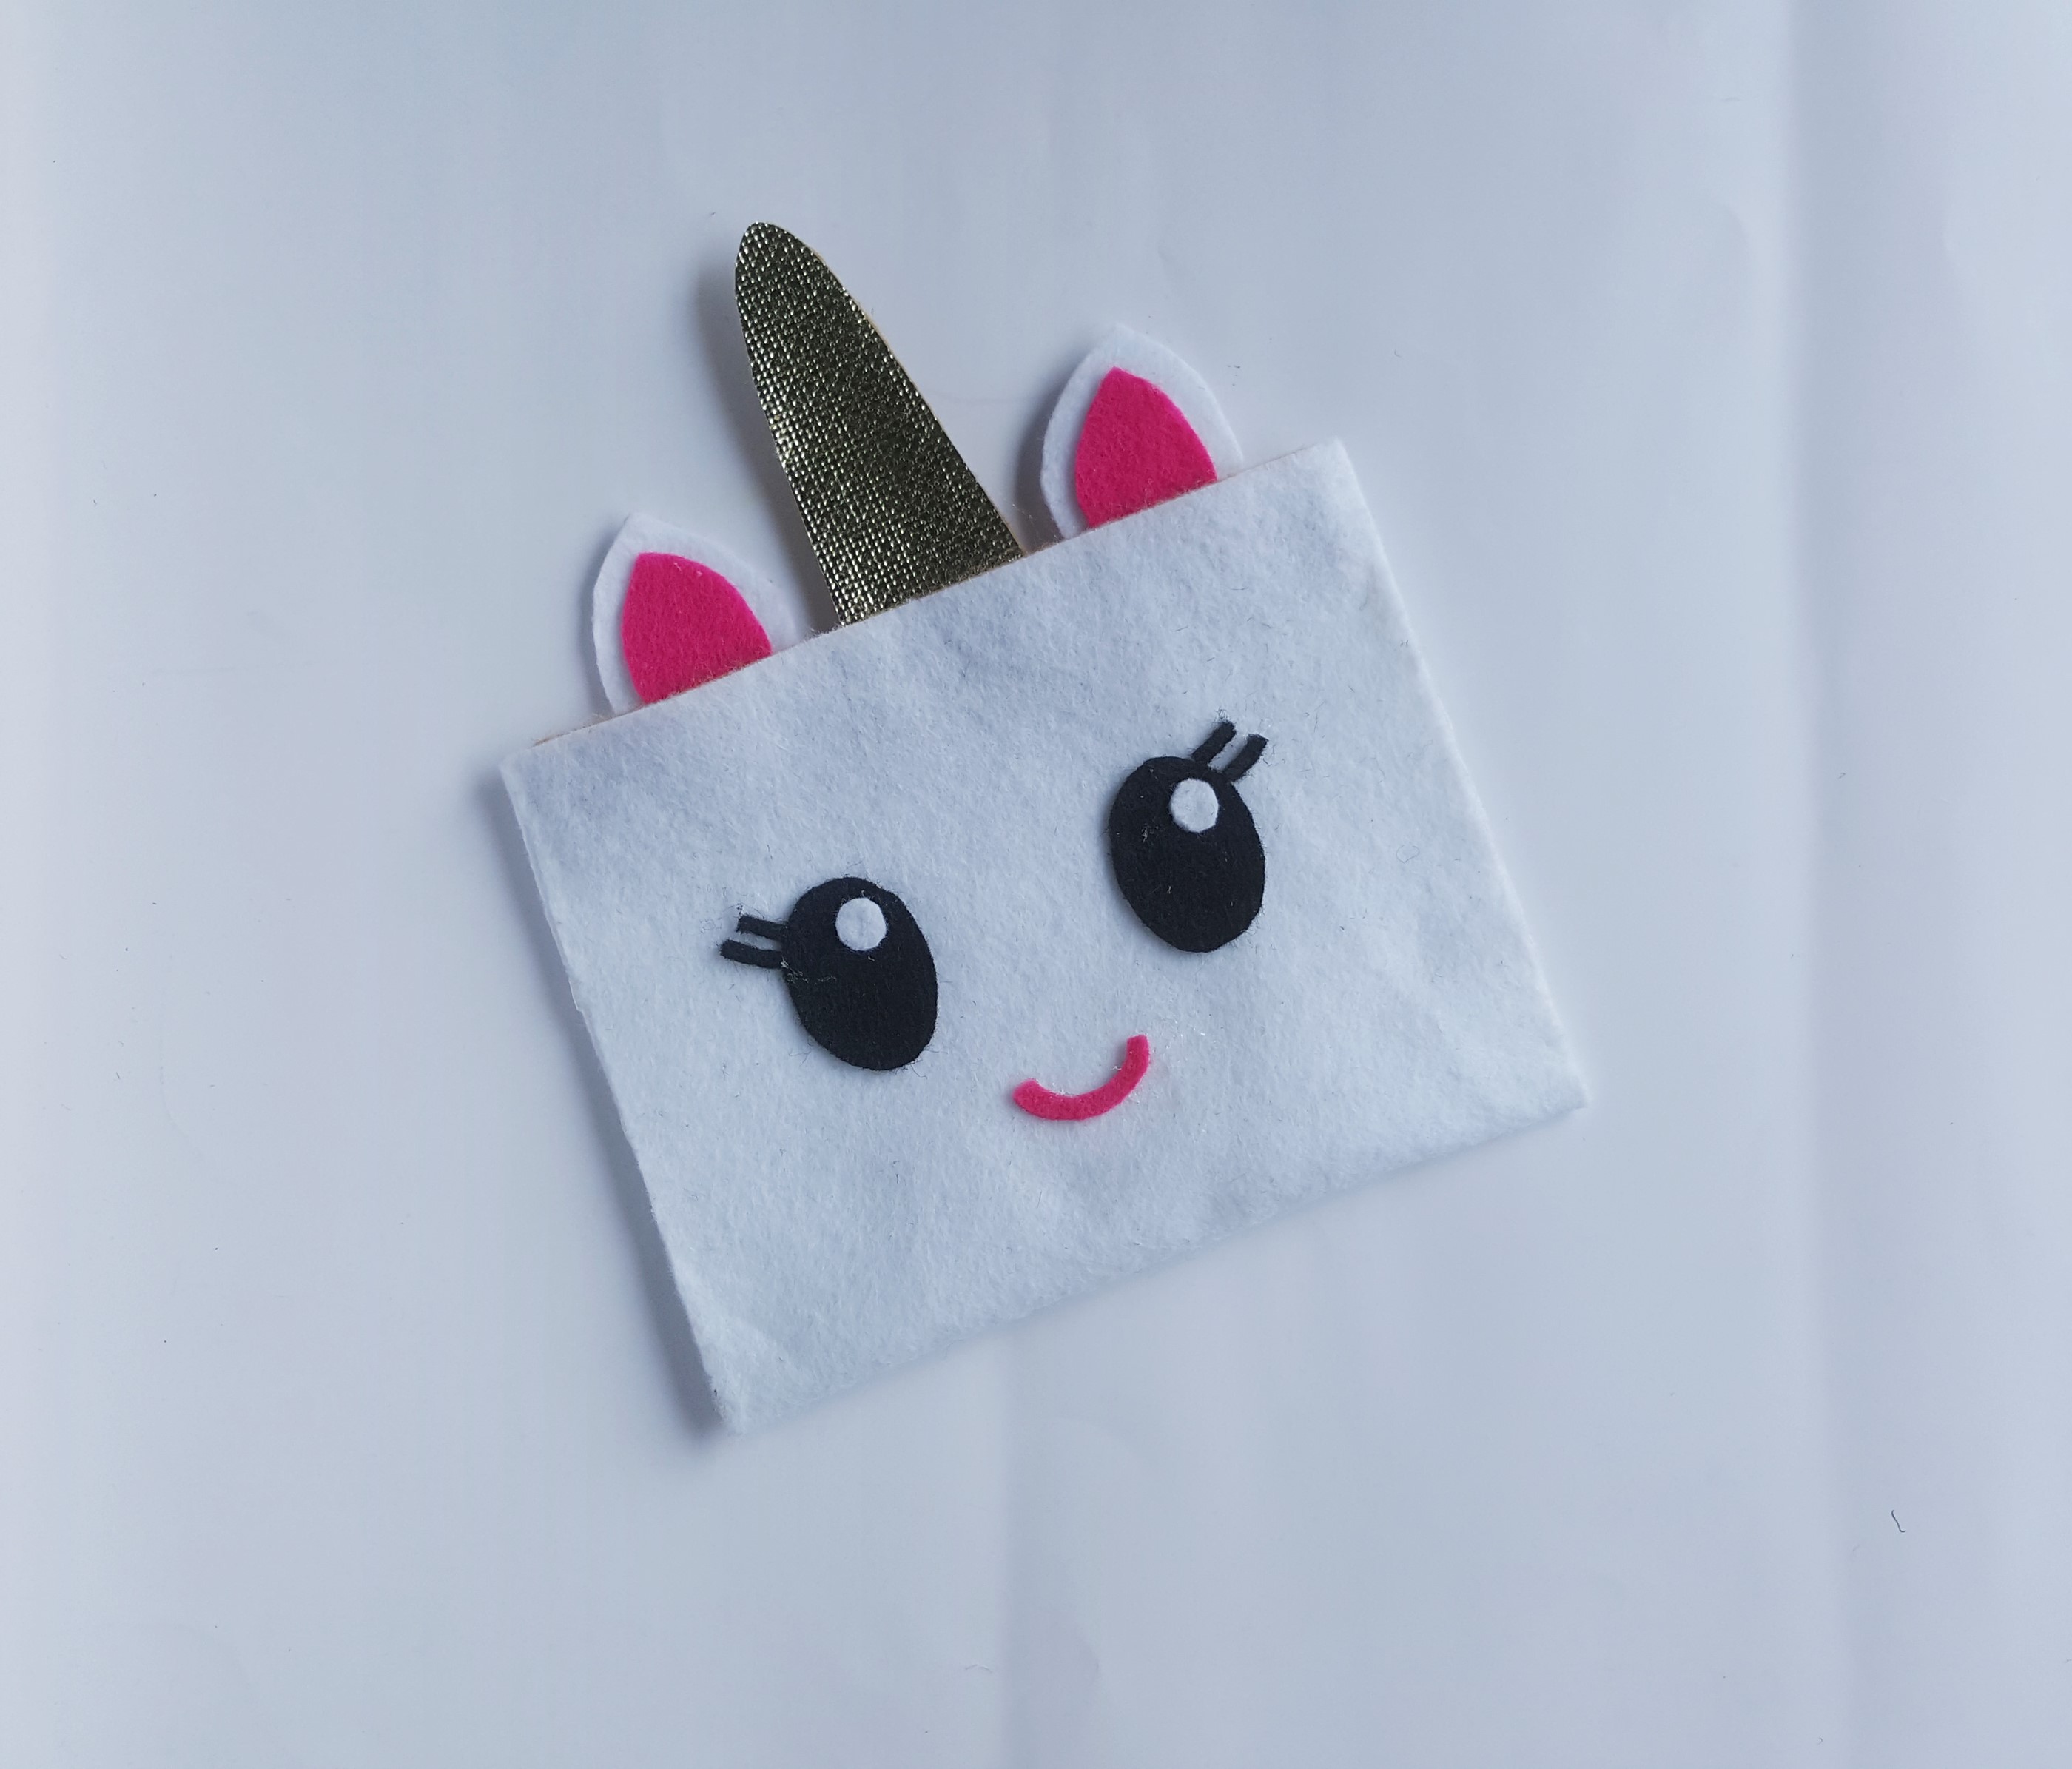
Now glue the eyes, lashes, and lips on the front side of the pouch.
Step (8)
Prepare the items for decorations: the 3 spirals, 4 leaves, and blush/ freckles. Make rolled flowers using the spiral patterns.
Step (9) (10)
Now attach the prepared items one by one onto the pouch and along the top end of the pouch.
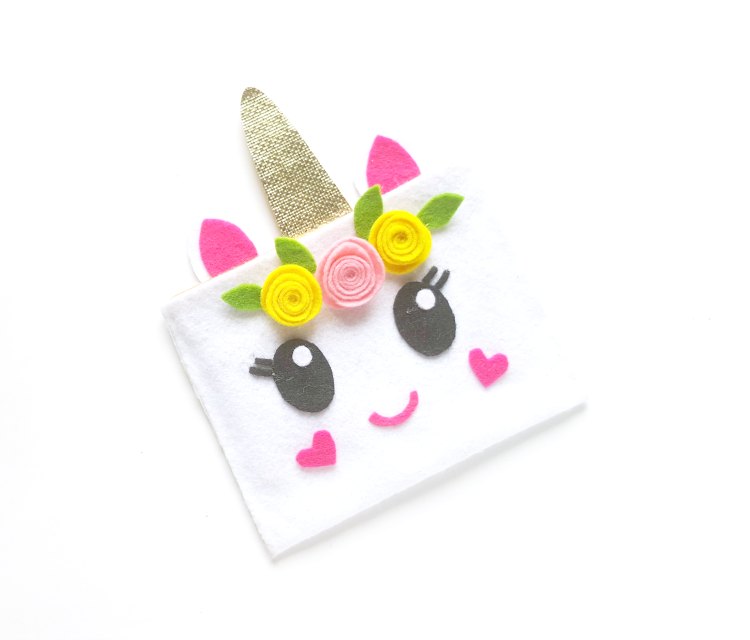
Ta Da, You Are Done! Mix and match different colored felt fabrics for more variation.
Free Printable Unicorn Pouch Template
- New here? Be sure to Subscribe.
- Pin it for Later
- Follow us on Pinterest
- Shop our favorites on Amazon
More Fun Felt and No-Sew Projects for Teens and…
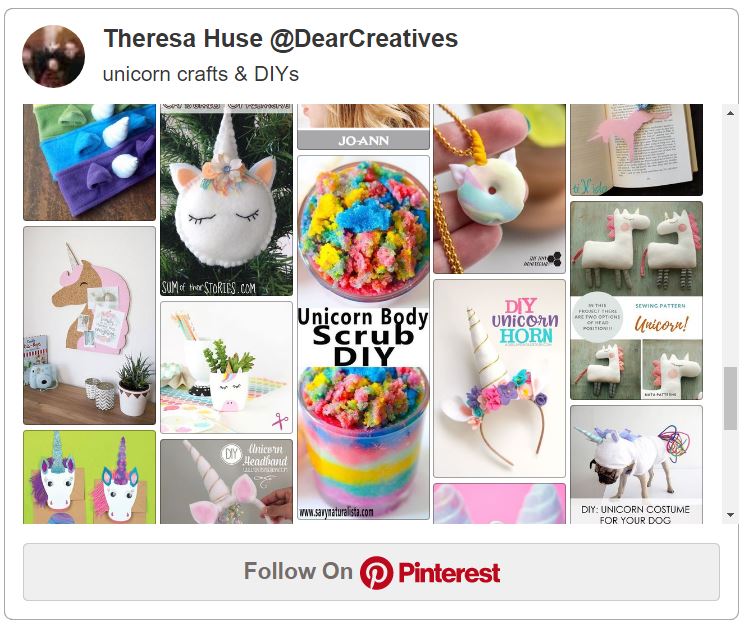
Unicorn DIY Crafts