This post contains links to affiliate websites, such as Amazon, and other affiliates. We receive an affiliate commission for any qualifying purchases made by you using these links. This is at no additional cost to you. We appreciate your support!
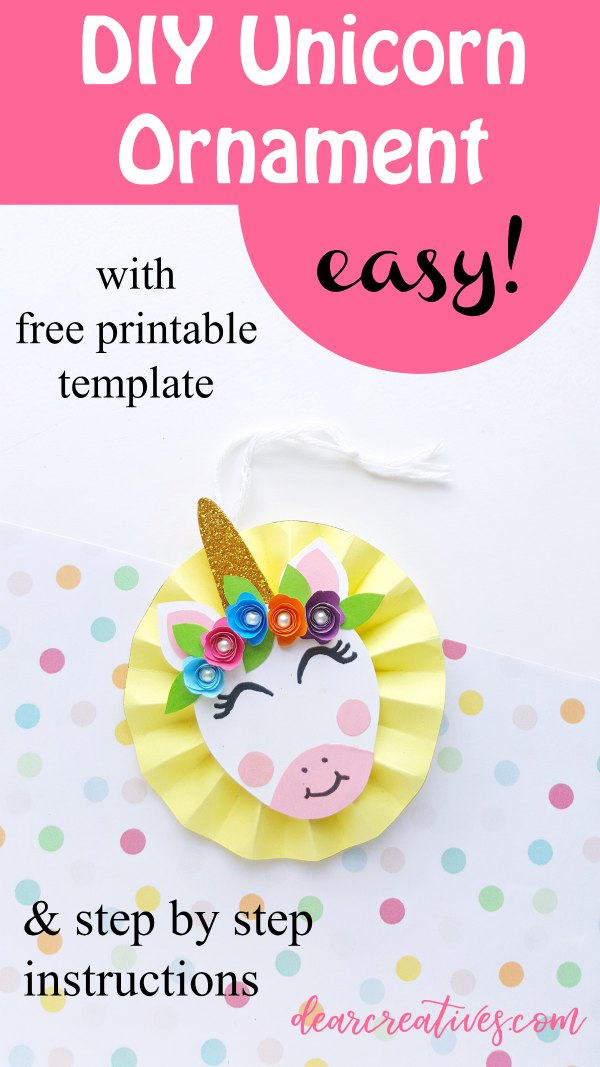
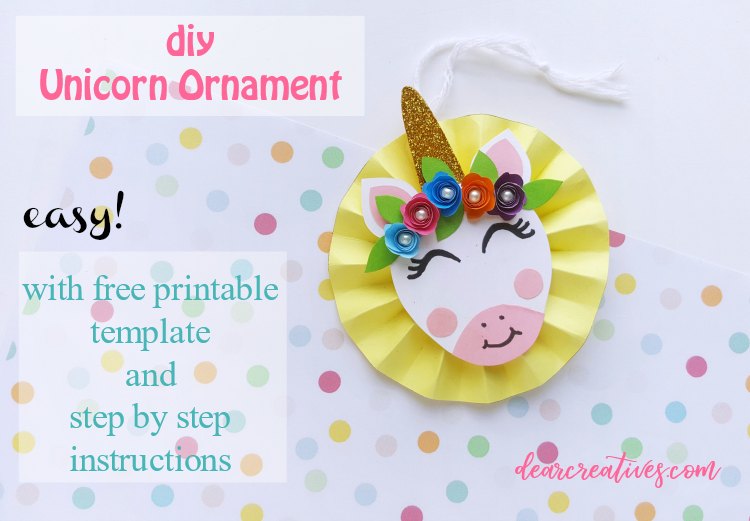
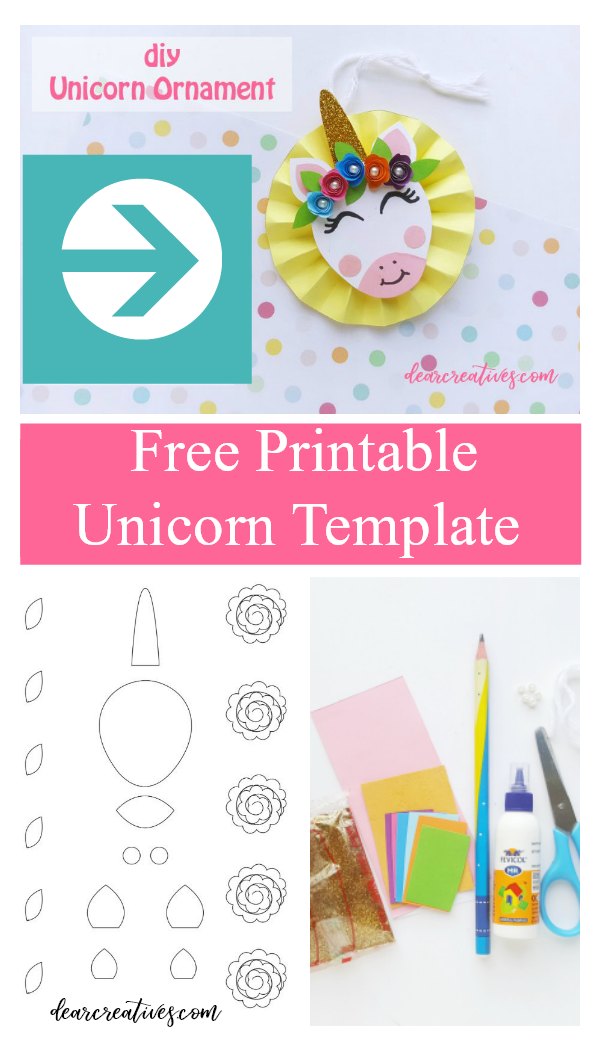
Are you ready to add a little sparkle to your crafting time? Unicorns are trending, and today we're sharing the best way to make a magical, easy DIY unicorn ornament! I'm thrilled to share this beautiful DIY unicorn ornament template that is absolutely free for you to download and print. Since this is a simple paper craft, it’s a quick, low-mess activity that is perfect for kids, classrooms, or anyone who needs a fantastic Christmas craft you can complete in minutes! Forget complicated projects! Grab your favorite colorful paper, scissors, and a little glue. Let's get started on creating the most enchanting paper unicorn for your home or gift-giving.
What I love most about this DIY Unicorn Ornament is that it's useful year-round! Besides being a fun Christmas craft or decoration, you can easily use these charming paper unicorns for a kids' party, a baby shower, or just as room decor. If you're looking for more inspiration, be sure to Unicorn DIYS! However you use them, we know you'll have fun making this simple paper project today.
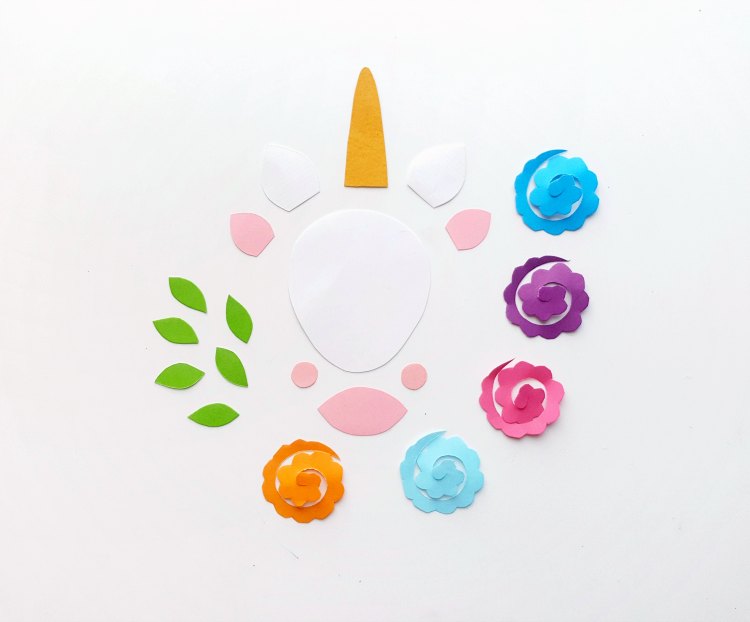
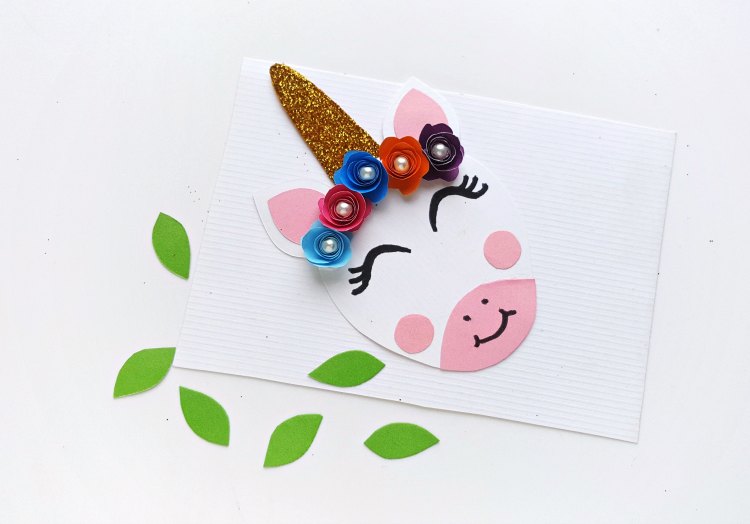
Trace the patterns on the selected colored craft papers from the given template. The template includes 2 outer ear patterns, 2 inner ear patterns, 1 horn pattern, 1 mouth pattern (bottom part of the unicorn’s face), 2 blush patterns, 5 spiral flower patterns, and 6 leaf patterns.
Step 2:
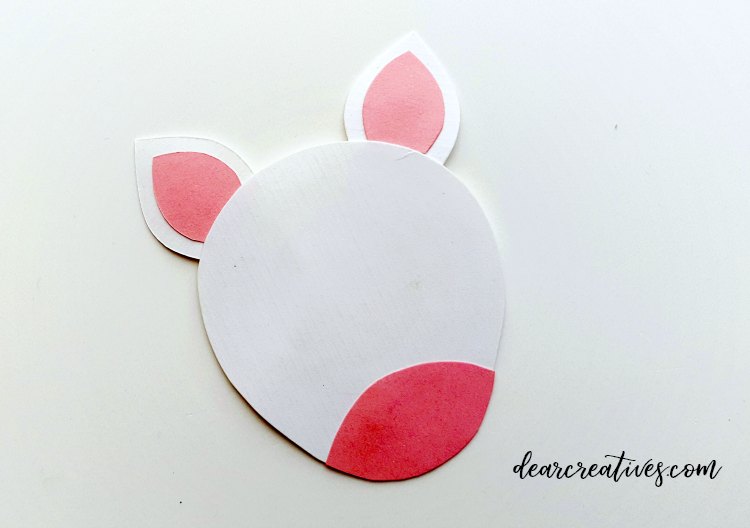
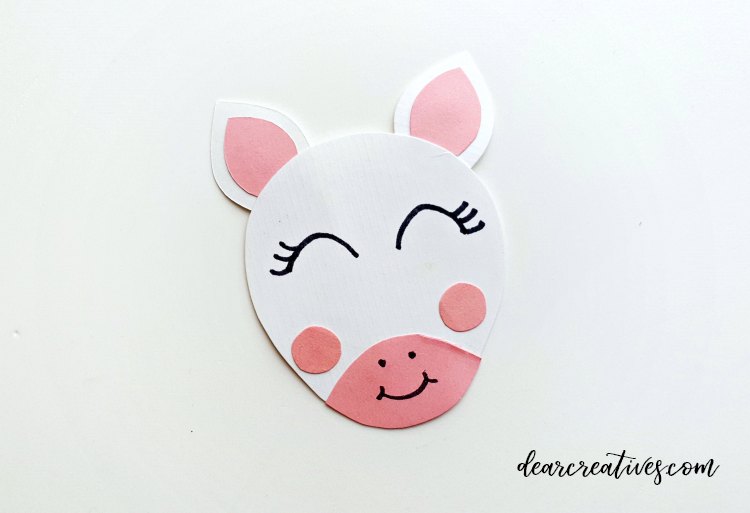
Attach the inner ear parts (pink) to the outer ear parts (same color you chose for the unicorn head). Glue the ears on the 2 sides of the unicorn head’s top end. Glue the mouth pattern on the bottom side of the head.
Step 3:
Glue the 2 blush patterns on both cheeks. Use a black Sharpie to draw the eyes, nose, and mouth of the unicorn.
Step 4:
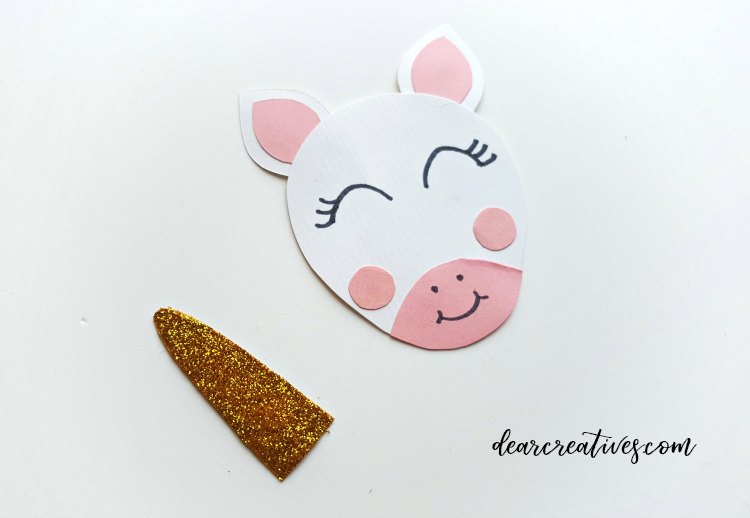
Take the horn, cut out, and apply golden craft glitter all over it.
Step 5:
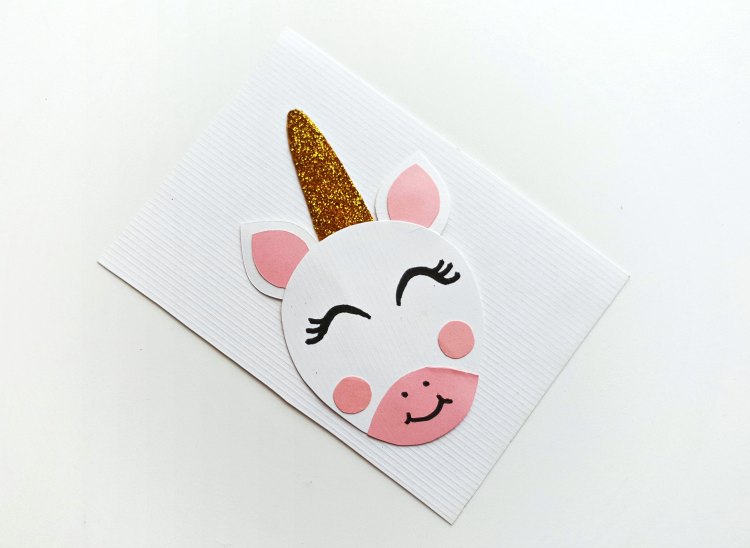
Attach the horn on the back side of the unicorn’s head top end, in the middle of both ears.
How to make paper flowers
Step 6:
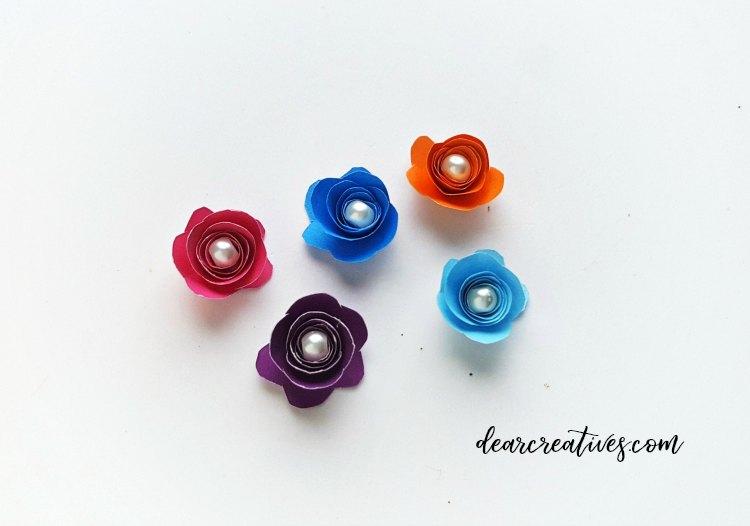
Create flowers with the spiral patterns. Simply roll the spiral from the outer edge all the way to its center and then glue the rolled part to the center to secure it. Attach a small bead to the center.
Add the paper flowers to your unicorn to make a flower crown.
Step 7:
Attach the flowers along the top side of the unicorn head, below the ears and horn.
How to make the unicorn ornament backing and hanger
Step 8:
Glue the leaves between the flowers.
Step 9:
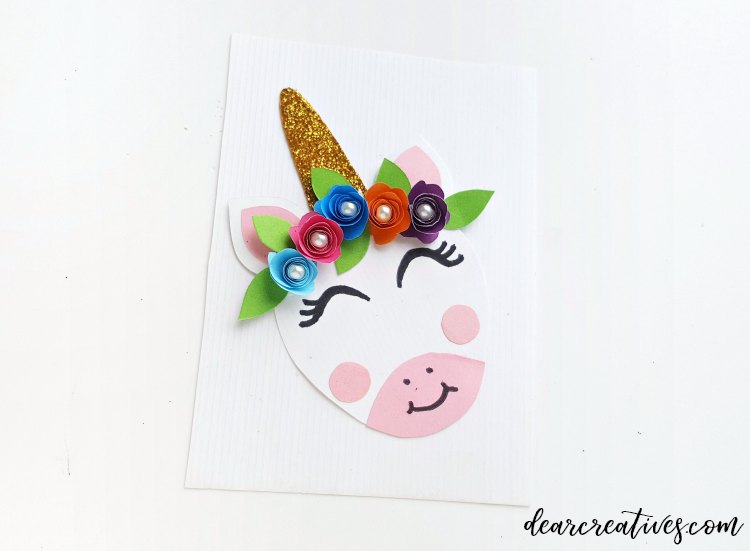
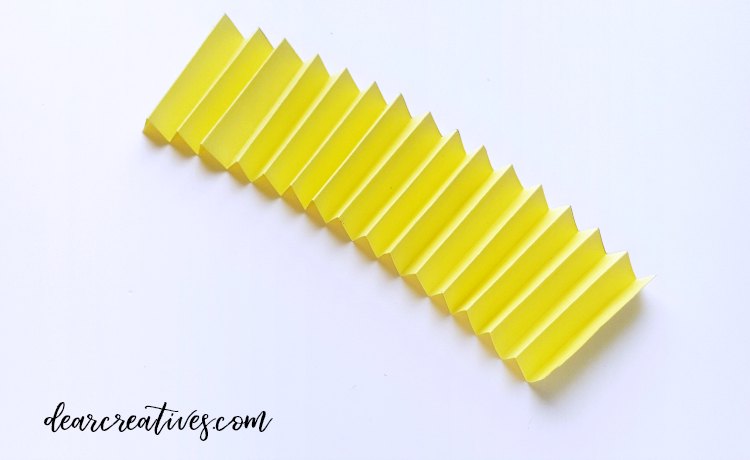
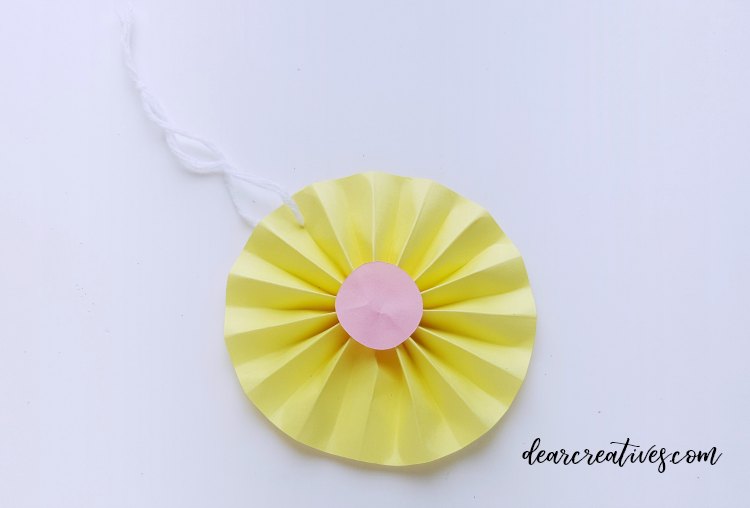
Select a craft paper to cut out a 15-inch-long and 2-inch-wide strip. Create small and even accordion folds on the strip.
Step 10:
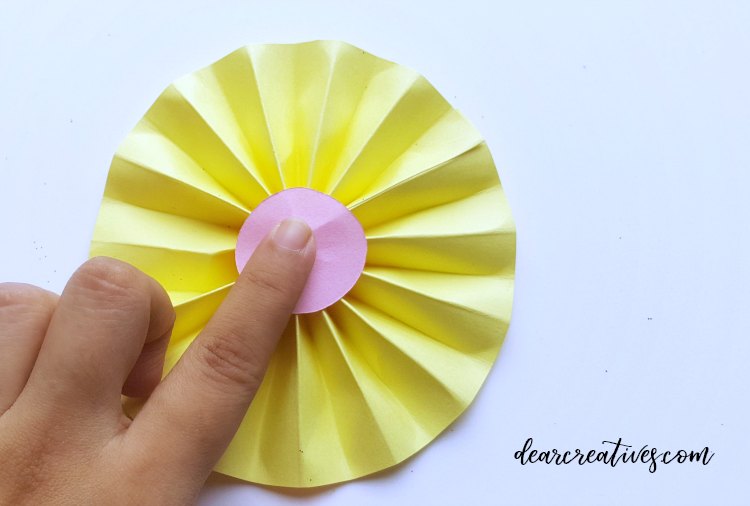
Attach both open sides of the accordion-folded strip. Hold any one side of the roll (accordion-folded roll) and press it towards the center to flatten it. Cut out 2 round patterns and glue them to the center of the flattened accordion-folded piece, on both sides.
Step 11:
Cut out a small piece of yarn or string and tie its open ends together. Attach it to the accordion-folded piece. You can either glue the yarn or make a hole in the accordion-folded piece and then attach the yarn.
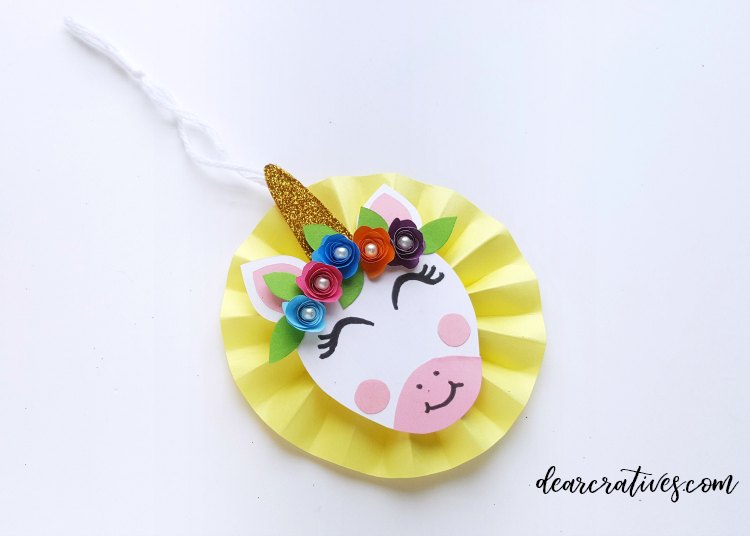
Step 12:
Finally, attach the unicorn head right in the center of the accordion-folded piece and allow the glue to dry completely.
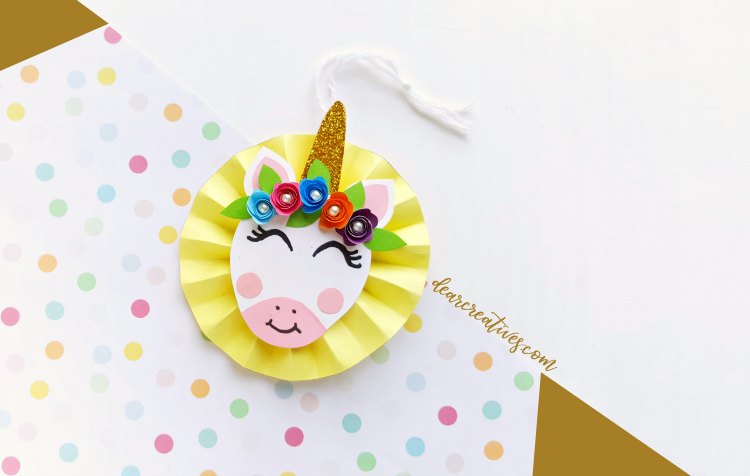
When dry the unicorn ornament is ready to be hung or strung onto string for a banner even put them on a special gift for a unicorn lover.
Whether you string these unicorn ornaments up on the tree for Christmas, or together as a banner for a shower, or make them for a kids' party. We hope you enjoy making this unicorn ornament diy in all the colors of the rainbow. Or make them in holiday colors.
If you don't have time to make them now? Or are you planning your paper-craft projects? Pin the DIY Unicorn Ornament for later.